Build Your Own FPV Drone A Practical Guide
- A.E. Williams

- Aug 17, 2025
- 20 min read
Updated: Aug 19, 2025
Thinking about building your own FPV drone? You’re in the right place. It all boils down to picking the right parts—like the frame, motors, and flight controller—and then putting them all together. This means getting your hands dirty with some basic tools and a bit of soldering.
From there, you’ll dive into the software, run some crucial pre-flight checks, and then you’re off. It's an incredibly rewarding process that gives you a drone customized exactly to your liking, with performance you just can’t get off the shelf.
Why Build Your Own FPV Drone?
Jumping into the world of FPV drones is a wild ride, and deciding to build your own quad puts you squarely in the pilot's seat—in every sense of the word. This isn't just about assembling a gadget; it's about truly understanding the tech that makes these incredible machines fly. You get to handpick every single component, shaping your drone to fit your unique flying style. Whether you're into smooth, cinematic cruising, aggressive freestyle, or blistering-fast racing, a DIY build lets you tailor everything.
But it’s about more than just the hardware. When you build a drone, you plug into a massive, super-helpful community of pilots and creators. The whole process is an amazing learning curve that demystifies all the complex systems. Suddenly, you’re empowered to troubleshoot, repair, and upgrade your own gear with total confidence. Plus, there’s just nothing like the satisfaction of flying something you built with your own two hands.
The Path Ahead in Your Drone Build
Embarking on this DIY adventure means tackling a few distinct stages, each one getting you closer to that heart-pounding first flight. Consider this guide your pre-flight briefing, here to set your expectations and get you in the right mindset before we dive into the nitty-gritty.
Here’s a look at the key phases we’ll walk you through:
Component Selection: We'll break down how to choose parts that play nicely together, from the frame that forms the skeleton to the motors that provide the muscle.
Hands-On Assembly: You’ll get a logical, step-by-step process for putting it all together, including mastering the essential skill of soldering.
Firmware Configuration: This is where we get into the software, programming your drone’s brain and tweaking its flight characteristics to perfection.
The First Flight: We’ll cover all the pre-flight checks and initial tuning adjustments you need for a successful and, most importantly, safe maiden voyage.
This hobby is absolutely exploding. The global FPV drone market was valued at around USD 287.72 million in 2024 and is projected to skyrocket to nearly USD 2.55 billion by 2032. This massive growth is being driven by a growing army of racers, filmmakers, and hobbyists just like you. You can discover more about the FPV drone market's impressive growth and what it means for builders.
There's never been a better time to jump in and build a drone that is 100% yours.
Choosing Your Core FPV Drone Components
Here's where your FPV drone starts to become real. Moving from an idea to a pile of parts is exciting, but picking those parts is arguably the most critical step when you build your own FPV drone. Every decision you make here directly impacts how your quad will perform, how much it will cost, and how well it will hold up to abuse. Get this right, and you're in for an amazing experience.
The parts we're talking about—the frame, flight controller (FC), electronic speed controllers (ESCs), and motors—are the very foundation of your build. It's a lot like building a custom PC. Each component needs to be high-quality on its own, but more importantly, they all need to play nice together.
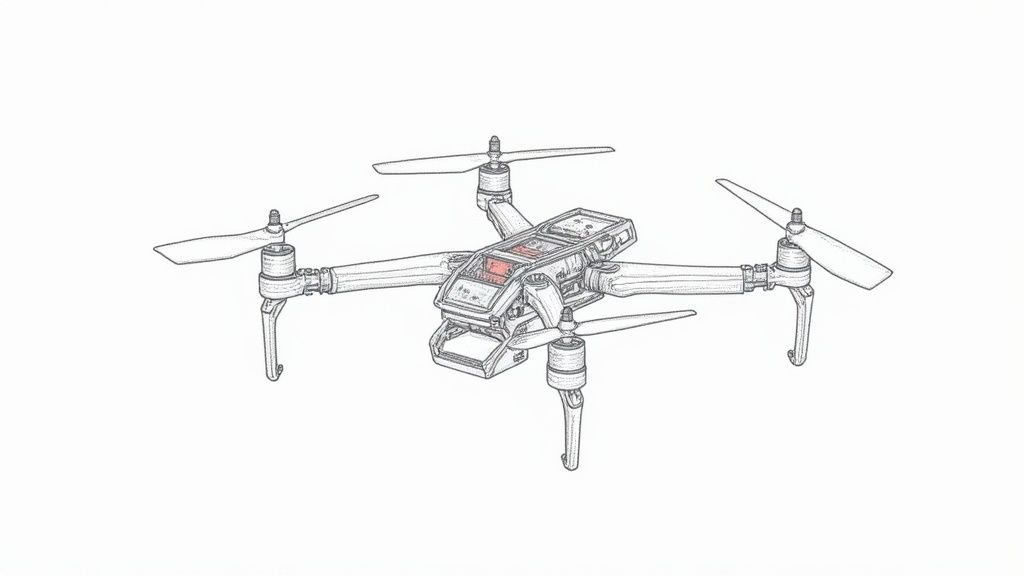
The Frame: Your Drone's Skeleton
The frame is the backbone of your machine. It’s what gives your drone its structure and provides a mounting point for everything else. Most frames are cut from carbon fiber, which offers an incredible strength-to-weight ratio that's perfect for FPV.
Frames come in different sizes, measured diagonally from motor to motor in millimeters. By far, the 5-inch (roughly 220-250mm) frame is the most popular choice for freestyle flying, and for good reason. It’s the perfect starting point for a beginner, offering a sweet spot of agility, stability, and a massive selection of compatible parts.
If you’re dreaming of long-range adventures, a bigger 7-inch frame might be more your speed, as it can carry larger batteries for extended flight times. On the other end of the spectrum, smaller 3-inch "cinewhoop" frames are built specifically for capturing smooth, cinematic video, especially indoors or in tight spots.
The shape matters, too. A "True-X" frame has perfectly symmetrical spacing between the motors, giving it balanced and predictable flight characteristics that racers love. A "dead cat" style frame pushes the front arms out wider, which is a massive plus for keeping your propellers out of the camera's view when you're recording footage.
Pro Tip: Don't just look at the size and shape. Check the carbon fiber thickness. For a 5-inch freestyle quad, I wouldn’t use arms that are less than 5mm thick. The top and bottom plates should be around 2.5mm. This gives the frame the durability it needs to survive the inevitable crashes you'll have while learning.
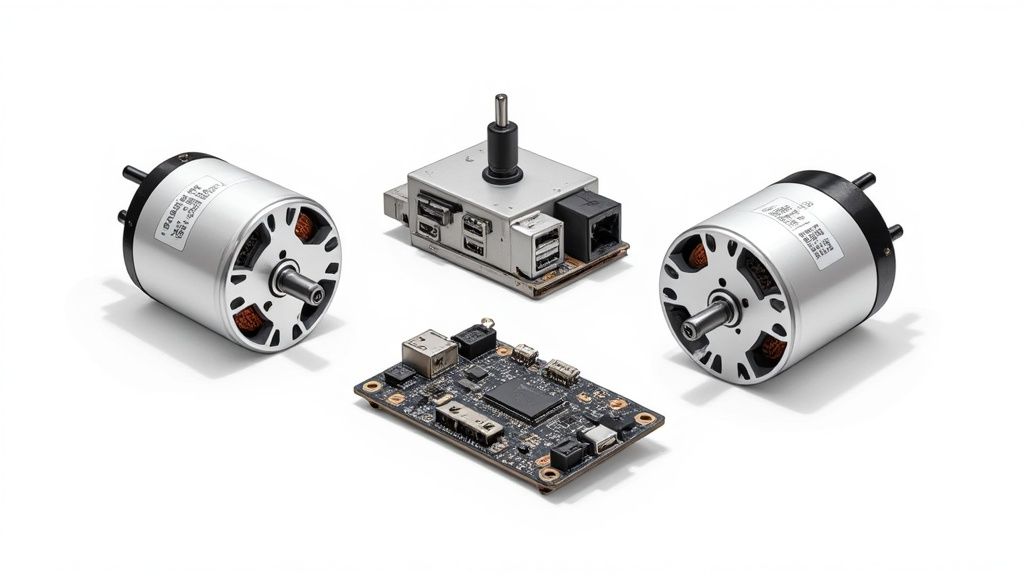
The Flight Controller and ESC: The Brains and Brawn
Think of the flight controller (FC) as the central nervous system. This little circuit board is packed with a processor and sensors, like a gyroscope, that take the inputs from your radio controller and tell the motors what to do thousands of times per second. It runs on firmware, and for DIY builders, Betaflight is the undisputed king.
If the FC is the brain, then the electronic speed controllers (ESCs) are the muscle. They take the low-power signals from the FC and convert them into the high-current power needed to spin the motors at incredibly precise speeds.
You really have two options here:
Individual ESCs: This involves mounting one ESC on each arm of the drone. It’s an older style that's less common today, but some builders argue it can be more durable in a crash.
4-in-1 ESC: This is a single board that integrates all four ESCs. It leads to a much cleaner and simpler build with way less soldering. This is the standard for almost every modern build.
The easiest path is to buy a "stack." This is a combo pack that includes an FC and a 4-in-1 ESC designed to be mounted together. It guarantees they’re compatible and makes the wiring process much more straightforward. Just make sure the stack’s mounting pattern (30.5x30.5mm or 20x20mm) matches your frame.
Motors and Propellers: The Propulsion System
Motors are what make your drone fly, and the key spec you need to understand is the KV rating. This number tells you how many RPMs (revolutions per minute) the motor will try to spin for every volt you apply to it. A common misconception is that KV equals power, but that's not the case.
High KV Motors (like 2400-2700KV on a 4S battery) spin faster. This gives you that snappy, responsive feel that's perfect for aggressive freestyle and racing, but they tend to be less efficient.
Low KV Motors (like 1700-1900KV on a 6S battery) spin slower but generate more torque. This makes them more efficient and better suited for smooth, cinematic flying or for builds carrying a heavier camera. The 6S battery and lower KV motor combo is the current meta for most 5-inch builds.
The motor stator size (e.g., 2207, 2306) is also a big deal. The first two digits represent the stator's diameter, and the last two are its height in millimeters. A larger motor, like a 2306, will typically produce more torque than a 2207, giving it a more "grippy" and connected feel in the air.
Finally, propellers are your drone's wings. They need to match your frame size (5-inch props for a 5-inch frame) and be a good fit for your motors. A prop's size is described with numbers like "5045," which means it has a 5.0-inch length and a 4.5-inch pitch. A higher pitch grabs more air, which can mean more speed, but it will also draw more current from your battery.
To help you get a clearer picture of how these parts fit together, here's a quick breakdown of the core components, what they do, and what to look for when you're shopping.
Essential FPV Drone Component Breakdown
Component | Primary Function | Key Selection Factor |
|---|---|---|
Frame | Provides the drone's structure and mounting points. | Size (e.g., 5-inch), carbon thickness, and layout (True-X vs. Dead Cat). |
Flight Controller (FC) | The "brain" that processes inputs and controls motors. | Firmware compatibility (Betaflight), processor (F7/H7), and mounting size. |
ESC (4-in-1) | Regulates power to spin the motors at precise speeds. | Amperage rating (e.g., 45A), protocol (BLHeli_32), and mounting size. |
Motors | Generate thrust to lift and maneuver the drone. | Stator size (e.g., 2306), KV rating (e.g., 1900KV), and battery voltage (4S/6S). |
Propellers | Act as wings to create lift and move air. | Diameter (to match frame size), pitch, and number of blades. |
Choosing the right combination of these parts is the first major step in building a drone that you'll love to fly.
The incredible accessibility of these components is a huge reason why the FPV hobby has exploded. In fact, the FPV drone market was valued at around USD 1.2 billion by 2024 and is projected to hit USD 3.5 billion by 2033. This growth is fueled by a constant stream of better and more affordable flight controllers, HD video systems, and powerful batteries that have completely lowered the barrier to entry. For a wider look at all the drone options out there, check out our guide on how to choose a drone that is right for you.
Selecting Your FPV System and Radio Gear
Alright, with the core hardware picked out, it's time to choose the gear that actually puts you in the pilot's seat. Your FPV system and radio link are your eyes and hands, connecting you directly to the drone while it’s screaming through the air. This choice is deeply personal and will define your entire flying experience more than almost any other part of the build.
The FPV system is a trio of components: the camera on the drone, a video transmitter (VTX) that beams the live feed back to you, and the goggles you wear to see what the drone sees. Your radio gear is composed of the transmitter (the controller in your hands) and a tiny receiver on the drone that listens for your commands. Nailing both of these systems is non-negotiable for a successful build.
The growing obsession with custom-built drones is a huge driver in the market's growth, which was projected to hit USD 558 million by 2025. This expansion is directly tied to advancements in the very gear we're talking about—higher-res cameras, rock-solid video transmission, and better batteries. All of these things empower pilots to build your own fpv drone that's perfectly suited to their style. You can get a deeper look at the trends driving the FPV market and see how these innovations are shaping the hobby.
Analog vs. Digital: The Great FPV Debate
The single biggest decision you’ll make for your video setup is whether to go with an analog or digital feed. Both sides have passionate advocates, and the "best" choice really comes down to your budget and what you value most. Think of it like watching a movie on an old tube TV versus a modern 4K screen.
Analog FPV is the classic, battle-tested option. It’s known for extremely low latency—the tiny delay between what the drone's camera sees and what you see in your goggles. Its main downside is image quality; it’s prone to static and interference, just like an old TV trying to find a signal. But, it's way cheaper and degrades gracefully. When the signal gets weak, the image just gets snowy but stays flyable, giving you a chance to turn back.
Digital FPV systems, with brands like DJI and Walksnail leading the charge, deliver a stunningly clear, high-definition video feed. The difference in image quality is night and day. The trade-off is a much higher cost and a totally different kind of signal breakup. Instead of getting snowy, a weak digital signal will freeze, stutter, or pixelate, which can be pretty jarring and lead to a sudden, complete loss of video.
For a new pilot, analog offers a much lower barrier to entry, financially speaking. A complete analog setup can be had for a fraction of the cost of a digital one. But if your top priority is capturing beautiful, cinematic footage, the investment in a digital system is tough to argue with.
My Personal Takeaway: While I love the crisp image from my digital setup, I still fly my analog quads all the time. The way analog handles signal breakup just feels more intuitive for aggressive flying, giving me a better sense of my connection's limits. For beginners, the affordability and robust nature of analog make it a fantastic place to start.
Your Radio Link: The Lifeline
If the FPV system is your set of eyes, the radio control link is the drone's lifeline. This is one area where you absolutely should not cut corners. A lost video signal is an inconvenience, but a lost control signal means your drone is flying away without you—a situation we call a "failsafe."
Not too long ago, the radio landscape was a confusing mess of competing protocols. Thankfully, one system has emerged as the clear leader for DIY builders: ExpressLRS (ELRS). It's an open-source project that delivers unbelievable range, rock-solid reliability, and incredibly low latency, all for a very reasonable price.
When you're picking out a radio transmitter, look for one that either has an ELRS module built-in or has a module bay on the back where you can plug one in. Models from Radiomaster, like the TX16S or the smaller Zorro, are massively popular for good reason. Just pair your transmitter with a tiny ELRS receiver on the drone, and you'll have a control link you can trust, even from kilometers away.
Finally, whatever you do, don't overlook your antennas. Both your VTX and your radio receiver need quality antennas to perform their best. For the VTX, using a good circularly polarized (CP) antenna—like a Lumenier AXII or a TrueRC Singularity—will dramatically cut down on signal breakup as the drone banks and turns. This simple upgrade provides one of the biggest performance boosts for any FPV system, ensuring your connection stays strong and clear when it matters most.
Assembling and Wiring Your FPV Drone
Alright, you've got a pile of carefully chosen parts sitting on your workbench. Now for the fun part—this is where your drone really starts to take shape. Turning those individual components into a cohesive flying machine is the most hands-on phase of any FPV build.
It's going to take some patience and a steady hand, but trust me, seeing your drone come together piece by piece is one of the most rewarding feelings in this hobby. It's more than just connecting wires; it's about smart planning. Think ahead about how you'll route wires and place components to create a build that's clean, durable, and—importantly—easy to fix when you inevitably need to.
Prepping the Frame and Mounting Motors
Before any electronics get near the frame, take a minute to prep your carbon fiber. Freshly cut carbon can have sharp edges that might chafe wires over time, eventually leading to a short circuit. A quick, simple fix is to lightly file or sand the edges of the frame plates and arms with some fine-grit sandpaper.
Frame prep done? Time to mount the motors. Grab a motor and mount it to the end of each arm using the screws that came with it. Here’s a pro tip: put a small drop of blue threadlocker on each motor screw. The intense vibrations from spinning props can easily loosen screws over time, and losing a motor screw mid-flight is a guaranteed recipe for disaster.
Installing the Flight Stack and ESCs
With the motors securely in place, it’s time to install the brain and the muscle of your quad: the flight controller (FC) and your 4-in-1 ESC stack. Most modern frames and stacks use standardized mounting holes, either 30.5x30.5mm or 20x20mm, which makes life a lot easier.
The process is pretty straightforward:
Mount the ESC: Secure the 4-in-1 ESC board to the frame first, using the standoffs and rubber grommets from your stack hardware. Those little rubber grommets are critical—they dampen vibrations that could throw off the FC's gyroscope.
Solder Motor Wires: Next, carefully trim the three wires from each motor so they're just long enough to reach the solder pads on the corners of the ESC. Solder them on. Don't worry about the order for now; we can easily reverse motor direction in the software later.
Connect Battery Leads: Now for the main power. Solder your battery pigtail (the one with the XT60 connector) to the large positive (+) and negative (-) pads on the ESC. Pay very close attention to polarity here. Getting this backward will instantly fry your electronics. While you're at it, solder the included capacitor across these same pads, making sure to match the capacitor's polarity as well.
Crucial Tip: A "smoke stopper" is a cheap tool that can save you from expensive mistakes. It's a small device you plug in between your battery and the drone on its very first power-up. If you have a short circuit somewhere, it limits the current and prevents you from releasing the magic smoke from your components. Every new builder should have one.
Essential Tools for Your FPV Drone Build
Having the right tools on hand makes the entire assembly process smoother and less frustrating. Here's a quick checklist of the tools I recommend for any FPV drone build.
Tool Category | Essential Items | Nice-to-Have Items |
|---|---|---|
Soldering | Soldering Iron (TS100 or similar), 60/40 or 63/37 Solder, Soldering Flux Pen, Brass Tip Cleaner | Fume Extractor, Silicone Soldering Mat |
Hand Tools | Hex Drivers (1.5mm, 2.0mm, 2.5mm), Wire Cutters/Strippers, Needle-Nose Pliers, Tweezers | Prop Tool/Nut Wrench, Precision Knife |
Adhesives & Fasteners | Blue Threadlocker, Electrical Tape, Zip Ties, Double-Sided Tape (VHB) | Heat Shrink Tubing Assortment, Hot Glue Gun |
Safety & Testing | Smoke Stopper, Multimeter, Safety Glasses | Battery Voltage Checker |
Investing in a decent set of these tools from the start will pay off in the long run, leading to cleaner builds and easier repairs down the road.
Wiring the Core Components
With the power system taking shape, it's time to connect the flight controller to everything else. This is where having the wiring diagram for your specific FC is an absolute must. Keep it open on your phone or laptop; it will show you exactly which solder pad to use for every single connection.
This diagram shows the fundamental flow of power and signals between the flight controller and the ESCs—the absolute heart of your drone's control system.
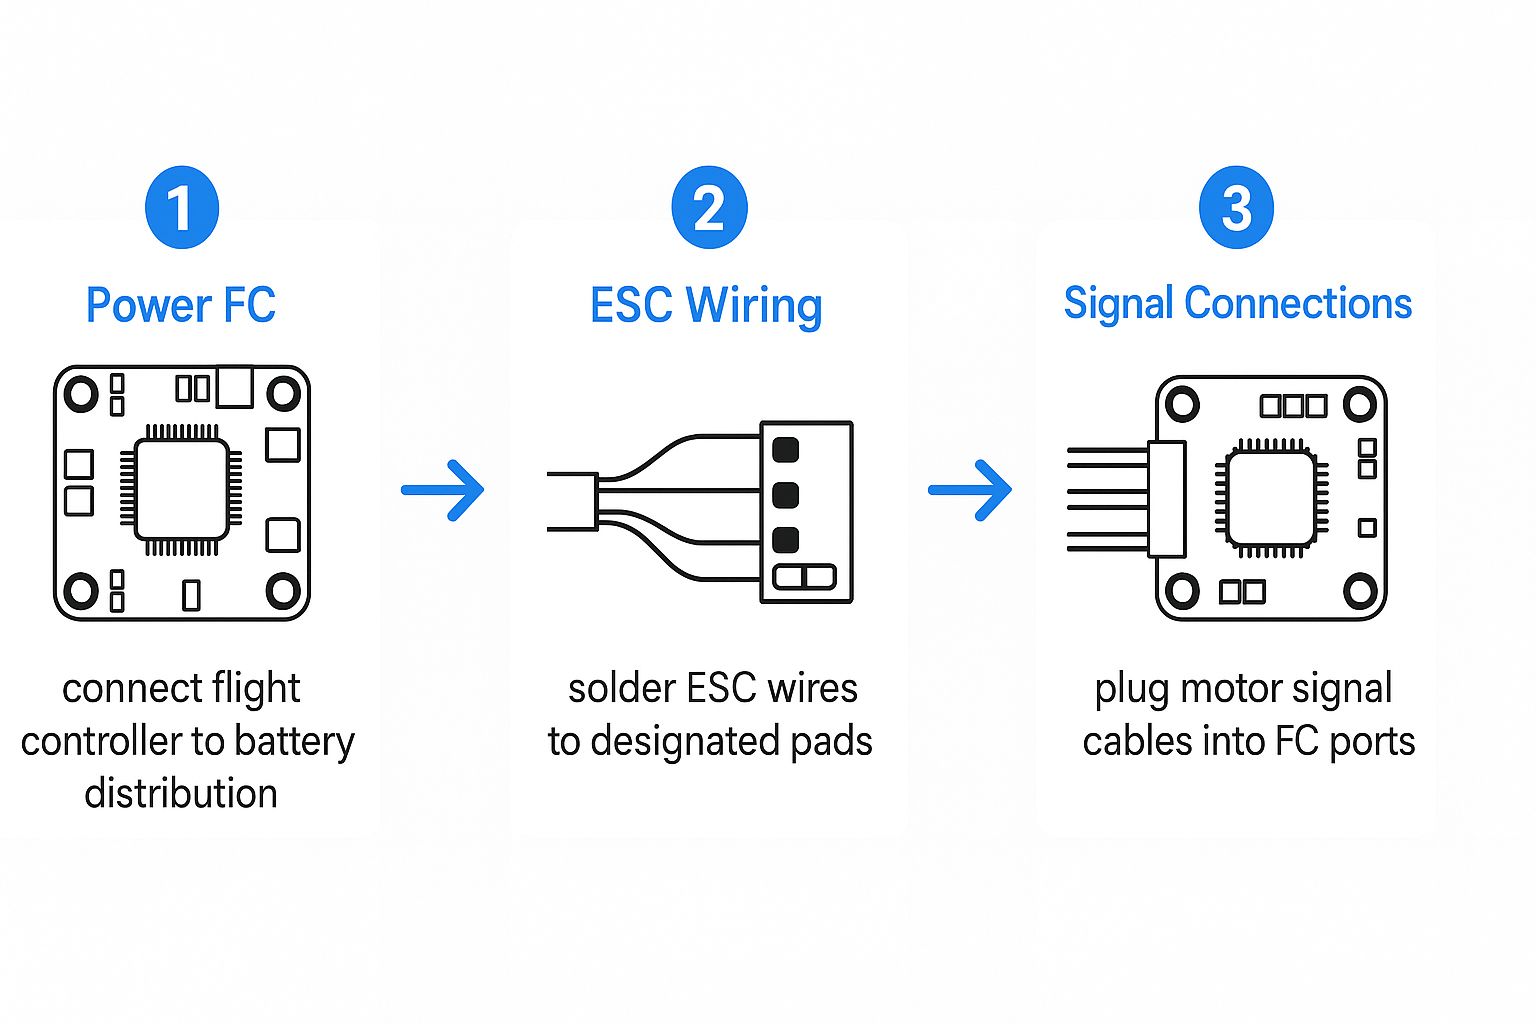
Getting this core connection right ensures power gets where it needs to go and your motors receive the right commands. It's the foundation for a successful build.
Next up are your FPV system and radio receiver.
FPV Camera and VTX: Connect your camera’s power, ground, and video signal wires to the designated pads on the FC. Do the same for your Video Transmitter (VTX). Don't forget to connect the VTX's SmartAudio or Tramp wire to a free TX pad on the FC—this is what lets you change your VTX settings right from your radio.
Radio Receiver: Wire up your radio receiver. If you're using ExpressLRS, this typically means connecting power, ground, and then wiring the receiver's TX wire to an RX pad on the FC, and the receiver's RX wire to a TX pad on the FC.
A clean, tidy build is the hallmark of an experienced pilot. Plan your wire routes, trim every wire to the perfect length, and use zip ties or heat shrink to keep everything organized. This not only looks professional but also prevents wires from getting chopped by props and makes future repairs a thousand times easier.
For more in-depth examples, especially for high-performance setups, our complete FPV racing drone build guide is a great place to look next.
Getting Your Firmware Sorted and Running System Checks
Alright, the physical build is done. You've got a quad that looks ready to rip, but right now, it's just a cool-looking paperweight. To actually bring it to life, we need to give its brain—the flight controller—a proper set of instructions. This is where we plug it in and turn that pile of parts into a responsive, high-performance FPV drone.
This whole process happens inside a free piece of software called [Betaflight Configurator](https://github.com/betaflight/betaflight-configurator/releases). Think of it as the command center for your drone. It's where you'll flash the latest firmware, tell the flight controller which way is up, set up your radio link, and tweak just about everything. It can feel a little overwhelming at first, but we'll tackle it one logical step at a time.
Flashing the Latest Betaflight Firmware
First things first, let's get your flight controller's software up to date. Manufacturers almost always ship these boards with older firmware, and updating gets you the latest features, bug fixes, and performance tweaks. It's a simple process, but it's the foundation for everything else.
Before you even think about plugging that USB cable in, take your propellers off. Seriously. This is the golden rule when you build your own fpv drone. An accidental motor spin with props off is a funny little buzz; with props on, it's a trip to the emergency room.
Once you’re connected, you'll need to get the board into "DFU mode," which is just a fancy term for a state that lets it accept new firmware. From there, you'll select the correct firmware target for your specific flight controller (the name is usually printed right on the board or in its documentation) and flash the latest stable version of Betaflight.
Setting Up the Core Configuration Tabs
With fresh firmware loaded, the real fun begins. We’re going to move through the most important tabs in Betaflight to get your drone prepped for its first flight. This is where you tell the software exactly how your drone is put together and how you want it to fly.
The first few tabs are all about the fundamentals:
Ports Tab: Remember all those wires you soldered to the UARTs? This is where you tell the flight controller what each one is for. You'll assign your radio receiver to one UART, your VTX control to another, and so on. This is how the FC knows where to "listen" for all the different signals.
Configuration Tab: This is a big one. You’ll set your ESC protocol (likely DShot600), make sure the gyro is working, and, most importantly, set the board alignment. If you had to mount your flight controller sideways or upside-down to make it fit, you have to tell Betaflight here so it can adjust its math.
Receiver Tab: Time to connect your radio. In this tab, you'll make sure your transmitter is bound and that the channels map correctly. When you wiggle the sticks on your radio, you should see the corresponding bars for Roll, Pitch, Yaw, and Throttle move just as you'd expect.
Key Takeaway: The Receiver tab is your first critical systems check. If the bars don't move correctly (e.g., you move the roll stick and the pitch bar moves), you have to fix your channel map. Get this wrong, and your drone will violently flip the second you try to arm it.
Calibrating Motors and Customizing Your Flight Experience
Once the basic hardware setup is locked in, you can get into the settings that define how the drone actually feels in the air. A lot of this comes down to personal preference, and you'll likely be tweaking these settings for as long as you fly the quad.
Pop over to the Motors Tab. With your props still off, you can use the sliders to spin up each motor individually. The goal here is to confirm they spin in the correct direction, as shown in the diagram. If one is spinning backward, it’s an easy fix using your ESC configuration software (like BLHeliSuite or an online tool like the ESC Configurator).
Next up, let's configure how you'll actually fly it:
Modes Tab: This is where you assign your radio's switches to do things. At a minimum, you need an ARM switch (the master on/off for your motors), an Angle mode switch (a self-leveling mode that's a lifesaver on your first few flights), and a Beeper switch (to help you find the drone when you inevitably crash it in tall grass).
PID Tuning Tab: The default Betaflight PIDs are fantastic these days, so don't touch those yet. What you do want to look at here are the "Rates." Rates control how sensitive the drone is to your stick inputs. Higher rates mean faster flips and rolls, so start low and work your way up.
OSD Tab: Customize your On-Screen Display. This is the fun part where you get to drag and drop all the info you want to see in your goggles—things like battery voltage, flight time, and signal strength. You can arrange it exactly how you like it.
Finally, and this is non-negotiable, set up your Failsafe. This is a critical safety feature that tells the drone what to do if it loses the signal from your radio. The standard procedure is to have it cut motor power and simply drop out of the sky. Do not skip this step.
Your First Flight and Basic Tuning Tips
This is it—the moment you've been working toward. The smell of solder has faded, the firmware is dialed in, and a fully charged LiPo is waiting. A successful maiden flight comes down to a calm, methodical approach, not just rushing out to the field and hoping for the best.
Before any flight, but especially this first one, get in the habit of a quick pre-flight check. Are your props on correctly and tightened down? Is the battery strapped in tight? Are your antennas clear of obstructions? A quick look through your FPV feed will also confirm your camera and VTX are powered up and working as they should.
The Initial Hover Test
Your very first liftoff needs to be a simple line-of-sight (LOS) hover test. That means no FPV goggles just yet.
Find a nice, wide-open grassy area. Place the drone on level ground, and step back a safe distance. Arm the motors and gently, gently apply just enough throttle to make the drone feel light on the ground.
Listen. Do you hear any weird vibrations or strange sounds? If everything sounds smooth, slowly add a bit more throttle until it lifts into a hover just a few feet off the ground. Now, test your basic controls: a little roll, a little pitch. Is it responding the way you expect? This quick test is your sanity check to make sure the motors are spinning right and your controls are oriented properly before you put the goggles on.
Gearing Up for Your First FPV Flight
Okay, the hover test went well. It's time to fly FPV. It's completely normal to feel a rush of nerves, but just remember to take it easy. Your goal right now isn't to pull off any wild tricks; it’s just to get a feel for how the drone moves and responds through the camera.
Fly slowly at first. Practice some gentle turns and other simple maneuvers. Focus on just maintaining a steady altitude and getting comfortable with the control feel through the FPV feed.
Key Insight: Fight the urge to overcorrect. Your best friends are small, smooth stick movements. A classic beginner mistake is "chasing" the drone with frantic inputs, which almost always ends in an unplanned landing. Stay calm and try to think one step ahead of the quad.
Introduction to Basic PID Tuning
After you get a few flights under your belt, you might start to notice some little quirks. Maybe you see some wobbles after a sharp turn (propwash), or you notice some high-frequency vibrations in your video feed. This is where basic PID tuning comes into play.
While the default settings in Betaflight are fantastic these days, some small adjustments can make your quad fly even smoother.
Don't just start changing numbers randomly. A good starting point is to slightly lower your P and D gains if you see oscillations or vibrations. If the drone feels a bit "loose" or sloppy, you might try slightly increasing them instead. The name of the game is making tiny, incremental changes, flying a quick test, and seeing how it feels. This iterative process is a core skill you'll develop as you continue to build your own FPV drone setups.
For a deeper dive into the entire build process from start to finish, our complete FPV drone build guide covers everything in much more detail.
Common Questions When Building an FPV Drone
Jumping into your first FPV build is exciting, but it almost always brings up a ton of questions. Let's tackle some of the most common ones we see from new pilots to help you clear those final hurdles and get your quad in the air.
How Much Does It Cost to Build a Drone?
This is the big one, and the answer can vary wildly. For a solid, budget-friendly 5-inch freestyle drone, you can expect the parts for the quad itself to run you somewhere between $200 and $350. That gets you the core components—frame, motors, flight controller, FPV camera, and the like.
But that's just the drone. Don't forget you need the gear to actually fly it. Be ready to invest in a few other key items:
FPV Goggles: This is your window into the drone. You can find basic analog models for around $100, while high-end digital systems can easily top $500.
Radio Transmitter: Your link to the quad. A great entry-level radio, like a Radiomaster Pocket, starts at about $65.
Batteries and Charger: You can't fly without power. Plan on spending at least another $100 to $150 for a few good LiPo batteries and a reliable charger to get started.
When you add it all up, a complete beginner setup typically lands somewhere in the $500 to $700 range.
What Is the Hardest Part of the Build?
For most people diving in for the first time, soldering is by far the most intimidating step. It takes a steady hand and a bit of practice to create those clean, strong electrical connections on tiny little pads. The good news? It's a skill anyone can learn.
With a decent soldering iron, quality solder, and a few practice runs on an old circuit board, you'll gain confidence quickly. Patience is the key; rushing a solder joint is a recipe for a mid-air failure.
Do I Need to Worry About Drone Regulations?
Yes, absolutely. Once you build a drone, you become a pilot, and that means you're responsible for flying legally and safely.
In many places, including the United States, most FPV drones you build will need to be registered. You'll also have to comply with broadcast identification rules. It's crucial to understand the basics of what Remote ID is and how it affects your FPV drone before you even think about your first flight. It’ll save you a lot of potential headaches and legal trouble down the road.
Ready to dive deeper into the world of aerial innovation? JAB Drone offers expert insights, tutorials, and the latest news to keep you ahead. Explore our guides and join a community passionate about flying. Find out more at https://www.jabdrone.com.
Comments