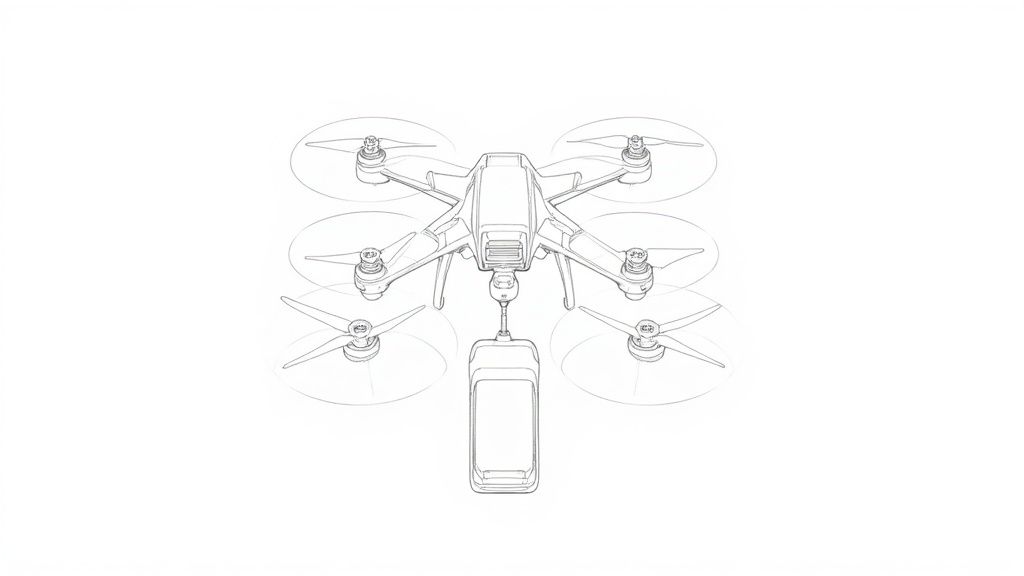
FPV Drone Build Guide: Build Your First Drone Today
- James Baptiste

- Jul 18, 2025
- 20 min read
If you’ve ever wanted to build your own FPV drone, you’ve come to the right place. This guide covers the whole nine yards—from picking out your parts to your very first flight. Building a drone yourself gives you unmatched control over how it performs, makes repairs a breeze, and helps you manage costs. The end result? A machine that’s perfectly tuned to your flying style.
Your Journey Into Building an FPV Drone
Welcome to the exciting world of custom FPV drones. Putting together your own quadcopter is so much more than just plugging in wires; it’s a hands-on project that blends technical skill with your own creative vision. You're not just assembling a drone—you're crafting a personalized flying machine built for your specific goals, whether that's tearing up a race track or capturing smooth, cinematic footage.
Don’t let the process intimidate you. What seems complex is actually quite manageable with the right guidance. Honestly, anyone can build a drone that not only flies incredibly well but often outperforms many off-the-shelf models. The best part? The knowledge you gain is priceless. You’ll know your quad inside and out, making you confident enough to diagnose problems and handle repairs on your own—a must-have skill in this hobby.
Why a Custom Build Beats Off-the-Shelf
When you decide to build your own drone, you call all the shots. You get to hand-pick every single component to create a specific feel and performance profile.
Performance Tailoring: Want a nimble, lightweight quad for racing? Go for it. Need a larger, more stable frame to carry a GoPro for silky-smooth video? You can build that, too.
Cost Efficiency: You’re in complete control of the budget. You can splurge on high-end motors and a premium video system or opt for reliable, budget-friendly parts to build a great practice quad.
Repairability: This is a big one. When you build it, you know how to fix it. A crash with a pre-built drone might mean shipping it back to the manufacturer for weeks. With a custom build, you can just swap out a broken arm or motor and be back in the air in no time.
This project is as much about the rewarding experience of creating something with your own hands as it is about the final product. And it's a fantastic time to jump in. The global FPV drone market was valued at USD 287.72 million in 2024 and is projected to skyrocket to nearly USD 2.55 billion by 2032, largely thanks to its growing use in filmmaking and other industries. You can find more details on this growth over at StellarMR.com.
Building your first FPV drone can feel like a steep climb, but the sense of accomplishment when you finish is incredible. The skills you pick up along the way will make you a much more confident and capable pilot.
Before you start ordering parts, take a moment to get familiar with the rules and regulations in your area. Our comprehensive guide on understanding drone regulations has the essential info you need to fly safely and legally.
Now, let's get a bird's-eye view of the build process. To help you understand the journey ahead, I've broken it down into a few key stages.
FPV Drone Build Stages at a Glance
This table provides a simple overview of what to expect at each phase of your build, from planning to flying.
Build Stage | Primary Goal | Key Activities |
|---|---|---|
Component Selection | Choose parts that match your flying style and budget. | Researching frames, motors, ESCs, flight controllers, and video systems. |
Frame Assembly | Build the foundational structure of the drone. | Assembling the frame arms, bottom plate, and top plate. |
Component Installation | Solder and mount all electronic components. | Installing motors, ESCs, flight controller, receiver, and video transmitter. |
Firmware & Software Setup | Configure the drone's brain and software. | Flashing Betaflight, setting up ports, configuring modes, and tuning PIDs. |
Final Checks & First Flight | Ensure everything is safe and operational for flight. | Performing prop-off motor tests, failsafe checks, and a maiden flight. |
Seeing the process laid out like this makes it feel much more achievable. Let's dive into the first stage: choosing the right components for your build.
Choosing Your Core Drone Components Wisely

This is it—the most critical part of any FPV drone build. The components you pick right now will define absolutely everything about your quad. We’re talking about how it feels in the air, how well it survives a crash, and, of course, how much it costs. Think of it like casting for a movie; every single part has a role to play, and they all need to work together.
We’re not just going to list off specs. Let’s get into the real-world impact of your choices. This is where your dream of what you want to fly becomes a concrete shopping list.
The Frame: The Foundation of Your Build
The frame is the skeleton of your drone. It holds everything together and takes the punishment from every crash, big or small. The main question to answer here is simple: are you building a snappy racer or a buttery-smooth freestyle machine?
Freestyle Frames: These usually come in a "True-X" or "Wide-X" layout. That extra space makes building easier and gives them the durability needed for acrobatics. They’re a stable platform, perfect for carrying a GoPro and nailing those flowing lines. For a first-timer, a 5-inch freestyle frame is a brilliant place to start.
Racing Frames: It's all about shedding weight and cutting through the air. Racers often use a "stretched-X" geometry to help with tight cornering on the track. They’re incredibly agile but can be a real puzzle to build in due to the tight space.
My advice for any beginner? Go with a popular 5-inch freestyle frame. The community support is massive, meaning you’ll find tons of 3D-printed parts and build videos online, which makes the whole process way less frustrating.
The Brain and Brawn: Flight Controller and ESCs
The Flight Controller (FC) is your drone's brain, running all the calculations. The Electronic Speed Controllers (ESCs) are the muscles, telling the motors precisely how fast to spin. Luckily for us, modern builds almost always combine these into a "stack," which makes wiring so much easier.
For your first FPV drone, I can't recommend an All-in-One (AIO) board or a stack highly enough. An AIO puts the FC and ESCs on a single board, while a stack uses two separate boards connected by a simple cable. Either way, you're saving yourself from a dozen tedious soldering jobs, which is a huge win.
Pro Tip: Look for a flight controller with a powerful processor (like an F7 or H7) and a quality gyro (like the MPU6000 or BMI270). A good gyro is less sensitive to electrical "noise," which means a smoother-flying quad that needs less time-consuming tuning.
The market for these parts is fiercely competitive, which is great for us builders. This constant innovation is a huge part of the FPV scene. In fact, the market for core components was valued at USD 139.30 million in 2024 and is expected to rocket to USD 562.44 million by 2032. This growth means there's always an amazing selection of parts for new builds and upgrades.
Motors and Propellers: The Propulsion System
This is what gets your drone in the air. The relationship between your motors and props is what defines your drone's personality—from aggressive, punchy acceleration to long, efficient cruising. Don't get bogged down by all the specs; just focus on a couple of key numbers.
Motor Sizing and KV Rating
For a typical 5-inch drone, you'll almost always see motor sizes like 2207 or 2306. The first two numbers (22/23) are the stator width, and the second two (07/06) are the stator height. Generally, a taller stator gives you more torque.
The KV rating tells you how many RPM (revolutions per minute) the motor tries to spin for every volt you give it. It is absolutely not a measure of power!
For 6S batteries (the modern standard): A KV between 1700-1950KV is the sweet spot for freestyle flying.
For 4S batteries (the older standard): You'd look for something around 2400-2700KV.
Heads up: pairing a high-KV motor with a high-voltage battery is a fast track to smoking your electronics. Always match your motor KV to the battery voltage you plan to use.
Propeller Selection
Props are cheap and have a massive effect on how your drone feels to fly. They're defined by their diameter (e.g., 5 inches) and pitch. A higher pitch grabs more air, giving you more thrust but also drawing more battery power. A great starting point is a medium-pitch, 3-blade prop, like a 5.1x4x3. You can always buy a few different types later to experiment.
Choosing motors and props is a balancing act. A super aggressive setup might feel amazing, but it will kill your flight time. If you want to learn more about extending your time in the air, check out our guide to [boost your drone battery life for longer flights](https://www.jabdrone.com/post/boost-your-drone-battery-life-tips-for-longer-flights). Getting this combo right is a core skill you'll develop as you get deeper into the FPV hobby.
Selecting Your FPV System and Radio Gear

The parts that give you a live video feed and control over your drone are every bit as important as the motors spinning the props. Your FPV system—the camera, Video Transmitter (VTX), and goggles—is your eye in the sky. At the same time, your radio transmitter and receiver form the unbreakable link between your thumbs and the drone's every move.
Making the right call here is a massive part of any successful FPV build. A bad video link or a shaky radio signal can end a flight in an instant. This is one area where investing in quality gear pays huge dividends, not just in raw performance but in your confidence as a pilot. You want a system that will grow with you, from those first wobbly hovers all the way to complex aerial tricks.
The Great Debate: Analog vs. Digital FPV
For years, analog was the only game in town. It’s still loved for its extremely low latency and affordability. But digital FPV systems have completely changed the game, offering crystal-clear HD video that analog just can't touch.
The choice really boils down to a few key things: image quality, latency, signal penetration, and of course, your budget.
Analog: The classic choice. It's easy on the wallet, has almost zero latency, and deals with signal breakup gracefully—the video gets snowy but rarely freezes solid. It's a fantastic option for racers or anyone on a tight budget.
Digital: This is where you find those stunning, immersive visuals. Systems from DJI, Walksnail, and HDZero deliver high-definition feeds that make flying feel like you're actually in the cockpit. The trade-off is a higher price tag and a different kind of signal breakup, where the image can freeze or show large blocks instead of turning to static.
For a first build, it can be a tough decision. Analog gets you in the air for less money, but the visual experience of digital is so good that many pilots feel it's a worthwhile long-term investment.
Choosing your video system is a major commitment because your goggles are often tied to that ecosystem. If you buy DJI goggles, you're pretty much locked into the DJI FPV system. Think hard about what matters most—budget or visual quality—before you pull the trigger.
Comparing Digital FPV Systems
If you decide to go digital, you've got a few excellent options, and each has its own philosophy. This isn't about which one is "best," but which one is best for you.
FPV System | Key Advantage | Best For |
|---|---|---|
DJI O3 | Unmatched image quality and rock-solid signal penetration. | Pilots who prioritize cinematic visuals and a premium experience. |
Walksnail Avatar | Excellent image quality with a focus on low latency. | Freestyle pilots who want HD video without sacrificing responsiveness. |
HDZero | Fixed low latency, similar to analog, but with a clearer picture. | Racers and performance-focused pilots who need a consistent, responsive link. |
Each system represents a different approach. DJI offers a polished, "it just works" experience. Walksnail strikes a great balance. HDZero is all about pure performance, giving you a digital signal that feels as connected as analog.
Choosing Your Radio and Receiver
Your radio transmitter is the one piece of gear you physically touch on every single flight. It has to feel right in your hands, but more importantly, it needs to provide a link you can trust with your drone's life.
Two radio link protocols dominate the modern FPV world: ExpressLRS (ELRS) and Crossfire.
ExpressLRS (ELRS): This open-source system has absolutely taken the FPV world by storm. It offers incredible range, extremely low latency, and is seriously affordable. For the vast majority of pilots, ELRS is the top recommendation. It gives you top-tier performance at a fraction of the cost of its rivals.
TBS Crossfire: For years, Crossfire was the undisputed gold standard for long-range reliability. It’s still an incredibly robust system, but its higher price and slightly higher latency make ExpressLRS a much more compelling choice for most new builds today.
When you're picking a radio, look for one with a built-in ELRS module, like a RadioMaster Boxer or Zorro. This makes setup a breeze and ensures you have a high-performance link from day one. Pairing it with a tiny, inexpensive ELRS receiver is all it takes to get a connection you can count on. This is a non-negotiable step, as a reliable link is the foundation of safe flying.
Hands-On Assembly and Clean Soldering
Alright, this is where the real fun starts. You've got a box full of carefully chosen parts, and now it's time to turn that pile of components into a high-performance flying machine. Think of this part of our FPV build guide as a hands-on workshop, packed with the kind of practical advice you’d get from an experienced builder looking over your shoulder.
Our goal here is to build a quad that's not just clean and professional-looking, but also tough enough to take a few hits—because crashes are going to happen. We'll zero in on the two most important physical skills you need to master: smart assembly and clean soldering. Let’s fire up the soldering iron and get started.
Prepping the Frame and Mounting the Motors
Before a single piece of electronics touches your new frame, a little prep work can save you a world of headaches later. Start by assembling the main carbon fiber structure—the bottom plate, arms, and top plate. As you tighten things down, get into the habit of adding a small dab of blue threadlocker to your motor screws. Vibrations are the enemy in FPV, and the last thing you want is a motor coming loose mid-flight.
With the frame solid, it's time to mount your motors to the arms.
Check Your Screw Length: This is absolutely critical. Before you crank down on those motor screws, make sure they aren't too long. If a screw bottoms out and presses against the delicate motor windings inside, you can create a short that will instantly kill the motor.
Use Soft Mounts: If your frame came with TPU soft-mounts or little rubber gaskets, use them. These small additions are fantastic for isolating your flight controller from frame vibrations, which translates directly to smoother, more stable flight.
Taking your time here really sets the stage for a cleaner, easier wiring job down the line. A solid mechanical foundation is every bit as important as perfect solder joints. This kind of precision is why the FPV racing drone market, estimated at USD 347.16 million in 2024, continues to grow. Pilots who build their own quads demand this level of reliability.
The Art of Clean Soldering
For beginners, soldering can feel like the most intimidating part of the build. But honestly, with a bit of practice and the right technique, it quickly becomes one of the most satisfying skills you'll learn. A clean, strong solder joint is the difference between a reliable quad and one that’s cursed with mysterious electronic gremlins.
The secret isn’t some high-end, expensive iron; it all comes down to two simple things: pre-tinning and flux.
Getting a solid connection between your wires and circuit boards is all about preparation. For anyone starting out, or even experienced builders looking to perfect their technique, having the right tools makes all the difference.
Essential Soldering Tools and Materials
Tool/Material | Its Purpose in Your Build | What I Recommend |
|---|---|---|
Soldering Iron | The core tool for melting solder to create electrical connections. | A temperature-controlled iron (like a TS100/TS101 or Pinecil) is a game-changer. |
Solder | The metal alloy that forms the actual connection. | 60/40 or 63/37 rosin-core solder is perfect for electronics. Get a thin gauge. |
Flux Paste/Pen | A cleaning agent that helps solder flow smoothly and bond strongly. | A no-clean flux paste in a syringe or a flux pen. This is non-negotiable. |
Wire Strippers | For cleanly removing insulation from wires without damaging the copper. | An automatic wire stripper saves so much time and frustration. |
"Helping Hands" | A stand with clips to hold components steady while you work. | The kind with a heavy base and flexible gooseneck arms are the most useful. |
Brass Tip Cleaner | For cleaning oxidation off your soldering iron tip without thermal shock. | Much better for tip longevity than a wet sponge. |
These are the items I make sure are on my bench before I even think about plugging in my iron. They make the whole process smoother, cleaner, and far less frustrating.
A good solder joint should look like a small, shiny volcano or a Hershey's Kiss. If it’s dull, lumpy, or spiky, you've probably got a "cold" joint. Just add a little more flux and reheat it until it flows properly into that perfect shape.
This visual guide breaks down the core steps for getting your flight controller wired up cleanly.
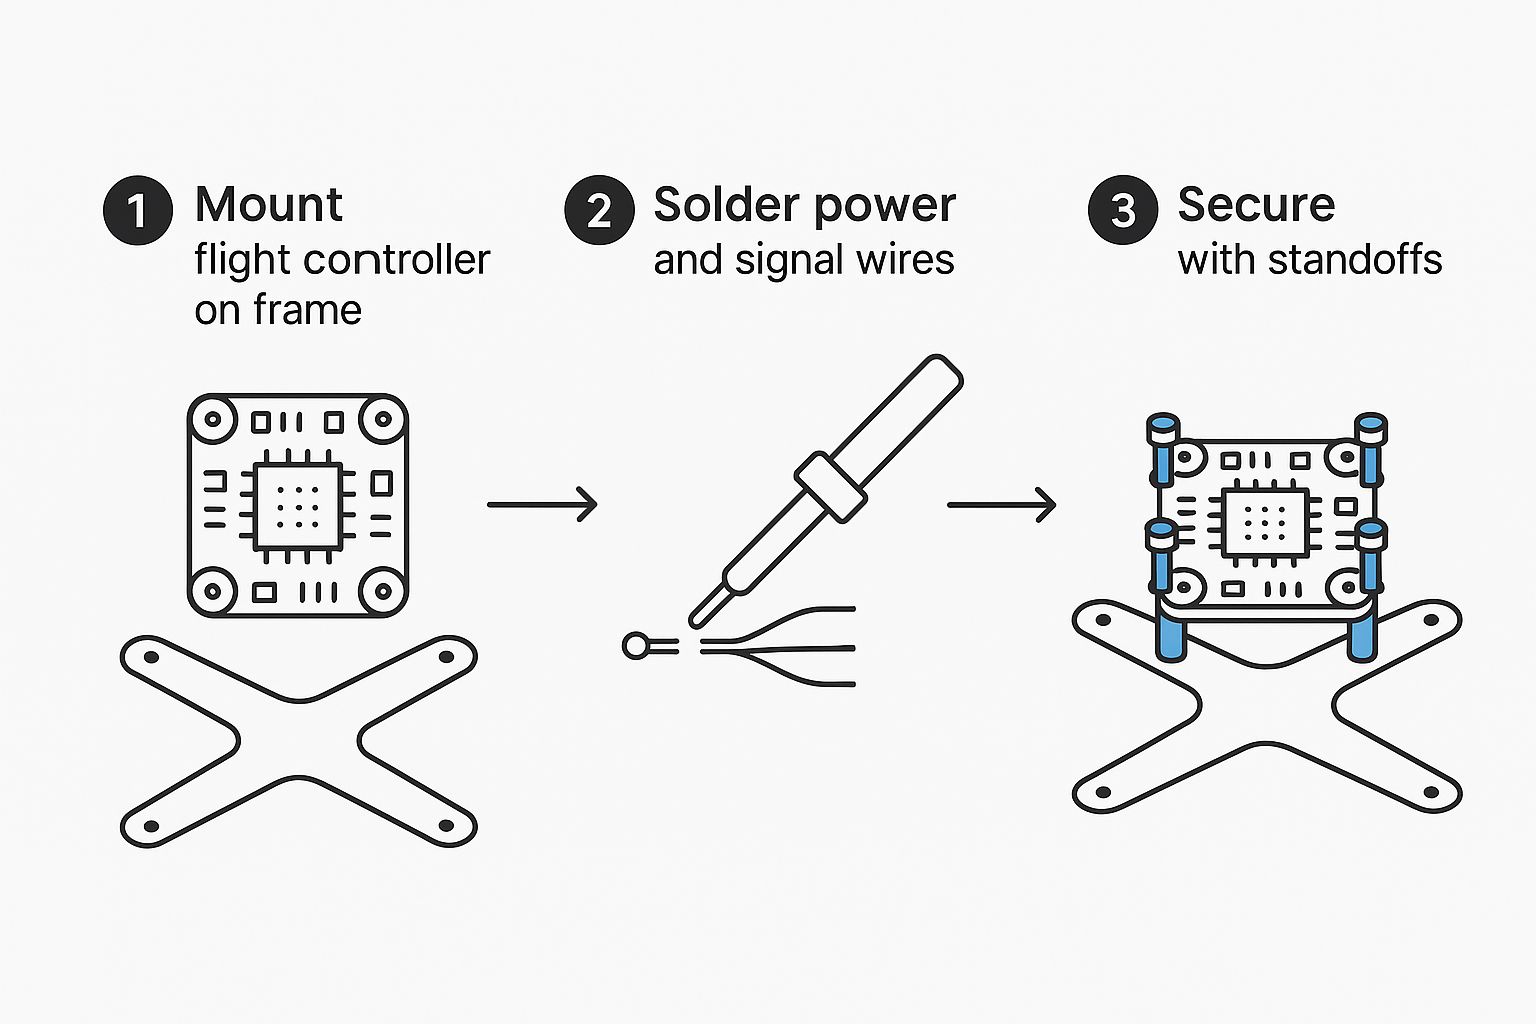
As you can see, a logical, step-by-step approach to mounting and wiring is the key to avoiding a "rat's nest" of wires and ensuring your build is reliable.
Smart Wiring and Final Connections
Now that your soldering skills are warmed up, let's connect everything to the flight controller stack. I always start with the biggest wires first: the motor wires to the ESC and the main battery lead (your XT60 connector). These joints need the most heat, so don't be shy about cranking your iron up to around 450°C (840°F) for these larger pads and wires.
Next, run the smaller signal wires from your camera, VTX, and receiver to their designated pads on the flight controller. A common mistake I see is cutting wires too short. Always leave a little bit of slack. It makes future repairs infinitely easier and prevents stress on the solder pads when you crash. To keep everything tidy and safe from prop strikes, twist your wires together and use small zip ties or electrical tape to secure them neatly to the frame arms.
For a deeper dive into a build focused specifically on the racetrack, check out our guide on [building a racing drone for your complete FPV build guide](https://www.jabdrone.com/post/building-a-racing-drone-your-complete-fpv-build-guide). It’s packed with component suggestions and assembly tricks tailored for pure speed and agility.
Configuring Your Firmware in Betaflight
Your FPV drone is physically assembled—a beautiful machine of carbon fiber and wires. But right now, it’s just a collection of parts. The next crucial step is teaching it how to fly by configuring its brain, the flight controller. This is where we dive into the software side using Betaflight Configurator.
This whole process might seem intimidating, but don't worry. It's really just a series of logical steps. We're about to turn what looks like a complex dashboard into an intuitive control panel, ensuring your quad is safe, responsive, and ready for its first flight.
First Connection and Firmware Flash
Before we can tweak anything, we need to get your computer talking to your flight controller and make sure it's running the latest stable firmware. Think of this as installing the operating system on a new computer; it’s the foundation for everything else.
First, download and install the Betaflight Configurator for your operating system. With the configurator open, connect your flight controller to your computer using a proper USB-C data cable. A common rookie mistake is using a charge-only cable, which simply won't work.
Once connected, you should see a new COM port pop up in the top-right dropdown menu. Go ahead and click "Connect." If it works, you'll see a 3D model of your drone that moves as you tilt the physical quad. Now, it's time to flash.
Enter DFU Mode: Disconnect your drone. Now, find the tiny "boot" button on your flight controller. While holding that button down, plug the USB cable back in. The configurator should now show "DFU" in the port menu, which means it's ready for new firmware.
Select Firmware: Jump over to the "Firmware Flasher" tab. Choose your flight controller's target name from the list (for example, "SPEEDYBEEF405V4"). Always select the latest stable release, not a release candidate, for maximum reliability.
Flash: Leave the other options at their defaults, click "Load Firmware [Online]," and then hit "Flash Firmware." The whole process takes about a minute, and a satisfying green progress bar will confirm it's done.
With fresh firmware installed, you can reconnect to the configurator to begin the real setup.
Essential Port and Receiver Setup
With the basic OS loaded, our first job is telling the flight controller which "ports"—known as UARTs—are connected to which devices. This is how it knows where to listen for signals from your radio receiver and where to send data to your video transmitter.
In the Ports Tab, you'll see a list of UARTs. You need to enable "Serial RX" for the specific UART you soldered your receiver to. For instance, if you wired your receiver to the T6 and R6 pads, you would find UART6 and toggle on Serial RX.
Next, head to the Receiver Tab.
Under Receiver Mode, select "Serial (via UART)."
For the Serial Receiver Provider, choose "CRSF" if you're using an ExpressLRS (ELRS) or Crossfire receiver. This is the standard for most modern builds.
This is your first big test. After saving, power on your radio transmitter. As you move the control sticks, you should see the corresponding bars for Roll, Pitch, Yaw, and Throttle moving in the configurator. If they don't budge, it's time to double-check your wiring and port settings.
Motors, Modes, and Failsafe
Now for the fun part: making sure the motors are spinning correctly and assigning switches for crucial functions. Take your propellers off for this part! Seriously, this is non-negotiable for safety.
Navigate to the Motors Tab. Here, you need to verify two things: motor order and motor direction. Betaflight expects a specific layout (motor 1 in the back-right, motor 2 in the front-right, and so on). Enable the motor test slider and gently raise the master slider to spin each motor one by one. Make sure they match the diagram. If the order is wrong, don't panic—the "Reorder Motors" wizard makes it easy to fix.
Next, check the spin direction. If a motor is spinning the wrong way, you can reverse it using your ESC's configuration tool (like the SpeedyBee app or BLHeliSuite) or a simple command in Betaflight's CLI.
Configuring Arming and Flight Modes
The Modes Tab is where you bring your drone to life. You'll assign physical switches on your radio to different functions in Betaflight. At a minimum, you need to set up these two:
Arm: This is the safety switch that allows the props to spin. I always assign this to a sturdy, two-position switch on my radio that's easy to reach but hard to bump by accident.
Beeper: Assign another switch to activate the drone's beeper. This is an absolute lifesaver for finding your quad after a crash in tall grass. Trust me on this one.
I also highly recommend setting up a "Flip Over After Crash" mode (sometimes called Turtle Mode). This lets you use your motors to flip the drone back upright if it lands upside down.
Finally, let’s configure your Failsafe settings. This tells the drone what to do if it loses the signal from your radio. The safest and most common option is "Drop," which will immediately disarm the motors and let the quad fall to the ground. This prevents a dreaded "flyaway" where the drone just flies off uncontrollably. Setting this up correctly is a vital step for any responsible FPV pilot.
Your Pre-Flight Checklist and Maiden Flight
This is it—the moment of truth. After all that work, your custom FPV drone is fully assembled, configured, and ready to rip. It’s a testament to your patience and skill. But before you even think about sending it to the sky, there’s one critical step that separates smart pilots from those who end up with a pile of broken carbon and electronics: the pre-flight check.
This isn't about being overly paranoid; it's about being methodical. A few minutes of checks on the ground can easily save you hours of heartache and repairs. Trust me on this.
The very first time you plug a LiPo into a fresh build can be a real nail-biter. That’s precisely why I never power up a new quad without a smoke stopper. This little lifesaver sits between your battery and the drone, instantly cutting power if it detects a short circuit. It's the difference between a quick fix and a puff of magic smoke.
Pre-Power Safety Checks
Before a battery gets anywhere near your drone, run through these quick but crucial sanity checks.
Props Off: Seriously, double-check that your propellers are off. We’re about to spin the motors, and the last thing you want is your brand-new build turning into an uncontrollable desk blender.
Antenna On: Make sure your VTX antenna is screwed on tight. Powering up your video transmitter without an antenna, even for a few seconds, can fry it for good.
The Smell Test: It might sound silly, but give your electronics a quick sniff. A distinct burnt smell is a dead giveaway that something went wrong during the build.
Once you’ve done that, plug in your battery through the smoke stopper. If you get the familiar ESC startup chimes and no drama, you’re in business. If the smoke stopper trips, unplug that battery immediately and start hunting for shorts.
Key Takeaway: A smoke stopper is your best friend on a new build. It turns that tense first power-up from a risky gamble into a safe, controlled test. Don’t ever skip this with a new FPV drone.
Final Bench Checks and The Maiden Flight
With the drone safely powered on, it’s time for the last round of checks in Betaflight Configurator. First, pop over to the Receiver Tab. Wiggle your sticks and flick your switches to confirm everything moves correctly. Make sure your arm switch works as intended and that your failsafe is set to "Drop."
Next, click over to the Motors Tab for one last prop-off motor test. Confirm the motor direction and order are still correct. More importantly, listen. You want to hear a smooth whir—any grinding or rattling is a major red flag. For a deeper dive into all the checks you should perform, our complete [drone preflight checklist for safe flight prep](https://www.jabdrone.com/post/drone-preflight-checklist-safe-flight-prep) covers every single step in detail.
Alright, time for the main event: the maiden flight. Find a huge, open field with zero people or obstacles around.
Set the drone on level ground, a good 20 feet away from you.
Arm it, take a breath, and gently ease up the throttle to hover just a foot or two off the ground.
Just listen. Are there any strange vibrations or oscillations? Is the drone drifting hard in one direction?
If it feels locked in, fly it around gently, keeping it in your line of sight. This isn’t the time for flips and rolls. The goal here is simple: verify that it flies predictably and get a feel for how it handles.
A successful maiden flight, no matter how short, is a massive milestone. Congratulations—you built that
Got Questions About Your FPV Build?
Even after following a step-by-step guide, it's totally normal to have a few lingering questions. Building your first (or even your fifth) FPV drone is a learning process. Here are some of the most common questions I get asked, with answers to help you push through those final build stages.
What’s the Toughest Part of Building an FPV Drone?
For just about everyone starting out, the most daunting step is soldering. It's a skill that looks tricky and requires a steady hand. But honestly, it's more about patience than anything else.
Get yourself a decent temperature-controlled soldering iron, some good flux, and a practice board. After a few tries, it starts to click. The real secret is to take your time. Rushing is what leads to those frustrating "cold joints" that don't work. Once you master pre-tinning your wires and pads, you'll be making clean, shiny connections like a pro.
How Much Does It Really Cost to Build a Good FPV Drone?
This is the big one, isn't it? If you already have goggles and a radio transmitter, you can build a really solid, modern FPV quad for somewhere between $200 and $400. That budget gets you reliable components like a modern F7 flight controller and quality motors without breaking the bank on top-shelf gear.
Of course, the price can climb quickly. If you want a high-end digital FPV system like the DJI O3 Air Unit, the drone alone can easily push past $600. It all comes down to what you want to spend and the video quality you're aiming for.
The best part about building it yourself? You're in complete control of the budget. You decide where to save and where to splurge. For a first build, I always suggest putting your money into a quality flight controller stack and a dependable radio link—those are the brains and the lifeline of your quad.
Should I Use an All-in-One FC for My First Build?
Yes, absolutely. For any first-time builder, I strongly recommend getting an All-in-One (AIO) board or a pre-built stack. An AIO combines the flight controller (FC) and the 4-in-1 Electronic Speed Controllers (ESCs) on one board. A stack does the same thing, but with two boards connected by a simple plug-and-play cable.
Either option dramatically simplifies the wiring. You’ll have far fewer solder points to worry about, which means fewer chances for something to go wrong. It makes the whole process cleaner, faster, and way less frustrating.
What Should I Upgrade First on My Drone?
Once you're flying confidently, you'll probably get the itch to upgrade. The most satisfying upgrades are often the cheapest and easiest ones.
Antennas: Swapping out the stock antennas on your drone's VTX and your goggles can give you a surprisingly clearer and more stable video signal. It's a night-and-day difference for a small cost.
Propellers: Props are inexpensive and can completely change the way your drone flies. Playing around with different blade counts and pitch angles is a fun and effective way to tune your quad's handling and performance.
These small tweaks can give you a much bigger performance boost than swapping out a major component like your motors.
At JAB Drone, we're here to give you the knowledge to build, fly, and innovate. Check out our website for more expert guides, product reviews, and FPV inspiration. Find your next project at https://www.jabdrone.com.
Comments