How to Build an FPV Drone a Practical Guide
- Paul Simmons

- Sep 3, 2025
- 18 min read
Updated: Sep 8, 2025
Building an FPV drone is an incredible journey. You'll start by hand-picking every component—the frame, motors, ESCs, and flight controller—and then bring it all to life with your own hands, soldering each connection. From there, it's about diving into the firmware, binding your transmitter, and running through those all-important pre-flight checks.
This is how you transform a box of parts into a high-performance quadcopter that’s truly your own.
Why You Should Build Your Own FPV Drone

Jumping into the world of First-Person View (FPV) drones can feel a little intimidating at first, but honestly, building your own quad is one of the best ways to get started. It’s a hands-on experience that takes you way beyond just flying; it gets you deep into the nuts and bolts of what actually makes these machines rip through the sky.
When you build an FPV drone from the ground up, you gain a real understanding of how every single component talks to the others. That knowledge is gold. After a crash, instead of boxing up a pre-built drone for a costly repair, you'll have the confidence to grab a soldering iron, swap out a part, and get back in the air yourself.
The Core Benefits of a DIY Drone Build
Going the DIY route gives you some serious advantages over just buying a drone off the shelf. It’s not just about potentially saving a few bucks; it's about becoming the master of your own machine. This process turns you from a pilot into a pilot and a technician.
Here’s what you really gain:
Total Customization: You call the shots. Every part is chosen to fit your flying style. Dreaming of a long-range cinematic machine? You’ll go for efficient motors and a larger frame. Want a super-agile freestyle beast? You’ll pick up powerful motors and a tough-as-nails 5-inch frame.
Painless Repairs: If you know how to build it, you know how to fix it. A snapped arm or a fried motor becomes a simple fix, not a weekend-ruining disaster.
Fine-Tuned Performance: The build process naturally leads you to the software side. You’ll learn your way around tools like Betaflight, tweaking rates and PIDs until the drone feels like an extension of your own thoughts.
This is more than just an assembly project; it’s a masterclass in the technology that powers this hobby. The FPV market is absolutely exploding, valued at USD 287.72 million in 2024 and on track to hit nearly USD 2.55 billion by 2032. As this tech goes mainstream, knowing how to build and maintain your own gear will put you way ahead of the curve.
Mapping Out Your Build Journey
To help you see the path ahead, it’s best to break the process down into manageable phases. Each stage builds on the last, guiding you from a pile of electronics to a fully tuned, flight-ready quadcopter. We cover this structured approach in detail throughout our **practical guide to building your own FPV drone**.
The best part of building your own drone isn't just that first flight. It's the first time you crash, troubleshoot the problem, and fix it yourself. That's the moment you realize you truly understand your machine.
Here’s a quick look at what the journey looks like from start to finish.
Your FPV Drone Build Journey at a Glance
Phase | Key Activities | Focus | Estimated Time |
|---|---|---|---|
1. Component Selection | Researching parts, checking compatibility, ordering components. | Creating a balanced and reliable parts list that fits your budget and flying goals. | 5-10 hours |
2. Assembly & Soldering | Mounting motors, installing the flight stack, soldering all connections. | Precision, clean connections, and proper component placement. This is the core hands-on work. | 6-12 hours |
3. Firmware & Software Setup | Flashing Betaflight, configuring ports, setting up modes and OSD. | Getting the drone's "brain" working correctly and communicating with all peripherals. | 3-5 hours |
4. Binding & Final Checks | Pairing your transmitter and receiver, checking motor direction, failsafe test. | Ensuring all systems are go for a safe and controlled first flight. Safety first! | 1-2 hours |
5. Tuning & First Flight | Performing a maiden flight, basic PID tuning, adjusting rates. | Dialing in the flight characteristics to match your personal preference. | 2-4 hours |
At the end of the day, building your own quadcopter means you get a machine that's perfectly dialed in for you. Whether you're chasing cinematic shots or trying to hit gaps at full speed, this is the first step toward owning the skies on your terms.
Choosing the Right Components for Your Build
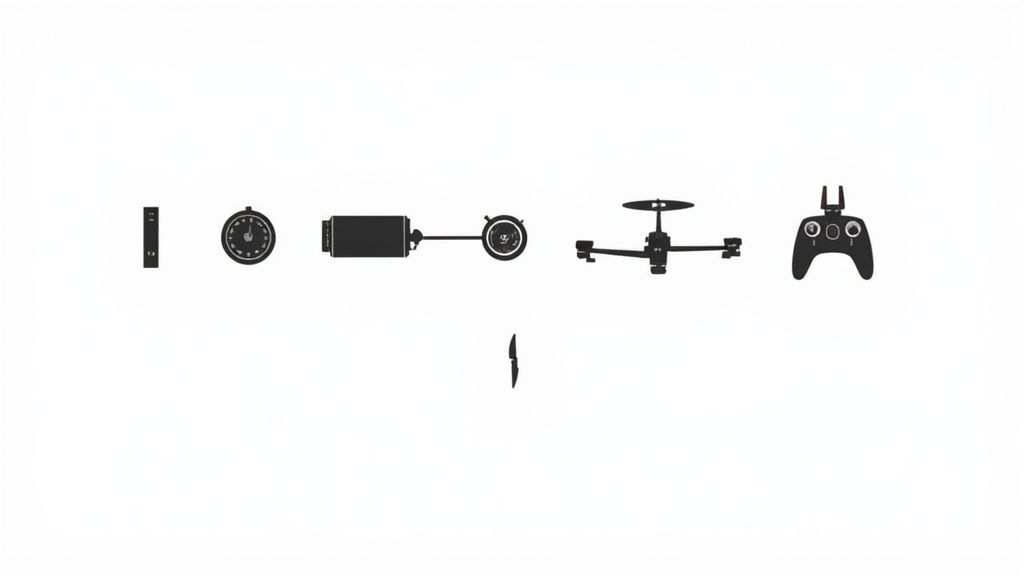
Alright, this is where the magic really happens. Picking your components is easily the most critical part of any build because this is where you decide what kind of drone you're actually creating. We're going to skip the generic shopping lists and get into the why behind each part so you can make smart choices that match your flying style and budget.
Think of your drone as a finely tuned system where every piece has to play well with the others. For instance, your motor's KV rating is directly tied to the propellers you can run and the battery voltage (LiPo cell count) you should use. Nailing this synergy from the start is the real secret to building a quad that flies like a dream.
The Foundation: Your FPV Drone Frame
The frame is your drone's skeleton. It’s the backbone that holds everything together and, most importantly, determines what size propellers you can spin—the single biggest factor defining a drone's character. For anyone looking to build an FPV drone for the first time, the 5-inch frame is the undisputed king. It hits that perfect sweet spot between agility, stability, and a massive ecosystem of parts to choose from.
Sure, a tiny 3-inch frame is a blast for ripping around tight gaps, but a 5-inch quad is way more versatile for freestyle flying in a park. On the other end, 7-inch or 10-inch rigs are built for long-range cruising, but their size and cost make them a bit much for a first build.
The Powerhouse: Motors and ESCs
Motors and Electronic Speed Controllers (ESCs) are the heart and muscle of your drone. The motors spin the props, and the ESCs are the translators that tell them how fast to spin based on commands from your flight controller.
The main thing to wrap your head around here is the motor KV rating. This number isn't a measure of raw power; it tells you how many RPMs the motor will try to spin for every volt you feed it.
Lower KV (like 1700-1900KV): This is the modern standard for 6S LiPo batteries (22.2V). It’s the go-to for 5-inch freestyle drones today, offering a great blend of punch and efficiency.
Higher KV (around 2400-2700KV): These motors are designed for 4S LiPo batteries (14.8V). While a bit less efficient, 4S builds are often cheaper to get into and can be more forgiving for new pilots.
Your ESCs just need to be rated to handle the current your motors will pull under load. A solid 4-in-1 ESC that can handle 45A to 60A is a bulletproof choice for pretty much any 5-inch build. It also makes wiring much cleaner and simpler. Our detailed FPV drone build guide has a complete walkthrough for getting these parts paired up perfectly.
The Brain and Eyes: Flight Controller and Video System
The flight controller (FC) is your drone's central nervous system. It takes your stick inputs, processes data from its gyro, and sends precise instructions to the ESCs. For a beginner, an FC with a modern F7 or H7 processor is a great investment. It gives you plenty of overhead for all the cool features you’ll want to enable down the road.
Your video system is your window into the world from the drone’s perspective, and you’ve got two main roads you can go down: analog or digital.
Analog: The classic, budget-friendly choice. You get incredibly low latency, but the image quality is more like an old-school TV. It’s raw and unfiltered.
Digital: Systems from DJI, Walksnail, and HDZero deliver stunningly clear HD video. The experience is on another level, but it comes with a much higher price tag.
Critical Tip: Make sure your camera and video transmitter (VTX) are from the same family. You absolutely cannot mix an analog camera with a digital VTX or vice-versa. This is one of the most common and expensive mistakes new builders make.
The entire global drone industry is booming, projected to hit a valuation of USD 54.6 billion by 2025. This growth is fueled by over 33,000 companies, including countless startups pushing the envelope on components just like these.
Beginner FPV Component Recommendations
To cut through the noise, I’ve put together a table of tried-and-true components perfect for a first build. This list is all about balancing performance, durability, and cost to give you a great starting point.
Component | Recommended Model | Key Feature | Best For | Approx. Price |
|---|---|---|---|---|
Frame | TBS Source One V5 | Open-source, durable, and spacious | First-time freestyle builders | $35 |
Motors | EMAX ECO II 2207 (1900KV) | Smooth, reliable, and affordable | 6S freestyle and cruising | $17 per motor |
FC & ESC Stack | SpeedyBee F405 V3 Stack | Bluetooth config, 50A ESC | All-around ease of use | $70 |
Video System (Analog) | Caddx Ratel 2 + TBS Unify Pro32 | Excellent low-light performance | Budget-conscious builds | $75 |
Video System (Digital) | Caddx Vista / DJI O3 Air Unit | High-definition clarity | Pilots prioritizing video quality | $140 / $229 |
Receiver | Radiomaster RP1 (ELRS) | Long-range, low-latency link | Future-proof control link | $14 |
Following a parts list like this will result in a balanced, high-performance quadcopter that you can learn and grow with. By understanding why you're choosing each part, you're not just assembling a drone—you're crafting a flight experience that’s truly your own.
Assembling and Soldering Your FPV Drone
Alright, you’ve got a pile of carefully selected parts on your workbench. Now for the fun part—this is where your FPV drone actually comes to life. We'll start by getting the frame and motors together before diving into the single most important skill you'll learn in this hobby: soldering.
Don't let soldering scare you. Seriously. It's just a skill, and like any other, it just takes a bit of patience and the right touch. A clean, solid solder joint is the difference between a quad that can take a beating and one that’s constantly haunted by mysterious electronic gremlins.
This visual guide gives you a quick rundown of the big decisions you face when picking out a frame, which is always the first piece of the puzzle.
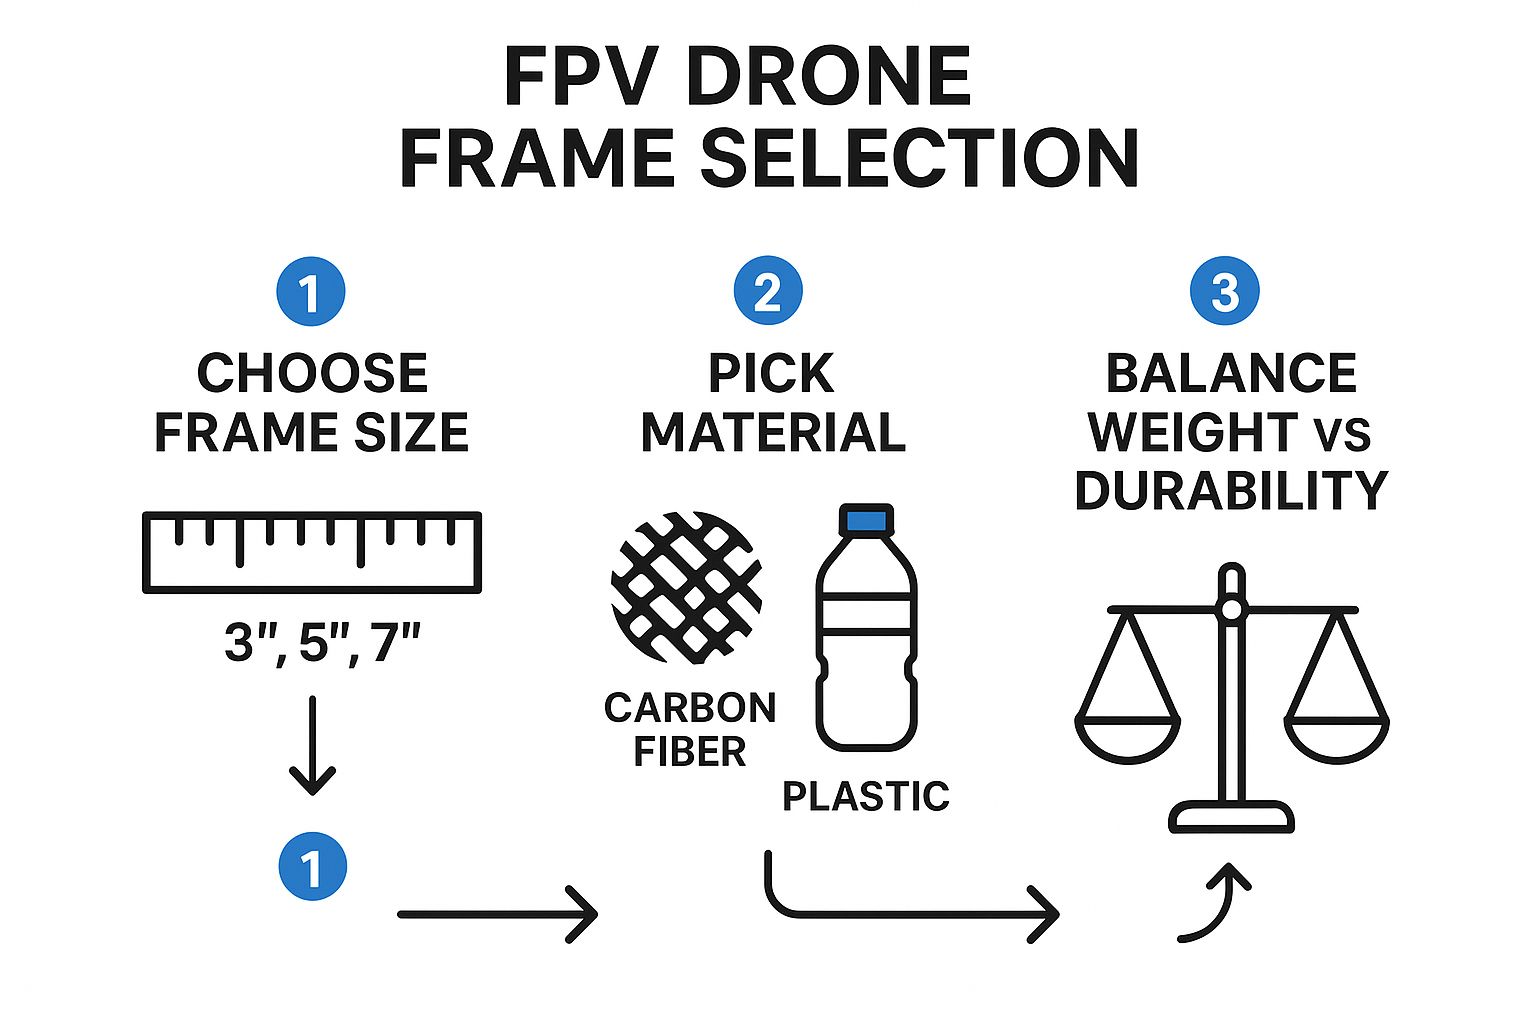
As you can see, choosing a frame is all about balancing size, material, and that constant trade-off between weight and durability.
Preparing the Frame and Mounting Motors
Before a single electronic component touches that carbon, you need to prep the frame. Grab a small file or a piece of sandpaper and gently bevel the sharp edges of the carbon fiber plates, paying special attention to the arms. This tiny step can save you a world of hurt later by preventing the frame from slicing through motor wires or battery straps in a crash.
Next up, loosely assemble the main body of the frame. Don’t go cranking down all the screws just yet; leaving them a bit loose gives you some wiggle room for mounting everything else. Now, it’s time for the motors.
Motor Placement: Make sure each motor sits perfectly flat on the arm. No wobbling.
Screw Length: This is absolutely critical. Use the screws that came with your motors and double-check that they aren't long enough to hit the motor windings inside. A screw that’s even a millimeter too long can instantly fry a motor the first time you power it up.
Securing: Put a small drop of blue threadlocker on each motor screw before tightening it. This is cheap insurance against vibrations shaking them loose mid-flight.
Once the motors are snug, you can run the wires along the arms. I like to use a bit of electrical tape or a small zip tie to hold them in place for now, leaving just enough slack to comfortably reach the 4-in-1 ESC.
Mastering the Art of Soldering
Soldering is the electrical lifeblood of your drone. Bad joints will fail under stress, and failed joints lead to crashes. Simple as that. The goal here is a strong, shiny, conductive connection that can handle vibrations and impacts. You don’t need a fancy, expensive soldering station—a decent 60W adjustable iron is more than enough to get started.
A great solder joint looks like a small, shiny volcano or a Hershey's Kiss. If it's dull, blobby, or spiky, it's a "cold joint" and needs to be redone. The trick is to heat the pad and the wire together, then apply the solder to the heated parts, not directly to the iron's tip.
If you’re new to this, do yourself a favor and practice on an old circuit board first. The real key to success is tinning—applying a thin layer of solder to both the wire and the pad before you ever try to join them.
When you're ready for the motor wires, trim them to length, strip about 2-3mm of insulation, twist the copper strands tightly, and tin the exposed wire. Do the same for the corresponding pads on your ESC. Now, just place the tinned wire on the tinned pad, touch your iron to both for a second or two, and let the solder flow together into a beautiful joint. Pull the iron away and let it cool on its own.
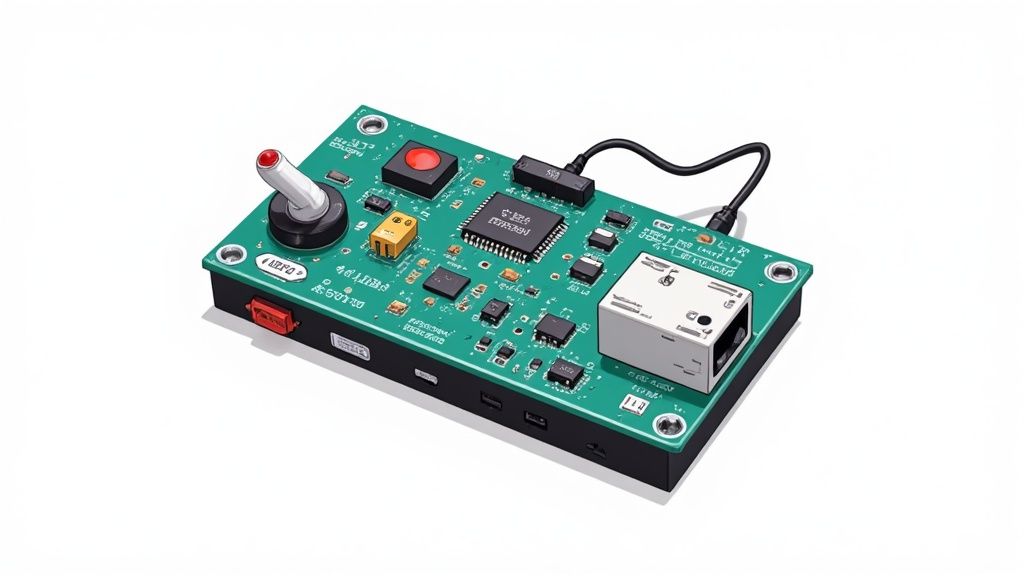
Installing the Flight Controller Stack
Your flight controller (FC) and 4-in-1 ESC will usually arrive as a "stack," connected by a small wiring harness and designed to be mounted on soft-mount grommets. This little package is the brain and power distribution hub of your entire quad.
Mount the ESC first, making sure the motor pads are oriented correctly for your wire routing. Then, place the FC on top. Pay very close attention to the small arrow printed on the board. This arrow must point toward the front of the drone, otherwise, the gyroscope won't know which way is up, and it will refuse to fly correctly.
With the stack in place, it’s time for the most important solder joint on the entire drone: the main battery leads (your XT60 connector). These go onto the large positive and negative pads on the ESC. You'll want a hot iron for this (around 400°C / 750°F) and you need to be quick to avoid dumping too much heat into the board.
FPV Camera Mounting and Cable Management
The last major assembly step is getting your FPV camera and video transmitter (VTX) installed. Most frames today come with a slick 3D-printed TPU mount for the camera. Secure your camera in the mount, then install it at the front of the frame. You can set your camera angle now, but I always recommend starting low (10-15 degrees) for your first few flights.
Next, wire the camera and VTX to their designated pads on your flight controller. This is usually just three small wires for each: power, ground, and video signal. Your FC’s wiring diagram is your best friend here—triple-check you're connecting everything to the right spot.
Finally, take a few minutes to manage your cables. Use zip ties to neatly secure all the wires, making absolutely sure they are clear of the spinning propellers. Tidy cable management doesn't just look professional; it dramatically improves the drone's durability and makes future repairs about a thousand times easier.
With all the components mounted and soldered, your machine is finally starting to look like a real FPV drone.
Configuring Your Drone in Betaflight
You’ve cooled the soldering iron and every component is securely in place. Your drone has a body, but now it needs a brain. This is where Betaflight steps in. Think of it as the operating system for your flight controller, the software that transforms your pile of parts into a responsive, high-performance flying machine.
The interface can look a little intimidating at first, but don't sweat it. We’re going to tackle the essential tabs one by one. The goal here isn't just to mindlessly click buttons; it’s about understanding how each setting shapes your drone’s unique flight personality.
First Connection and Firmware Flash
First things first, you'll need to download the Betaflight Configurator. Once it's installed, go ahead and plug your flight controller into your computer using a USB cable.
But before you do anything else, remember the golden rule of FPV safety: always remove your propellers before connecting a battery or plugging into Betaflight. No exceptions.
It's also a great habit to flash the latest stable firmware right away. This makes sure you’re running on the newest features and have all the latest bug fixes. Inside the configurator, you’ll find a firmware flashing tab. Just select your flight controller's target name (like "SPEEDYBEEF405V3") and the latest Betaflight version. The whole process is pretty much automated and just takes a minute.
Initial Setup and Calibrations
Once the flash is complete, connect to your drone. The very first thing you need to do is calibrate the accelerometer. Find a perfectly level surface, set your drone on it, and click the "Calibrate Accelerometer" button in the Setup tab. This simple step teaches the flight controller what "level" actually is—a critical reference for any self-leveling flight modes.
Next, we'll dive into the Ports tab. This is where you tell the flight controller which UART (a physical serial port) is talking to which component. You'll need to enable "Serial RX" for the specific UART your receiver is soldered to. If you’re using a digital FPV system from DJI or Walksnail, you’ll also enable "VTX (MSP)" on its corresponding UART.
A super common rookie mistake is getting the UARTs mixed up, which results in a dead receiver or no video feed. Always, always double-check your flight controller's wiring diagram to confirm which solder pad connects to which UART number.
Configuring Your Receiver and Motors
With the ports sorted, let's get your radio talking to the drone. Hop over to the Receiver tab and select the right protocol for your gear. For almost any modern build, this will be CRSF for ExpressLRS (ELRS) and Crossfire systems.
After you select the protocol and hit save, you should see the channel bars jumping around as you move the sticks on your transmitter. If nothing happens, you probably have a binding problem or you've picked the wrong UART.
Now for the fun part: the motors. In the Motors tab (with props still off!), you can spin up each motor individually to test them. More importantly, this is where you’ll correct their spin direction. It's almost guaranteed a few of your motors will be spinning the wrong way. Instead of breaking out the soldering iron again, you can easily reverse them right in your ESC software.
Setting Up Modes and Failsafe
Flight modes are your way of telling the drone how to behave mid-flight, and you'll assign them to switches on your radio in the Modes tab.
A few essential modes you absolutely need to set up are:
ARM: This is your master safety switch. The motors won't even think about spinning until you flip this switch.
ANGLE: A self-leveling mode that's perfect for your first few flights or for getting yourself out of a tricky spot.
BEEPER: This triggers the buzzer on your drone—a total lifesaver when you crash in tall grass and can't find your quad.
The Failsafe setting is arguably the single most important safety feature you'll configure. It tells the drone what to do if it ever loses the signal from your radio. The standard and safest option is "Drop," which immediately disarms the motors and prevents a dreaded flyaway.
Fine-Tuning with Rates and OSD
Rates define how sensitive the drone is to your stick movements—basically, how fast it flips and rolls. For a first-time pilot, I highly recommend sticking with the default Betaflight rates. They offer a smooth, predictable feel that's great for learning. You can always tweak them later as you get more comfortable and start developing your own flying style.
Finally, the On-Screen Display (OSD) tab lets you customize the info you see in your FPV goggles. This is your cockpit's dashboard.
Here are the key OSD elements to turn on:
Battery Voltage: This is the most critical piece of data, period.
Fly Time: Helps you keep track of your battery life.
RSSI Value: Shows how strong your radio link is.
Craft Name: Makes it easy to identify your video feed if you're flying with friends.
After you've got Betaflight all set up, it's smart to develop a routine you follow every single time you go out to fly. Using a good checklist prevents simple mistakes that can end a session early. For a solid example, take a look at our guide on building a drone preflight checklist for safe flight prep. A few extra moments on the ground will always lead to a safer, more enjoyable time in the air.
Your Pre-Flight Checklist and Maiden Flight
The moment of truth is here. All that time spent soldering, configuring, and troubleshooting has led to this point. But hold on—don't just rush out and plug in a battery. That's a classic rookie mistake, and a surefire recipe for a fried component or a flyaway.
This final stage is all about being methodical. We need to run through a few critical checks to make sure your new quad is safe, predictable, and ready to leave the ground without any nasty surprises. Let’s get it done.
Last-Minute Bench Checks
Your first line of defense is a simple, cheap tool called a smokestopper. Seriously, don't power up without one. This little device plugs in between your battery and the drone's XT60 connector. If you have a dead short somewhere—a tiny solder ball bridging two pads, for example—the smokestopper will limit the current and save your electronics from going up in a literal puff of smoke.
With your props off and the smokestopper connected, plug in a battery. The device shouldn't light up brightly (a bright light means you have a short). Instead, you should hear the familiar startup tones from your motors. That's your first green light.
Now, head back into Betaflight one last time for these non-negotiable checks:
Motor Direction: Pop over to the Motors tab. Spin up each motor individually at a very low throttle. You need to physically see that each one is spinning in the correct direction shown in the diagram. If one is wrong, you'll need to reverse it using your ESC configurator.
Radio Inputs: In the Receiver tab, move your transmitter sticks around. Watch the sliders for roll, pitch, yaw, and throttle. Do they all move in the right direction? A reversed channel here will make the quad completely unflyable.
Failsafe Test: Arm the drone (props are still off, right?) and nudge the throttle up slightly. Now, turn your transmitter completely off. The motors should stop instantly. This confirms your failsafe is working and will save you from a flyaway if you lose signal.
After building dozens of quads, I can tell you this: 90% of maiden flight issues are discovered during these final bench tests. Skipping them is asking for a crash. Take your time here, and your drone will thank you for it.
The Maiden Flight
Okay, all the bench checks passed. It's time to head outside. Find a big, open field—I'm talking no people, no cars, and no buildings anywhere nearby. Your first flight is all about observation and feeling out the new build, not pulling off wild tricks.
Before you go, make sure you're up to speed on handling your power source. Check out our essential LiPo battery safety guide for a full rundown.
Your first flight is a huge milestone when you build an FPV drone. It’s the moment that pulls you into the hobby. The drone racing market, which hit USD 493.59 million in 2024, is proof of how massive this community has become, with some analysts projecting it could reach nearly USD 2.65 billion by 2034. You can learn more about this explosive growth from Precedence Research's drone market analysis.
For the flight itself, start in Angle mode. This self-leveling mode makes the drone feel much more stable and forgiving for a first flight.
Place the drone on the ground, a good distance away from you.
Pop on your goggles and arm the quad.
Slowly and smoothly push up the throttle until the drone lifts off and settles into a stable hover a few feet off the ground.
Just listen. Do you hear any weird vibrations or oscillations?
Gently test the roll and pitch sticks. Does it feel responsive? Is it drifting hard in one direction?
Fly a few lazy patterns, keeping it close and low. After a minute or so, bring it in for a gentle landing.
Walk over and carefully touch the motors. If they're cool or just slightly warm to the touch, you're in great shape.
Congratulations—you’ve officially built and flown your very own FPV drone.
Got Questions? We’ve Got Answers for New FPV Pilots
Jumping into your first FPV drone build is a massive thrill, but let's be real—it can also feel a bit overwhelming. Most guides walk you through the happy path, but they often forget to mention the little tripwires and common questions that pop up for every single new pilot.
The biggest fear for most beginners? Making an expensive mistake. Nobody wants to see magic smoke pour out of a brand-new component or realize their parts just won't work together. Don’t worry, we’re going to tackle those frequent questions head-on so you can build with confidence.
What Are the Most Common Mistakes Beginners Make?
After helping countless pilots get into the air, I've seen a few mistakes happen over and over again. The good news is, they're all completely avoidable once you know what to look for.
The number one culprit is almost always poor soldering. It leads to weak connections, often called "cold joints," that look fine on the bench but fail the second the drone starts vibrating in the air. A close second is creating a component mismatch, like pairing low-KV motors built for a 6S battery with a 4S LiPo. The drone will fly, sure, but it will feel sluggish and underpowered.
Another classic rookie error is skipping the smokestopper test before the first power-up. This tiny, inexpensive tool is the only thing standing between a simple wiring fix and a fried $70 flight controller stack. It's a non-negotiable step.
Is practicing on an FPV simulator worth it? Absolutely. I tell every new pilot it's the single best thing you can do to prepare for the real deal. Putting in 10-20 hours on a sim like Liftoff or Velocidrone builds that crucial muscle memory in a zero-risk environment. Your wallet (and your drone) will thank you.
How Much Does a Beginner FPV Setup Really Cost?
Let's talk budget, because setting realistic expectations here is key. You can definitely find cheap individual parts online, but a complete and reliable setup involves more than just the drone. You have to factor in the transmitter, FPV goggles, batteries, and a good charger.
For a solid entry-level kit that won’t leave you frustrated, you should plan on a budget between $400 and $700. The parts for the drone itself will probably make up about $150-$250 of that.
Here’s a rough idea of where that money is going:
The Drone Itself: Frame, motors, ESC, flight controller, camera, and receiver.
The Radio Transmitter: Your link to the drone—don't cheap out here.
FPV Goggles: This is your window into the sky.
Batteries & Charger: You'll want at least 3-4 batteries and a safe, quality charger to keep them healthy.
Trust me on this: investing in dependable gear from trusted brands like EMAX, Radiomaster, or SpeedyBee will save you a world of headaches and cash down the road. When you build an FPV drone, quality components are your best insurance against endless troubleshooting.
At JAB Drone, we're here to guide you through every phase of your FPV journey, from picking parts to that victorious first flight. Check out our in-depth guides and reviews to build with confidence at https://www.jabdrone.com.
Comments