8 Essential Aerial Photography Techniques for 2025
- A.E. Williams

- Jul 6, 2025
- 16 min read
Aerial photography offers a breathtaking perspective, transforming familiar landscapes into stunning works of art. But moving beyond simple top-down shots requires mastering specific aerial photography techniques. Whether you're a seasoned pilot with a high-end drone or a hobbyist just starting your journey, understanding these methods is the key to unlocking creative potential and capturing truly unforgettable images. This guide moves past the basics, providing the actionable insights and pro tips you need to elevate your work from ordinary to extraordinary.
We will explore eight essential techniques that give you precise creative control. You will learn not just what to shoot, but how to execute each shot with intention and skill. From the geometric precision of a straight-down nadir shot to the dynamic energy of motion blur, each method offers a unique way to tell a visual story from above. This comprehensive roundup details the exact steps for capturing everything from high-altitude panoramas to high-dynamic-range scenes, ensuring you have the knowledge to control your craft and your camera with artistic precision. By the end, you'll be equipped with fresh perspectives and practical skills to tackle any aerial composition.
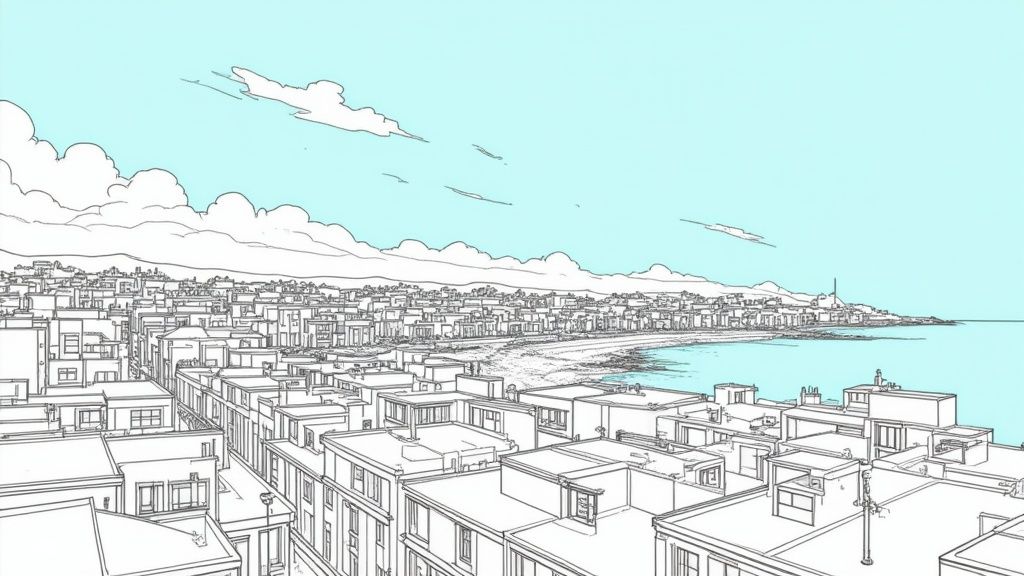
1. Straight Down (Nadir) Photography
Among the most fundamental and visually striking aerial photography techniques is the nadir, or straight-down, perspective. This method involves positioning the camera to point directly at the ground, perpendicular to the Earth's surface. The result is a two-dimensional, map-like image that strips away the horizon and transforms familiar landscapes into abstract art.
This top-down view excels at revealing patterns, textures, and geometric relationships that are invisible from an oblique or ground-level angle. It emphasizes composition in its purest form, relying on lines, shapes, and colors to create a compelling image. Photographers like Alex MacLean and Bernhard Edmaier have built entire portfolios around this technique, showcasing everything from the intricate grid systems of urban environments to the swirling, organic patterns of coastal deltas.
When and Why to Use Nadir Photography
The nadir shot is not just for creating abstract images; it has highly practical applications. It is invaluable for cartography, surveying, and site planning, providing clear, unobstructed views of an area. In creative photography, it’s the perfect technique to:
Highlight Geometric Patterns: Capture the mesmerizing repetition of agricultural fields, the neat organization of a container port, or the complex layout of a highway interchange.
Showcase Textural Details: Emphasize the rich texture of a forest canopy, the ripples on a water surface, or the unique roofing materials across a neighborhood.
Create Abstract Compositions: Isolate subjects like a lone boat in the vast ocean or a colorful cluster of beach umbrellas to produce a minimalist and powerful statement.
Actionable Tips for Perfecting Your Top-Down Shots
Achieving a high-quality nadir photograph requires precision and an eye for detail. First, use GPS and mapping tools on your drone or aircraft to position yourself directly above the most interesting part of your subject. For maximum post-processing flexibility, always shoot in RAW format.
To further enhance your images, consider adding a circular polarizing filter (CPL) to your lens. This will reduce glare from reflective surfaces like water, glass, and foliage, while simultaneously boosting color saturation and contrast. Pay close attention to seasonal changes, as the vibrant colors of autumn or the stark lines of winter can completely transform a scene.
For a summary of key considerations when planning a nadir shot, the following infographic highlights optimal settings and composition elements.

These metrics provide a solid starting point, indicating that a mid-range altitude is often best for capturing both scale and detail. The nadir technique is also a staple in property showcases; you can discover more about its application in our guide to drone real estate photography tips on jabdrone.com to see how this perspective helps highlight property lines and features.
2. Oblique Angle Photography
In contrast to the flat, two-dimensional nature of nadir shots, oblique angle photography offers a more familiar, three-dimensional perspective. This technique involves capturing images at an angle to the ground, typically between 30 and 60 degrees. The result is a dynamic composition that includes the horizon, providing depth, context, and a clear sense of scale and spatial relationships.
This method bridges the gap between a ground-level view and a top-down overview, making it one of the most versatile and widely used aerial photography techniques. It excels at telling a story by showing how a subject relates to its environment. Pioneers like George Lawrence and contemporary masters such as Yann Arthus-Bertrand have famously used this perspective to document everything from urban sprawl to untouched natural landscapes, showcasing the world in a way that is both expansive and intimately detailed.
When and Why to Use Oblique Angle Photography
The oblique angle is ideal for when you need to convey form, height, and depth, making it a go-to for commercial and artistic applications alike. It allows viewers to see the side of a building, the slope of a mountain, and the layout of a landscape in a way that feels natural. Use this technique to:
Showcase Property and Context: In real estate, an oblique shot can display a home, its yard, and the surrounding neighborhood in a single, compelling image.
Capture Expansive Landscapes: Reveal the dramatic elevation changes of a mountain range or the sprawling beauty of a coastline as it meets the sea.
Document Events and Venues: Provide an engaging overview of a concert, festival, or sporting event, showing the crowd, stage, and location.
Create Dynamic Cityscapes: Emphasize the depth and scale of a city's architecture, capturing the interplay of light and shadow on skyscrapers.
Actionable Tips for Perfecting Your Oblique Shots
Mastering oblique photography is about balancing composition and exposure. A key starting point is using the rule of thirds to place the horizon, deciding whether to emphasize the sky or the ground. For a more sophisticated composition, intentionally layer your shot with distinct foreground, middle ground, and background elements to create a powerful sense of depth.
Consider flying during the golden hour when the low, warm light will cast long shadows, accentuating textures and shapes within the landscape. To manage the bright sky and darker ground, a graduated neutral density (GND) filter can be a game-changer, helping you achieve a perfectly balanced exposure across the entire frame. Finally, experiment with different camera angles; a lower oblique (closer to 60 degrees) feels more dramatic and personal, while a higher oblique (closer to 30 degrees) provides a more comprehensive overview.
3. Low-Level Detail Photography
While high-altitude shots provide grand scale, low-level detail photography offers an intimate aerial perspective. This technique involves flying at altitudes between 50 and 500 feet, bridging the gap between ground-level and high-altitude views. It allows photographers to capture intricate details, textures, and subject nuances that are lost from higher up, all while retaining the unique vantage point that defines aerial imaging.
This approach brings the viewer closer to the action, creating a powerful sense of presence and connection. Photographers like David Maisel and Terry Evans have used low-level aerial photography techniques to reveal environmental stories and the subtle beauty of agricultural landscapes. The result is a dynamic composition that combines the abstract quality of an aerial view with the tangible details of the subject itself.
When and Why to Use Low-Level Detail Photography
Low-level detail photography is ideal when the story is in the specifics, not just the overall scene. It’s a powerful method for specialized fields where texture and fine features are paramount. Use this technique to:
Reveal Architectural Nuances: Capture the intricate design of a roof, the specific materials used in a structure, or the unique layout of a private garden.
Showcase Natural Textures: Emphasize the detailed patterns in rock formations, the individual characteristics of trees in a forest, or the subtle ripples and colors in a body of water.
Document Wildlife and Agriculture: Observe wildlife behavior in its natural habitat without significant disturbance or highlight detailed crop patterns and soil conditions for precision farming.
Actionable Tips for Perfecting Your Low-Level Shots
Success at low altitudes requires careful planning and precise execution. First and foremost, always check local aviation regulations and airspace restrictions, as flying low often comes with more stringent rules. Using a faster shutter speed is critical to counteract the amplified effect of motion blur when you're closer to your subject.
To ensure comprehensive coverage, plan to make multiple passes over your target from different angles and altitudes. This gives you more options in post-production. Consider your subject’s sensitivity; the noise from a drone or aircraft can be disruptive to both wildlife and people. Finally, utilize image stabilization features on your drone or camera gimbal to produce crisp, clear images. Even the best consumer models are equipped with impressive stabilization, as you can see in our guide to the top camera drones for beginners on jabdrone.com.
4. High-Altitude Landscape Photography
Moving beyond intimate, low-level views, high-altitude landscape photography captures the immense scale and grandeur of the Earth's surface. This technique involves shooting from significant altitudes, typically above 2,000 feet, to frame vast geographical areas in a single shot. The resulting images reveal sweeping vistas, intricate natural systems, and the breathtaking interconnectedness of landforms.
This elevated perspective transforms complex scenes like sprawling mountain ranges or winding river deltas into cohesive, understandable compositions. It emphasizes the sheer scale of the environment in a way that ground-level or even low-altitude drone photography cannot. Visionary photographers like Bradford Washburn, known for his pioneering mountain aerials, and Galen Rowell used this method to showcase the planet’s majesty, documenting geological narratives written across continents.
When and Why to Use High-Altitude Photography
High-altitude photography is the go-to technique for capturing the big picture. It’s less about isolating a single subject and more about showing how different elements relate to one another across a massive canvas. It is ideal for:
Documenting Grand-Scale Geography: Capture an entire mountain range, a vast desert dune system, or the full expanse of a coastal bay.
Revealing Large-Scale Patterns: Illustrate the network of a river system as it carves through a landscape or the grid-like expansion of urban sprawl into rural areas.
Creating Awe-Inspiring Vistas: Produce dramatic, panoramic shots that convey a sense of epic scale and timelessness, perfect for fine art prints and environmental storytelling.
Actionable Tips for Perfecting Your High-Altitude Shots
Success at high altitudes depends on overcoming atmospheric challenges and planning for long-distance logistics. To mitigate the natural blue cast and haze that increases with altitude, use a UV or haze filter to cut through atmospheric distortion and improve clarity. Always plan your flights for days with clear, stable weather conditions to ensure maximum visibility.
While wide-angle lenses are common, consider using a telephoto lens to isolate distant features, like a specific peak or a unique geological formation, creating a compressed and powerful composition. Since covering large areas requires significant time in the air, plan your flight paths and battery life accordingly. Using GPS tracking is also crucial for documenting the exact location of your shots, which is invaluable for both personal records and professional assignments.
5. Panoramic Stitching Photography
Panoramic stitching is a powerful aerial photography technique that overcomes the limitations of a single lens, allowing you to capture breathtakingly wide vistas. This method involves taking multiple, overlapping photographs from the air and digitally merging them to create a single, high-resolution image with an expansive field of view. The result is an immersive photo that can encompass an entire mountain range, a sprawling city skyline, or a vast coastline in stunning detail.
This technique is essential for conveying a true sense of scale and grandeur that a standard frame cannot achieve. By stitching frames together, you create a final image with a much higher pixel count, enabling large-format prints and deep zooms without losing clarity. Photographers like Peter Lik and the AirPano team have popularized this method, producing epic landscapes and 360-degree aerial views that transport the viewer directly into the scene.
When and Why to Use Panoramic Stitching
Panoramic stitching is not just for landscapes; it offers unique advantages across various scenarios. It is the ideal technique when your subject is too large to fit into a single shot, even with a wide-angle lens. Use this method to:
Capture Expansive Landscapes: Showcase the full sweep of a coastal bay, the interconnected peaks of a mountain range, or the endless patterns of agricultural fields.
Create Complete Urban Skylines: Present a city's entire architectural profile from one end to the other in a single, compelling image.
Build High-Resolution Compositions: Produce massive files suitable for large prints or detailed digital exploration, where every part of the scene remains sharp.
Actionable Tips for Perfecting Your Panoramas
Executing a flawless aerial panorama requires careful planning and consistent camera work. First, ensure there is a 30-50% overlap between each adjacent photo; this gives stitching software enough data to seamlessly merge the images. Lock your camera's exposure, focus, and white balance settings to maintain consistency across all frames.
For the best results, fly your drone in a stable, straight line or rotate it smoothly from a fixed point. This minimizes distortion and makes the stitching process much easier. Use specialized software like Adobe Lightroom's Photo Merge or PTGui for precise control over the final composition. This technique shares principles with photogrammetry, and you can explore more about how multiple images create a larger picture in our guide to the applications of drone 3D mapping on jabdrone.com, which uses similar overlapping methods for different outcomes.
6. Motion Blur and Panning Techniques
Breaking away from crystal-clear, static images, motion blur and panning are powerful aerial photography techniques used to convey energy, speed, and the passage of time. This method involves using a slower shutter speed to intentionally blur elements within the frame. The effect is achieved either by tracking a moving subject (panning) or by moving the drone or camera during the exposure, transforming a scene into a dynamic piece of art.
This technique turns moving subjects like cars, trains, or even flowing water into artistic streaks of light and color. It adds a layer of abstraction and dynamism that is impossible to capture with fast shutter speeds. Artists like Ernst Haas and photographers experimenting with Intentional Camera Movement (ICM) have pioneered these methods on the ground, and their principles translate beautifully to the unique perspective offered by drones.
When and Why to Use Motion Blur and Panning
Motion blur isn't just for creating abstract art; it serves a distinct creative purpose. It’s a fantastic way to isolate a subject, tell a story about movement, or simply add a unique visual flair to your portfolio. This is the ideal technique to:
Illustrate Speed and Flow: Capture mesmerizing light trails from vehicles on a highway at night, or convey the powerful movement of water in a river or along a coastline.
Create Abstract Visuals: Transform a familiar landscape, such as an agricultural field with working equipment or a bustling city center, into a painterly composition of color and motion.
Emphasize a Static Subject: Pan with a moving background, such as clouds or waves, to make a stationary object like a lighthouse or wind turbine appear even more solid and anchored.
Actionable Tips for Perfecting Your Motion Blur Shots
Mastering motion from the air requires practice and a steady hand. Start by setting your camera to Shutter Priority mode, which allows you to control the motion effect directly. For the best results, aim for shutter speeds between 1/4 and 2 seconds, depending on the subject's speed and the desired level of blur.
To shoot at slow shutter speeds in bright daylight, a neutral density (ND) filter is essential. It reduces the amount of light entering the lens, preventing overexposure while allowing for the necessary motion capture. Practice smooth, deliberate movements with your drone; a gentle, consistent pan or tilt will yield far better results than erratic gestures. Experiment with combining a slow shutter with your drone’s built-in stabilization to keep certain parts of the image sharp while blurring others for a compelling contrast.
For a visual demonstration of how to achieve these stunning effects, this video offers practical guidance on controlling your drone for long-exposure aerial photography.
By carefully controlling your camera settings and drone movements, you can introduce a captivating sense of motion that makes your aerial photography stand out.
7. HDR (High Dynamic Range) Photography
High Dynamic Range (HDR) is one of the most powerful aerial photography techniques for overcoming challenging lighting conditions. It involves capturing multiple images of the same scene at different exposure levels, typically one underexposed, one correctly exposed, and one overexposed. These bracketed shots are then merged in post-processing to create a single image with an extended dynamic range, retaining detail in both the brightest highlights and the darkest shadows.
This technique is a game-changer in aerial work, where the extreme contrast between a bright sky and a shaded landscape often exceeds a camera sensor's capabilities. By blending exposures, photographers can produce a final image that more closely resembles what the human eye sees. Artists like Trey Ratcliff and Elia Locardi have popularized HDR, demonstrating its ability to capture stunning, detail-rich landscapes that would otherwise be impossible.
When and Why to Use HDR Photography
HDR is not a universal solution, but it is indispensable in specific high-contrast scenarios. It allows you to produce balanced, vibrant, and incredibly detailed aerial photos that feel immersive and true to life. It is the perfect technique to:
Capture Dramatic Sunrises and Sunsets: Preserve the brilliant colors of the sky without losing the intricate details of the foreground landscape in shadow.
Balance Architectural Scenes: Show detail both inside a building through its windows and on its brightly lit exterior, a common challenge in real estate photography.
Enhance Stormy Skies: Capture the full range of tones from dark, ominous storm clouds to patches of bright, breaking sunlight without clipping highlights or crushing blacks.
Reveal Forest Canopy Detail: Balance the bright light hitting the top of the trees with the darker, shaded areas underneath, showing the texture and depth of the foliage.
Actionable Tips for Perfecting Your HDR Shots
Creating a natural-looking HDR image requires precision both in the field and during processing. Start by enabling your drone’s Auto Exposure Bracketing (AEB) mode, setting it to take at least three, if not five, shots with a 1 or 2-stop interval between them. Stability is crucial; ensure your drone is as still as possible to avoid ghosting or misaligned frames.
To ensure the best results, always shoot in RAW format to capture the maximum amount of data for merging later. Avoid using this technique on scenes with significant movement, like fast-moving cars or waves, as it can create unappealing artifacts. When processing, aim for a conservative and natural look, using the extra data to gently lift shadows and recover highlights rather than creating an overly surreal effect. This approach is one of the essential methods discussed in our list of top drone photography tips on jabdrone.com for capturing professional-grade images.
8. Infrared Aerial Photography
Infrared aerial photography is a specialized technique that captures light wavelengths invisible to the human eye. By using a camera modified to be sensitive to the infrared spectrum, photographers can reveal a hidden world of thermal patterns and unique landscape features. This method transforms ordinary scenes into surreal, dreamlike images, often rendering green foliage as a brilliant white or pink and skies a deep, dramatic black.
This technique is not just for artistic expression; it has significant scientific value. It was pioneered for practical purposes, with programs like NASA's Earth Resources Technology Satellite using it for environmental analysis. Artists like Richard Mosse and David Keochkerian have since popularized it in fine art, using its otherworldly aesthetic to create powerful and evocative landscape and conflict photography. As one of the more advanced aerial photography techniques, it offers a completely fresh perspective on the world below.
When and Why to Use Infrared Aerial Photography
Infrared aerial photography serves a dual purpose, blending creative artistry with data-driven insights. It is a powerful tool for revealing information that standard photography simply cannot capture. It is the ideal technique to:
Analyze Vegetation Health: Healthy, chlorophyll-rich plants reflect a large amount of infrared light, appearing bright white. This makes it easy to spot stressed or diseased vegetation in agricultural fields or forests.
Document Environmental Changes: Infrared is excellent for monitoring water bodies, detecting pollution, and mapping changes in land use over time. It can differentiate between water and land with stark contrast.
Create Surreal Artistic Landscapes: The unique color shifts turn familiar scenes into captivating, abstract art. It's perfect for photographers looking to develop a distinctive and unconventional style.
Conduct Geological Surveys: Different minerals and soil types reflect infrared light differently, making this technique valuable for mineral exploration and geological mapping from the air.
Actionable Tips for Perfecting Your Infrared Shots
Mastering infrared aerial photography requires specialized equipment and a new approach to exposure and focus. First, you will need a camera that has been professionally converted for full-spectrum or specific infrared wavelength capture, as standard cameras block this light. Always shoot in RAW to retain maximum data for post-processing, which is critical for this technique.
To further refine your images, experiment with different infrared filters (like 590nm, 720nm, or 850nm) to achieve varied color and contrast effects. Autofocus systems often struggle with infrared light, so switching to manual focus and using your screen's focus peaking feature is essential for sharp results. Finally, embrace post-processing; you will need to set a custom white balance and often perform a "channel swap" in software like Photoshop to achieve the classic false-color infrared look.
Aerial Photography Techniques Comparison Table
Photography Type | Implementation Complexity 🔄 | Resource Requirements ⚡ | Expected Outcomes 📊 | Ideal Use Cases 💡 | Key Advantages ⭐ |
|---|---|---|---|---|---|
Straight Down (Nadir) | Medium – Precise positioning and stability | Moderate – GPS tools, polarizing filters | Abstract, geometric overhead patterns | Mapping, surveying, abstract landscape art | Reveals hidden patterns, minimal distortion |
Oblique Angle | Medium-High – Angle control, lighting check | Moderate – Filters, timing for golden hour | Dynamic, 3D depth with horizon visible | Real estate, urban, coastal, event photography | Context and scale, engaging compositions |
Low-Level Detail | High – Skilled piloting, flight safety | Moderate-High – Stabilization, fast shutter | Intimate textures and fine details | Architectural details, wildlife, crop patterns | Reveals intricate details, creative control |
High-Altitude Landscape | High – Specialized aircraft, equipment | High – Pressurized systems, telephoto lenses | Sweeping, expansive landscape views | Large-scale geography, weather, natural patterns | Grand scale, comprehensive area coverage |
Panoramic Stitching | High – Precise flight and overlap control | High – Stitching software, stable conditions | Ultra-wide, immersive high-res panoramas | Vast landscapes, 360° views, urban skylines | High resolution, expansive scene coverage |
Motion Blur and Panning | High – Timing and controlled movement | Moderate – ND filters, stable platform | Artistic blur conveying motion and energy | Creative art, abstract landscapes, dynamic effects | Unique artistic style, conveys dynamism |
HDR | Medium-High – Multiple exposures, alignment | Moderate – Bracketing camera, HDR software | Balanced exposure, extended dynamic range | Sunrise/sunset, high contrast scenes | Effective contrast handling, flexible post-process |
Infrared | High – Specialized camera and exposure skills | High – Infrared-modified cameras, filters | False-color, thermal, and vegetation patterns | Environmental monitoring, agriculture, artistic | Reveals invisible data, scientific and artistic |
Take Flight with Your Newfound Knowledge
You’ve journeyed through a comprehensive collection of aerial photography techniques, each offering a distinct lens through which to view and capture the world. We’ve explored the symmetrical precision of nadir shots, the narrative depth of oblique angles, and the immersive sweep of high-altitude landscapes. The journey from novice to expert aerial photographer is not about finding a single "best" method; it's about building a versatile toolkit.
Mastering these concepts transforms your drone from a simple flying camera into a powerful instrument for artistic expression and professional documentation. By understanding when to use a low-level detail shot versus a panoramic stitch, you gain creative control. You're no longer just taking pictures from the sky; you are intentionally crafting compositions that evoke emotion, reveal patterns, and tell compelling stories.
Your Path Forward: From Theory to Practice
The true value of these aerial photography techniques is unlocked through application. To help you transition from reading to doing, here are your actionable next steps:
Create a Shot List: Before your next flight, choose two or three techniques from this article, such as HDR and a nadir shot. Plan specific subjects or locations where you can practice them. This focused approach is far more effective than trying to do everything at once.
Embrace Experimentation: Don't be afraid to push the boundaries. Try combining techniques. For example, apply motion blur to a low-level detail shot of moving traffic or create an infrared panorama. The most groundbreaking images often come from unexpected combinations.
Analyze and Refine: After each flight, critically review your images. What worked well? What could be improved? Compare your straight-down shots for symmetry or your HDR brackets for clarity. This feedback loop is essential for rapid skill development and helps you build a unique visual style.
The world truly does look different from above, offering a perspective that can reveal hidden beauty in the mundane and add epic scale to the magnificent. By consistently applying these diverse aerial photography techniques, you elevate your work from simple snapshots to breathtaking visual narratives. The sky is your canvas, and you now have the brushes and palettes needed to create your masterpiece. Continue to learn, to fly, and to see the world from a new and inspiring vantage point.
Ready to put these advanced aerial photography techniques into practice with a drone built for creative excellence? The JAB Drone features a state-of-the-art camera system and intelligent flight modes designed to help you execute complex shots like HDR, panoramic stitches, and precise nadir captures with ease. Visit the JAB Drone website to see how our technology can unlock your creative potential.
Comments