Top Drone Photography Tips to Elevate Your Shots
- Nickolas Williams

- May 25, 2025
- 19 min read
Take Your Drone Photography to New Heights
Want to capture breathtaking aerial photos and videos? This list of essential drone photography tips will help you elevate your skills, regardless of your experience level. Learn how to master lighting, composition, camera settings, flight planning, post-processing, and drone movements. We'll also cover safety regulations and specialized equipment to ensure you're capturing stunning imagery responsibly and effectively. These drone photography tips will help you achieve professional-quality results in 2025 and beyond.
1. Master Lighting Conditions
Among the many drone photography tips, mastering lighting conditions stands out as arguably the most crucial. Understanding and adapting to the quality, direction, and intensity of light dramatically impacts your final image. It affects color accuracy, reveals textures, and sets the overall mood of your shot. Unlike ground-based photography, drone pilots contend with constantly shifting aerial perspectives and rapidly changing light scenarios, making mastery of this element even more critical. This is why it earns a top spot on our list of essential drone photography tips.
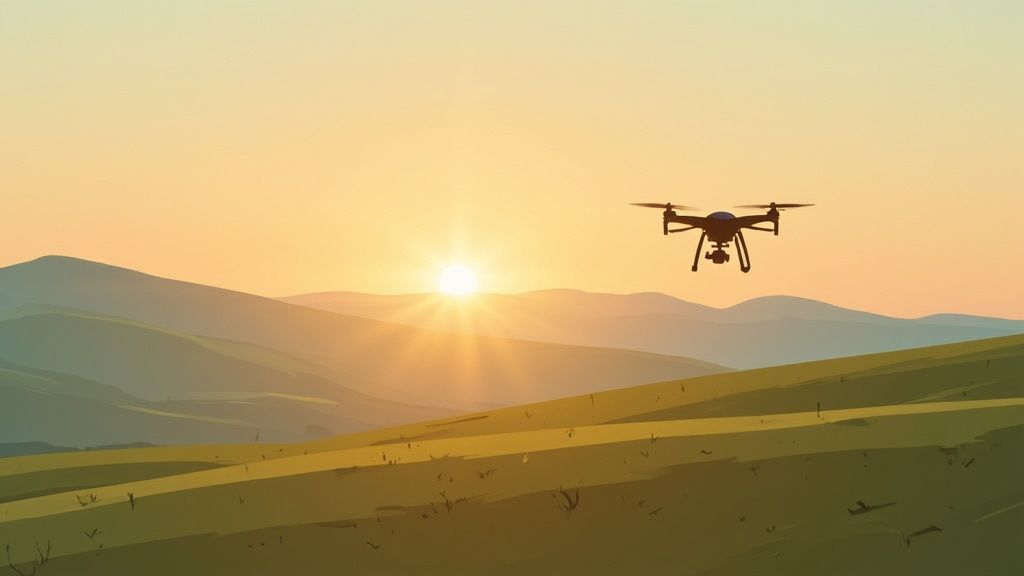
The key features to focus on are golden hour optimization, dynamic range management, and weather assessment skills. Golden hour, the period shortly after sunrise and before sunset, offers warm, diffused light that minimizes harsh shadows and enhances natural colors. Dynamic range, the difference between the lightest and darkest parts of an image, is crucial for capturing detail in both highlights and shadows, especially in challenging lighting situations. Finally, weather assessment allows you to anticipate changes in lighting conditions and plan your flight accordingly.
Why is mastering lighting so important for drone photography?
Creates Dramatic, Professional-Looking Images: By utilizing the golden hour and understanding how light interacts with the landscape, you can elevate your images from snapshots to stunning works of art.
Enhances Natural Colors and Textures: The soft, directional light of the golden hour brings out the vibrancy of colors and reveals the intricate details of textures in your subject.
Reduces Harsh Shadows and Blown-Out Highlights: The diffused light minimizes extreme contrasts, allowing for a more balanced and pleasing image.
Pros and Cons of Focusing on Lighting:
Pros:
Stunning visual results
Enhanced color and texture
Minimized unwanted shadows and highlights
Cons:
Limited shooting windows (primarily dawn and dusk)
Dependence on favorable weather conditions
Requires pre-flight planning around the sun's position
Actionable Tips for Mastering Light:
Golden Hour is Your Friend: Shoot 1-2 hours after sunrise or before sunset for the most desirable lighting conditions.
ND Filters for Bright Conditions: Use neutral density (ND) filters to control exposure and achieve desired effects like motion blur in bright sunlight.
Weather Awareness: Monitor weather apps and forecasts to anticipate cloud cover, fog, and other lighting changes that might impact your shoot.
White Balance Adjustment: Adjust your drone camera's white balance settings to match the prevailing lighting conditions (e.g., sunny, cloudy, shade) for accurate color reproduction.
Examples of Successful Implementation:
Professionals like the aerial photographers at National Geographic often plan their drone shoots exclusively during the golden hour to capture breathtaking landscapes. Similarly, DJI, a leading drone manufacturer, showcases the beauty of golden hour lighting in their promotional footage, demonstrating its effectiveness in creating compelling visuals. Renowned photographers like Chase Jarvis, along with winners of prestigious aerial photography contests like SkyPixel, frequently leverage these techniques. DJI's marketing campaigns themselves also heavily feature the benefits of optimal lighting.
By incorporating these drone photography tips, specifically focusing on light mastery, you can significantly enhance the quality and impact of your aerial imagery. Whether you’re a hobbyist capturing scenic views or a professional creating commercial content, understanding light is fundamental to achieving truly exceptional results.
2. Composition Techniques for Aerial Perspective
Elevating your drone photography from simple snapshots to breathtaking aerial art hinges on mastering composition. Aerial perspective offers unique compositional opportunities unavailable from ground level, allowing you to capture stunning imagery that goes beyond the novelty of flight. This involves leveraging patterns, symmetry, leading lines, and the inherent bird's-eye view to craft visually compelling stories. Understanding these elements is crucial for any aspiring drone photographer, whether a hobbyist or a professional.
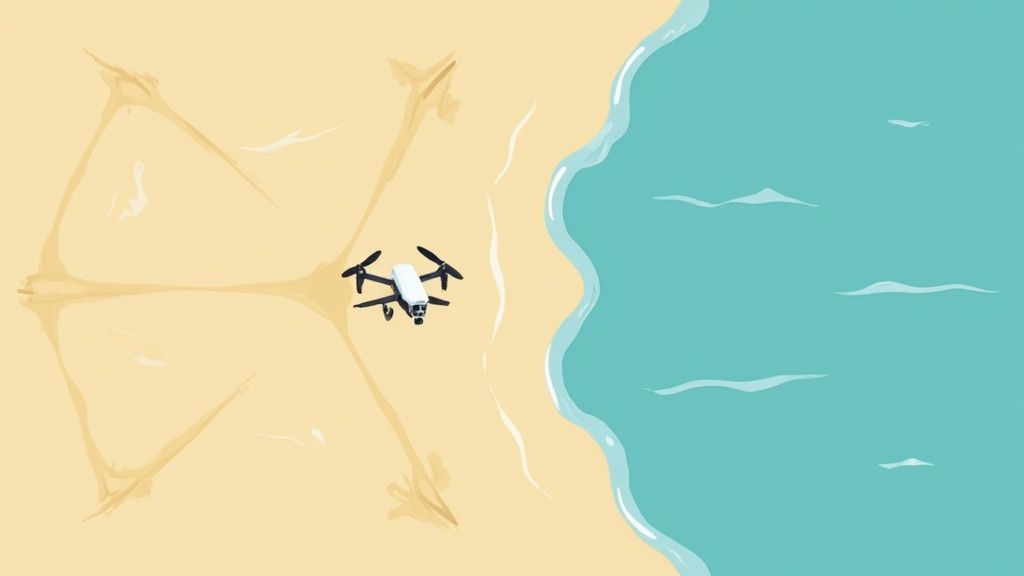
This technique unlocks the true potential of drone photography. The top-down perspective, coupled with intelligent application of the rule of thirds and an eye for abstract patterns, can transform mundane scenes into extraordinary works of art. Think of discovering the hidden symmetry of a sprawling industrial complex or revealing the intricate patterns carved into a landscape by agricultural practices. These perspectives are simply impossible to achieve without a drone.
The work of artists like Abstract Aerial Art, known for stunning beach photography showcasing wave patterns and sand textures, and Tobias Hägg (Airpixels), whose Swedish landscape compositions masterfully employ leading lines and negative space, exemplify the power of this technique. Their work reveals how aerial perspectives can offer fresh visual storytelling opportunities, showcasing the world from an entirely new angle.
Actionable Tips for Implementing Aerial Perspective:
Look for Natural Leading Lines: Rivers, roads, fences, and shorelines act as natural guides, drawing the viewer's eye through the image and adding depth to a 2D aerial view.
Rule of Thirds: Enable the grid overlay in your drone app and position key elements along these lines or at their intersections to create balanced and visually appealing compositions.
Establish Scale: Incorporate human elements, vehicles, or familiar objects to provide a sense of scale, especially crucial in vast landscapes where depth perception can be challenging.
Seek Patterns and Symmetry: From agricultural fields to urban architecture, look for geometric patterns and symmetry that create visually striking compositions. These often become more apparent from an aerial viewpoint.
Vary Altitude: Experiment with different altitudes to find the optimal composition. A slight change in height can dramatically alter the perspective and reveal hidden patterns or enhance leading lines.
Pros and Cons of Aerial Perspective:
Pros:
Unique Perspectives: Capture viewpoints impossible to achieve from the ground, offering fresh and exciting visual narratives.
Revealing Patterns: Uncover hidden patterns and textures invisible from ground level, adding depth and intrigue to your imagery.
Storytelling Opportunities: Provide new ways to tell visual stories, showcasing landscapes, urban environments, and natural phenomena in unique and captivating ways.
Cons:
Limited Depth Perception: 2D aerial views can sometimes lack depth, requiring careful composition and the use of techniques like leading lines and scale elements.
Repetitive Imagery: Without creative approaches and varied techniques, aerial photography can become repetitive. Continuously challenge yourself to find new angles and perspectives.
Communicating Scale: Vast landscapes can make judging size and distance difficult. Consciously incorporate elements that provide a sense of scale to avoid this issue.
This compositional approach deserves a prominent place in any drone photography tips list because it unlocks the medium's true potential. By understanding and implementing these techniques, you can transform ordinary aerial snapshots into extraordinary visual masterpieces, capturing the world from a perspective only a drone can provide. Learn from the masters like Dirk Dallas (@fromwhereidrone) and Jerome Courtial, explore their work, and let your creativity soar.
3. Master Manual Camera Settings
Taking your drone photography to the next level requires more than just pointing and shooting. While auto mode can suffice in perfect conditions, mastering manual camera settings is crucial for achieving professional-quality results and maximizing your drone's photographic potential. This is one of the most impactful drone photography tips you can learn. By understanding how ISO, aperture (if your drone allows aperture adjustments), and shutter speed work together – the so-called "exposure triangle" – you gain the power to adapt to challenging lighting situations and creatively capture your vision.
Understanding the exposure triangle is fundamental to manual camera control. ISO controls the sensor's sensitivity to light, aperture governs the amount of light entering the lens, and shutter speed dictates how long the sensor is exposed. Learn more about Master Manual Camera Settings to delve deeper into how these elements interact. Manipulating these settings allows you to balance exposure and achieve the desired artistic effect. For example, a lower ISO minimizes noise, a wider aperture (smaller f-number) creates a shallow depth of field, and a faster shutter speed freezes motion. Choosing the right equipment is essential for capturing stunning aerial footage. Check out our guide to the best drone for professional photography to help you make informed decisions about your gear.
Analyzing the histogram, a graphical representation of the tonal distribution in your image, is another key skill. It helps you assess the exposure and identify potential issues like clipped highlights (pure white with no detail) or crushed shadows (pure black with no detail). Shooting in RAW format further expands your control. Unlike JPEG, RAW files retain all the data captured by the sensor, providing maximum flexibility during post-processing.
Pros:
Greater control in challenging lighting: Manual settings empower you to capture well-exposed images even in difficult lighting conditions, such as sunrise, sunset, or overcast skies.
Reduced noise and higher image quality: Lower ISO settings minimize noise, resulting in cleaner and sharper images.
Consistent results across shooting conditions: Manual control helps maintain consistent exposure and image quality across varying environments.
Cons:
Steeper learning curve: Mastering manual settings takes time and practice.
Requires constant adjustments: You'll need to adjust settings frequently as lighting conditions change.
Higher risk of exposure errors while learning: Initially, you might make mistakes and capture improperly exposed images.
Examples of Successful Implementation:
Real estate drone photographers often use manual settings to achieve consistent exposures for both interior and exterior shots, ensuring balanced lighting throughout the property.
Commercial drone operators frequently shoot in RAW format for maximum post-processing flexibility, allowing for extensive color correction and image manipulation in editing software.
Actionable Drone Photography Tips:
Start low: Begin with an ISO of 100-200 to minimize noise. Increase ISO only when necessary.
Freeze the action: Use faster shutter speeds (1/500th of a second or higher) to counter drone movement and capture sharp images.
RAW power: Always shoot in RAW format for maximum post-processing flexibility.
Bracket your exposures: Utilize AEB (Auto Exposure Bracketing) for high-contrast scenes. This captures multiple images at different exposures, allowing you to combine them in post-processing for optimal dynamic range.
Check your histogram: Regularly review the histogram to avoid clipped highlights or shadows.
These drone photography tips are popularized by reputable sources like DJI flight tutorials, Hasselblad (camera partner with DJI), and Phil Steele's drone photography courses, emphasizing their importance in the drone photography community. By mastering manual camera settings, you'll unlock the full potential of your drone and elevate your aerial photography to new heights.
4. Flight Planning and Scouting
Successful drone photography rarely happens by chance. Thorough pre-flight planning and location scouting dramatically increase the likelihood of capturing exceptional images while ensuring safety and regulatory compliance. Planning involves researching locations, understanding airspace restrictions, checking weather forecasts, and visualizing potential compositions before even launching your drone. This crucial step maximizes your efficiency, especially considering limited drone battery life, and significantly improves the quality of your drone photography.
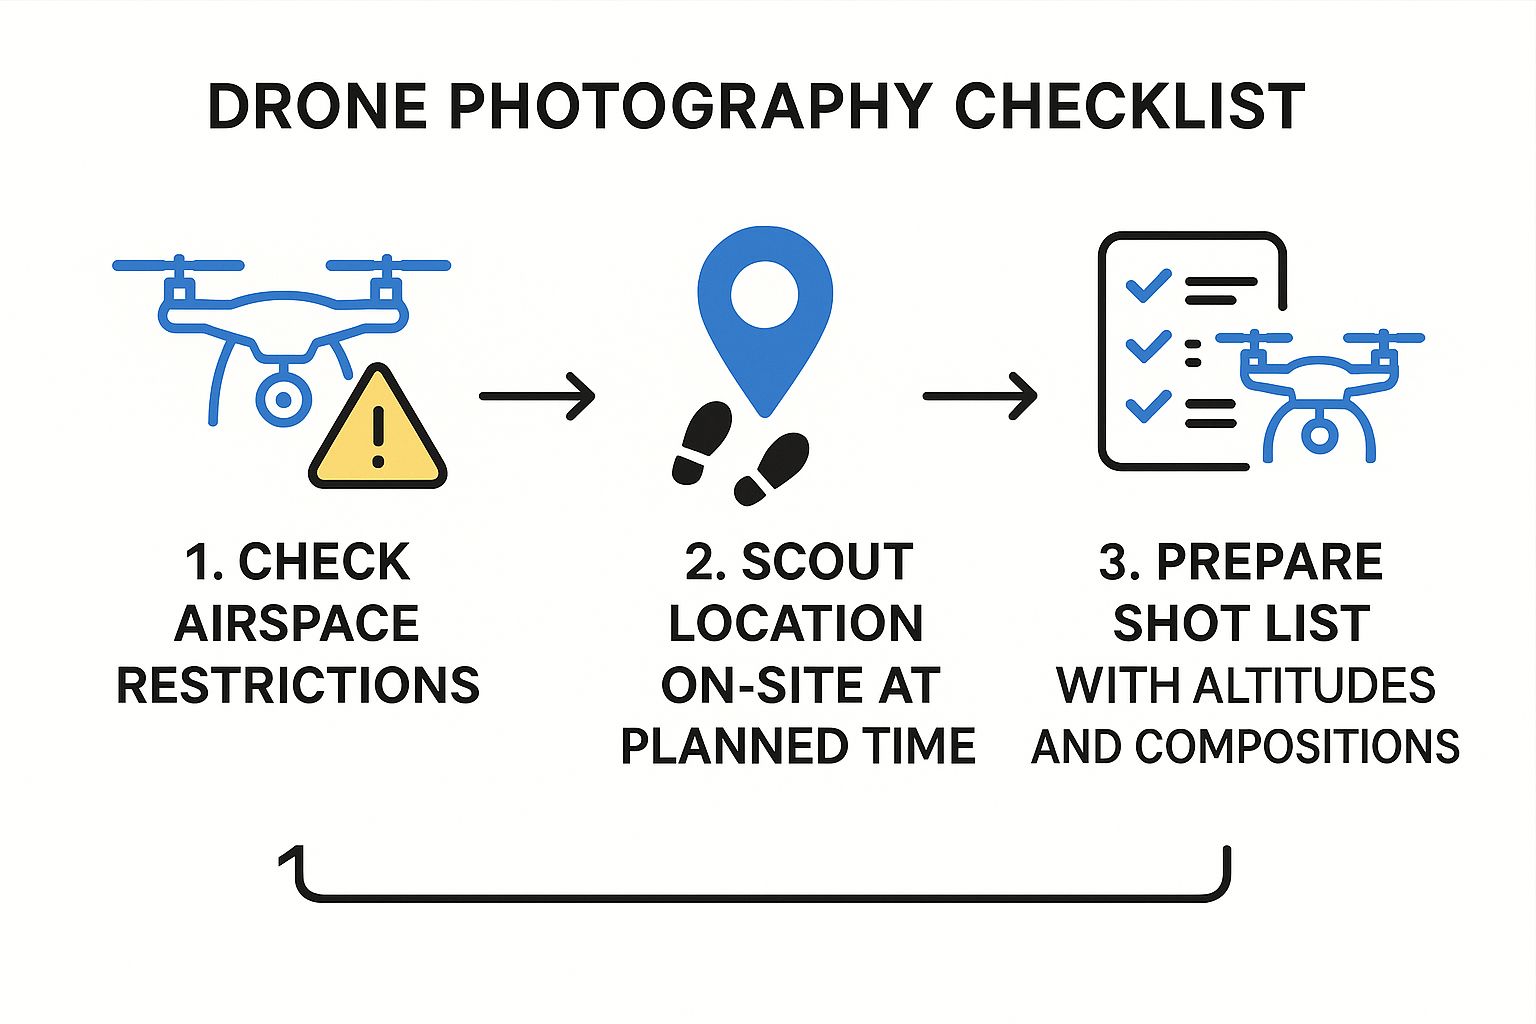
The infographic illustrates the cyclical process of effective flight planning for drone photography. Starting with Conceptualization, where you define your shot's objective, the process flows through Location Scouting (virtually and physically), Airspace Check, Weather Analysis, and finally to the actual Flight Execution. Crucially, feedback from each stage informs adjustments in previous steps, ensuring a dynamic and adaptable approach. This iterative process is key to maximizing your chances of a successful and safe drone flight.
When it comes to drone photography tips, flight planning stands out as one of the most vital. Understanding airspace restrictions is paramount for legal compliance, preventing accidents, and respecting other airspace users. Tools like Airmap, B4UFLY, or UAV Forecast provide up-to-date information on no-fly zones, restricted areas, and other crucial airspace data. This proactive approach ensures you're operating within legal boundaries and contributing to safe drone operations. Pre-visualization, a key aspect of planning, involves imagining your final shot and considering factors like lighting, angles, and composition before taking off. This technique allows you to maximize your limited flight time and significantly improves the artistic quality of your results.
Features like integrated airspace awareness within flight planning apps, combined with location research tools like Google Earth, empower you to visualize your shots before arriving on-site. Pre-visualization techniques, like storyboarding and shot lists, further enhance your preparedness and ensure you make the most of your flight time. Consider the example of commercial real estate photographers using Google Earth to plan precise shots, showcasing the practical application of these tools. Similarly, travel photographers often leverage Instagram geotags to research locations before visits, demonstrating the power of readily available resources.
While the benefits are numerous, it’s important to acknowledge the potential drawbacks. Thorough pre-flight planning is undoubtedly time-consuming. Conditions can change between scouting and shooting, requiring adaptability. Unexpected restrictions on-site can also disrupt your plans. However, the pros of increased efficiency, legal compliance, and improved composition significantly outweigh these cons.
Here are some actionable drone photography tips for effective flight planning and scouting:
Use apps like Airmap, B4UFLY, or UAV Forecast to check flight restrictions.
Research locations on Google Earth to preview potential compositions.
Scout locations in person at the same time of day you plan to shoot to accurately assess lighting conditions.
Create a shot list with specific compositions and altitudes.
Have backup locations in case of unexpected restrictions.
Learn more about Flight Planning and Scouting for information on cutting-edge flight planning software and advanced techniques. Software like Drone Deploy for mapping and Google Earth Pro provides powerful tools for advanced planning and execution. UAV Coach also offers valuable flight planning resources for drone enthusiasts of all levels. By implementing these drone photography tips and embracing a proactive approach to planning, you significantly increase your chances of capturing stunning aerial imagery safely and efficiently.
5. Post-Processing for Aerial Photography
Post-processing is a crucial step that often distinguishes amateur drone photos from professional-quality aerial imagery. It's the digital darkroom of the 21st century, where you refine your raw drone footage into stunning visuals. This essential aspect of drone photography tips deserves its place on this list because it unlocks the full potential of your aerial shots. The unique perspective of drone photography presents specific editing challenges and opportunities that require dedicated attention in post-production.
What it is and how it works:
Post-processing involves using software to adjust and enhance your drone photos after they've been captured. This can range from simple corrections like brightness and contrast adjustments to more complex manipulations involving perspective correction, color grading, and selective adjustments for specific landscape elements. Essentially, it's about taking the raw data captured by your drone's camera and transforming it into a polished, visually compelling image.
Features and Benefits:
Post-processing software provides a wide range of tools specifically designed for aerial photography needs. Perspective correction tools are invaluable for straightening out converging lines in buildings or other structures. Color grading tools allow you to adjust the overall mood and feel of your images, compensating for the often hazy or washed-out look of aerial shots. Selective adjustments give you the power to fine-tune specific areas of your image, enhancing details and creating a more balanced composition. These features translate into several key benefits: they correct limitations of drone cameras, enhance natural patterns and colors visible only from above, and allow you to create a signature style and maintain consistency across your work.
Pros:
Corrects limitations of drone cameras (lens distortion, dynamic range limitations)
Enhances natural patterns and colors, making them more vibrant and defined
Creates signature style and consistency across your aerial photography portfolio
Cons:
Can be time-intensive, requiring patience and practice
Risk of over-processing, leading to unnatural-looking images
Requires learning specialized software, which may involve a learning curve
Examples of Successful Implementation:
Professional photographers like Peter McKinnon are masters of aerial post-processing, creating stunning images with a distinctive style. Real estate photographers routinely use perspective correction tools to ensure buildings appear straight and true-to-life in their drone photos. These examples showcase the power of post-processing to transform ordinary drone shots into compelling visual narratives.
Actionable Tips for Drone Photography Tips in Post-Processing:
Use graduated filters: Balance bright skies with darker ground for a more evenly exposed image.
Apply dehaze filters moderately: Combat atmospheric haze without making the image look artificial.
Correct lens distortion: Pay attention to the edges of the frame, where distortion is often most pronounced.
Use HSL adjustments: Enhance natural colors without oversaturation, maintaining a realistic look.
Create presets: Save your preferred settings for common shooting conditions to maintain consistency and streamline your workflow.
When and Why to Use This Approach:
Post-processing is relevant for virtually all drone photography, from casual hobbyists to professional aerial photographers. Whenever you want to elevate your images beyond basic snapshots and achieve a polished, professional look, post-processing is essential. It allows you to compensate for technical limitations, enhance natural beauty, and express your creative vision.
Learn more about Post-Processing for Aerial Photography This link offers further insights into the software options available for enhancing your drone footage, providing a deeper dive into the technical aspects of post-production. Understanding the software landscape is a key component of effective drone photography tips.
6. Mastering Drone Movement for Video
Elevating your drone photography to the next level involves more than just capturing stunning stills; it's about mastering the art of drone movement for video. This crucial aspect of drone operation separates breathtaking, cinematic footage from amateur video. Mastering drone movement is an essential drone photography tip for anyone looking to create professional-looking content. Unlike traditional cameras confined to ground-level perspectives, drones offer the unique ability to navigate three-dimensional space, opening up a world of creative possibilities for dynamic storytelling.
This capability allows for innovative shots like reveals, orbits, and tracking shots that simply aren't possible with conventional equipment. Think sweeping reveals of hidden landscapes, dramatic orbits around points of interest, and smooth tracking shots that follow subjects with effortless grace. These movements, when executed correctly, add a layer of emotional impact and visual storytelling that significantly enhances the viewer's experience.
Examples of successful implementation of this technique are evident in the work of prominent content creators like Sam Kolder, whose travel videos often feature signature drone reveals that have become synonymous with his style. Similarly, Apple's product videos showcase the power of slow, controlled drone movements to highlight the sleek design and features of their devices. These examples demonstrate how mastering drone movement can be a game-changer for capturing truly compelling content.
Cinematic Movement Patterns and Techniques:
Speed Ramping: Varying the speed of your drone footage in post-processing (speed ramping) can drastically alter the mood and impact of a scene. Slowing down footage can emphasize dramatic reveals, while speeding it up can create a sense of urgency or excitement.
Complex Automated Flight Paths: Modern drones often feature automated flight modes like waypoints and Point of Interest (POI). Waypoints allow you to pre-program a flight path for the drone to follow autonomously, while POI allows the drone to circle a designated subject, maintaining a consistent distance and focus. These features are invaluable for complex shots that require precise movement and control.
Tips for Mastering Drone Movement:
Start and End Stationary: Begin and end each shot with a few seconds of stationary footage. This provides clean edit points and prevents jarring transitions.
Slower is Better: Use slower drone speeds than you initially think are necessary. This allows for smoother footage and gives viewers time to absorb the scene.
Practice Standard Movements: Focus on mastering fundamental movements like reveals (unveiling a subject by moving the drone vertically or horizontally), orbits (circling a subject), dronies (combining upward flight with camera tilt), and tracking shots (following a moving subject).
Utilize Automated Flight Modes: Experiment with automated flight modes like waypoints and POI to achieve complex, repeatable shots.
Post-Processing Enhancement: Utilize speed ramping in post-processing software to fine-tune the pacing and dramatic effect of your footage.
Pros:
Creates professional-looking footage with emotional impact
Allows for shots impossible with traditional equipment
Can dramatically enhance storytelling
Cons:
Requires significant practice and patience
Wind can disrupt planned movements, requiring adjustments and reshoots
Complex movements drain batteries faster, necessitating extra batteries or shorter flight times
Mastering drone movement transforms your drone from a simple flying camera into a powerful storytelling tool. By understanding the nuances of drone flight and incorporating these drone photography tips, you can capture truly cinematic footage that captivates your audience and sets your work apart. This skill is essential for drone hobbyists, professional photographers, and commercial drone operators alike, making it a deserved addition to any list of essential drone photography tips.
7. Safety and Regulatory Compliance
Safety and regulatory compliance isn't just a box to tick in drone photography; it's the foundation upon which all successful and responsible drone operations are built. Ignoring these aspects can lead to hefty fines, legal repercussions, and, most importantly, endanger people and property. This makes it a critical element of any drone photography tips list. Professional drone photography requires not just creative skills, but a deep understanding of the rules governing the airspace. Following these rules protects you, the public, and helps ensure the future of the drone industry by preventing accidents and the potential for increased restrictions that could follow.
Airspace awareness systems, pre-flight checklists, and proper registration and certification are key components of safe and compliant drone operations. Understanding and utilizing these features are crucial for responsible drone photography.
How it Works:
Safe and compliant drone photography involves several interconnected steps:
Understanding Airspace: Knowing where you can and cannot fly is paramount. This involves researching restricted airspace (like airports, military bases, and national parks), understanding temporary flight restrictions (TFRs), and using tools to visualize airspace classifications.
Pre-flight Checklists: A thorough pre-flight checklist ensures your drone is in optimal working condition and helps mitigate potential issues in the air. This includes checking battery health, calibrating sensors, verifying GPS lock, and examining propellers for damage.
Registration and Certification: Depending on your location and the type of flying you intend to do (recreational or commercial), you may need to register your drone and obtain a certification (like the Part 107 license in the US for commercial operations).
Examples of Successful Implementation:
Commercial drone operators meticulously maintain detailed flight logs to demonstrate compliance with FAA regulations, ensuring they are operating within the legal framework.
DJI's geofencing technology, a system that creates virtual boundaries around sensitive areas, prevents unauthorized flights near airports, enhancing safety for manned aircraft.
Actionable Drone Photography Tips for Safety and Compliance:
Register Your Drone: Register your drone with the relevant aviation authority in your country and clearly display the registration number on your drone.
Obtain Appropriate Certification: If you plan to use your drone for commercial purposes, obtain the necessary certification (e.g., Part 107 in the US).
Use a Pre-flight Checklist Every Time: Never skip a pre-flight check. This ensures your drone is airworthy and helps prevent accidents.
Maintain Visual Line of Sight (VLOS): Always keep your drone within visual line of sight unless you have obtained specific waivers for beyond visual line of sight (BVLOS) operations.
Stay Below 400 Feet and Away from Airports and Restricted Areas: Respect altitude restrictions and maintain a safe distance from sensitive locations.
Use Apps like B4UFLY or Aloft: These apps provide real-time information about airspace restrictions and can help you plan your flights safely.
Pros and Cons:
Pros:
Prevents Costly Fines and Legal Issues: Compliance keeps you on the right side of the law, saving you from potential penalties.
Maintains Public Trust in Drone Operators: Responsible operation builds public confidence in drone technology and helps prevent stricter regulations in the future.
Reduces Accident Risk: Adhering to safety protocols minimizes the risk of accidents, protecting yourself, others, and your equipment.
Cons:
Restricts Some Creative Opportunities: Regulations can sometimes limit certain types of shots or flying locations.
Regulations Vary by Location and Change Frequently: Keeping up with the latest rules can be challenging, especially when flying in different regions.
Registration and Certification Requires Time and Expense: Obtaining certifications and registering your drone takes time and involves some costs.
Why Safety and Compliance Deserves Its Place on the List:
Safe and responsible drone operation is non-negotiable. It is not just a "tip," but a fundamental requirement for every drone pilot. Learn more about Safety and Regulatory Compliance to further enhance your understanding of collision avoidance strategies. By prioritizing safety and compliance, you contribute to a safer airspace and a more sustainable future for drone photography. This ensures that you can continue to enjoy capturing stunning aerial imagery while minimizing risks and maximizing the potential of this powerful technology.
8. Specialized Equipment and Accessories
Taking your drone photography to the next level often involves going beyond the basic kit. While drones themselves are remarkable pieces of technology, adding specialized equipment and accessories can significantly expand your creative possibilities and help overcome technical limitations inherent in the standard setup. Understanding the drone accessory ecosystem is key to achieving professional-level aerial photography and maximizing your drone's potential. This is a crucial drone photography tip for anyone serious about capturing stunning aerial imagery.
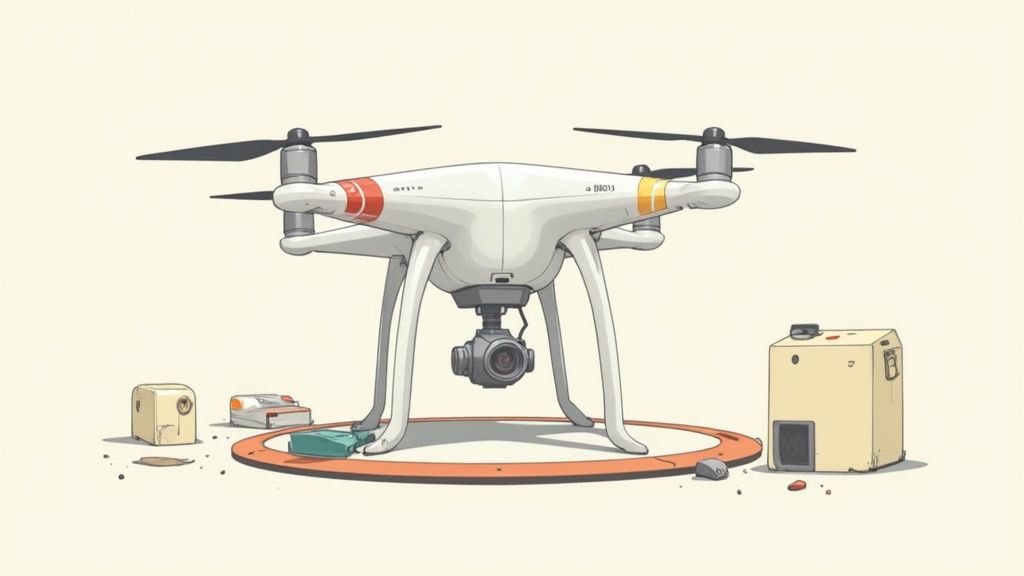
From filters that control light and color to specialized landing gear that protects your valuable investment, the range of accessories available can seem daunting. However, by understanding the core benefits of a few key items, you can strategically choose the right tools for your specific drone photography needs.
Key Features and Benefits:
ND and Polarizing Filters: These filters are essential for managing light and enhancing image quality. ND filters reduce the amount of light entering the camera, allowing for slower shutter speeds and creating motion blur effects, especially useful in bright conditions. Polarizing filters minimize glare from reflective surfaces like water or glass, deepening colors and improving overall clarity.
Range Extenders: Extend the operational range of your drone, enabling you to capture shots from further distances while maintaining a strong signal connection. This is particularly beneficial for landscape photography or when capturing subjects that require a safe distance.
Specialized Landing Gear: Protect your drone during takeoff and landing, especially in challenging terrain. Landing pads provide a stable and clean surface, preventing dust and debris from damaging the drone's delicate components. Extensions can raise the drone higher off the ground, accommodating uneven surfaces and taller vegetation.
Pros:
Overcomes Built-in Camera Limitations: Filters allow for greater control over light and exposure, surpassing the limitations of the drone's built-in camera settings.
Extends Operational Capabilities: Range extenders and specialized landing gear expand the environments in which you can safely and effectively operate your drone.
Protects Valuable Equipment: Accessories like landing pads and propeller guards safeguard your drone from damage, ensuring longevity and minimizing repair costs.
Cons:
Additional Cost: Accessories represent an added expense beyond the initial drone investment.
Increased Equipment Management: More accessories mean more items to transport, manage, and maintain.
Warranty Concerns: Some third-party accessories may void the manufacturer's warranty, so it's essential to check compatibility and terms of service.
Examples of Successful Implementation:
Real estate photographers frequently use polarizing filters to eliminate window reflections, providing clear views of the interior.
Wildlife photographers often rely on range extenders to capture images of animals in their natural habitat without disturbing them.
Actionable Drone Photography Tips:
Invest in a Set of ND Filters (ND4, ND8, ND16, ND32): This provides a range of light reduction options for varying shooting conditions.
Use a Polarizing Filter to Reduce Glare on Water and Enhance Colors: This is particularly effective for capturing vibrant landscapes and seascapes.
Consider a Landing Pad for Dusty or Uneven Terrain: This simple accessory can significantly extend the life of your drone.
Carry Multiple Batteries and a Field Charger for Extended Shoots: Maximize your shooting time in the field.
Use Propeller Guards in Tight Spaces or When Learning: Added safety and peace of mind, especially for beginners.
Popularized By:
PolarPro Filters: Known for high-quality filters specifically designed for drone cameras.
DJI's Accessory Ecosystem: DJI offers a wide range of accessories tailored to their drone models.
Moment Drone Accessories: Moment provides innovative and professional-grade drone accessories.
By carefully selecting and utilizing specialized equipment and accessories, you can elevate your drone photography from amateur snapshots to professional-quality imagery. This investment not only enhances your creative potential but also protects your valuable equipment and extends its operational lifespan. This attention to detail deserves its place in any list of essential drone photography tips.
8 Essential Drone Photography Tips Comparison
Tip Title | Implementation Complexity 🔄 | Resource Requirements ⚡ | Expected Outcomes 📊 | Ideal Use Cases 💡 | Key Advantages ⭐ |
|---|---|---|---|---|---|
Master Lighting Conditions | Medium - requires timing and weather planning | Moderate - ND filters, weather apps | Dramatic, natural colors; reduced harsh shadows | Outdoor landscape & scenic drone photography | Professional quality images; enhanced color accuracy |
Composition Techniques for Aerial Perspective | Medium - creative skill needed | Low - mostly in-app grid and scouting | Unique perspectives; strong visual storytelling | Abstract, pattern-focused, top-down shots | Reveals hidden patterns; fresh composition approaches |
Master Manual Camera Settings | High - steep learning curve | Moderate - camera with manual control | Consistent, high-quality images with reduced noise | Challenging lighting conditions; professional shoots | Full control over exposure; RAW format flexibility |
Flight Planning and Scouting | Medium - pre-flight research intensive | Low to Moderate - apps, map tools | Efficient shooting; legal compliance; improved composition | Commercial projects; restricted or complex areas | Maximizes battery life; ensures safety & legality |
Post-Processing for Aerial Photography | Medium to High - requires editing skills | Moderate - editing software | Enhanced color, corrected perspectives, signature style | All drone photos needing refinement | Corrects camera limits; improves image impact |
Mastering Drone Movement for Video | High - requires practice & coordination | Moderate - drone with advanced modes | Cinematic, emotionally impactful footage | Video production; storytelling with movement | Enables complex shots; enhances visual storytelling |
Safety and Regulatory Compliance | Low to Medium - procedural and research | Low - apps & registration fees | Avoids fines; maintains public trust | All drone operations, especially commercial | Legal compliance; risk reduction |
Specialized Equipment and Accessories | Low to Medium - involves additional gear | High - filters, batteries, gear | Expanded capabilities; equipment protection | Professional & long-duration shoots | Overcomes camera limits; extends operation range |
Soar Above the Rest: Putting Your Drone Photography Tips into Action
From mastering lighting conditions and composition techniques to understanding manual camera settings and flight planning, this article has covered essential drone photography tips to elevate your aerial imagery. Remember the importance of post-processing and how mastering drone movements can dramatically improve your video footage. We also touched on the critical aspects of safety and regulatory compliance, as well as the potential benefits of specialized equipment and accessories. By incorporating these drone photography tips into your workflow, you'll be well-equipped to capture breathtaking photos and videos from a unique perspective. These skills empower you to not only document the world from above but also to express your artistic vision in exciting new ways.
The more you practice and experiment with these drone photography tips, the closer you'll get to achieving your creative potential. Every flight is a learning opportunity, so embrace the process and watch your aerial photography skills soar. Elevate your drone photography game further with JAB Drone. We offer in-depth drone reviews, expert guides, and a vibrant community of aerial photography enthusiasts to help you make informed decisions and capture truly stunning imagery. Visit JAB Drone today and join the Sky Squad!
Comments