Your Guide to Building a Raspberry Pi UAV
- James Baptiste

- Jul 24, 2025
- 17 min read
So, you’re thinking about building your own drone? Fantastic. You’ve come to the right place.
This guide is all about taking a Raspberry Pi—that tiny, powerful, and affordable computer—and making it the brain of your very own Unmanned Aerial Vehicle (UAV). This isn't just another out-of-the-box kit. We're talking about a custom-built drone that gives you complete control, unlocking a world of flexibility and power that pre-packaged drones simply can't match.
Think of this project as more than just assembling parts. You're creating an intelligent, adaptable flying machine that you can tailor to almost any goal, whether it’s for advanced aerial photography, research projects, or just the pure thrill of building something that flies. A Raspberry Pi UAV is the perfect blend of challenge and reward.
Why Bother With a Raspberry Pi Drone?
The real magic of using a Raspberry Pi as the onboard computer is its incredible versatility. It elevates a standard drone from a simple remote-controlled toy to a platform ripe for innovation.
Just imagine what you could do:
Fully Autonomous Missions: You could program complex flight paths using GPS waypoints, perfect for tasks like aerial mapping or automated property surveillance.
AI and Computer Vision: Want your drone to be truly smart? Integrate a camera and run object detection algorithms to identify and track things on the ground in real-time.
Live Video Streaming: Transmit crystal-clear HD video straight from the drone to your ground station. This is ideal for immersive FPV (First-Person View) flying or conducting remote inspections safely.
Scientific Research: Why not strap on a few sensors? You could gather environmental data like air quality, humidity, or temperature readings across large or hard-to-reach areas.
It's this kind of advanced capability, made accessible by the Pi, that has the maker community buzzing and is a huge factor in the drone market's explosive growth. In 2023, the market was already valued at a staggering USD 28 billion. Projections show it rocketing to USD 208.38 billion by 2032, largely fueled by accessible tech like this. You can get a deeper dive into these drone market projections and their drivers.
Key Takeaway: Building a Raspberry Pi drone isn't just a weekend project. It’s your ticket to creating a sophisticated aerial system with capabilities that can rival commercial models. Plus, you’ll get a hands-on education in robotics, programming, and electronics along the way.
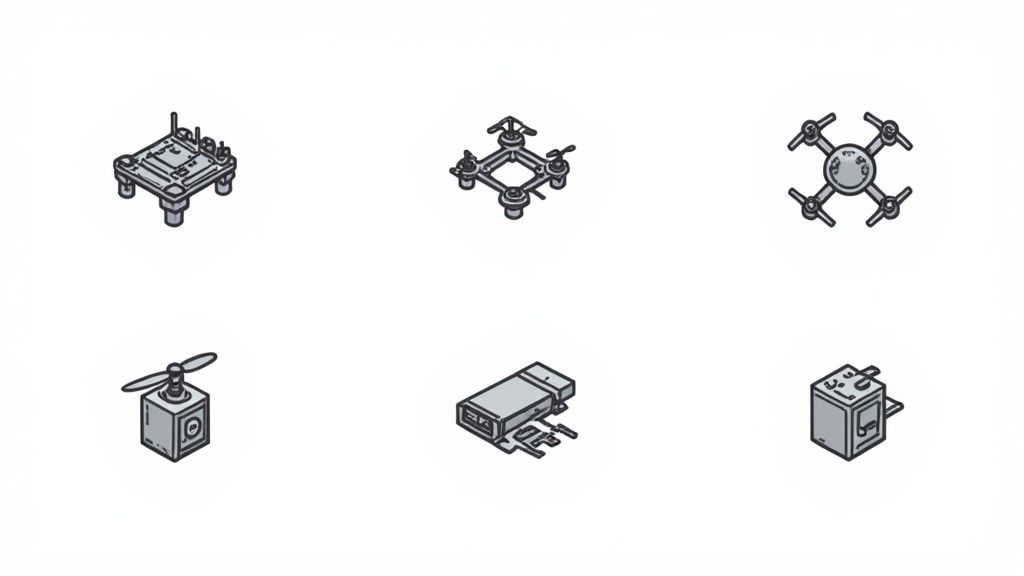
To give you a clearer picture of how these parts work together, let's break down the essential components and what they do.
Key Component Roles in a Raspberry Pi UAV
Component | Primary Role | Importance |
|---|---|---|
Raspberry Pi | The "brain" of the drone, running flight software and processing data. | Critical |
Flight Controller | Manages motors, stabilizes flight, and executes commands from the Pi. | Critical |
Motors & ESCs | Provide thrust and control speed based on signals from the flight controller. | Critical |
Frame | The structural skeleton that holds all the components together. | High |
GPS Module | Enables autonomous flight, waypoint navigation, and position hold. | High |
Camera Module | Provides video for FPV, recording, or computer vision tasks. | Medium |
Telemetry Radio | Transmits flight data between the drone and the ground station. | High |
Each piece plays a vital role, and understanding how they connect is the first step toward a successful build.
Your Project Roadmap
This guide is designed to be your clear, step-by-step roadmap for the entire build. We’ll start with the fundamentals—choosing the right parts and wiring them up—and walk you all the way through to your first successful flight.
Before you start clicking "add to cart," it’s smart to get a handle on the local rules. For our builders in the United States, we’ve put together a straightforward guide on drone FAA registration to make sure your project is fully compliant from day one.
Our goal is to give you the confidence and know-how to turn that pile of components into a capable raspberry pi uav, ready for whatever mission you dream up. Let's get started.
Choosing the Right Hardware for Your Build
Getting your hardware selection right is the bedrock of your entire project. I’ve seen it time and again: a mismatched set of parts leads to endless troubleshooting and frustration. Think of it less like a shopping list and more like putting together a high-performance team. Each component has a specific job, and they all need to work in concert.
My goal is to help you move past the spec sheets and think about the real-world impact of your choices. This isn't about finding the absolute "best" parts on the market, but the right parts for the specific Raspberry Pi UAV you have in mind.
Selecting Your Raspberry Pi Brain
The first big choice is the Raspberry Pi itself, which essentially sets the performance ceiling for your drone. Your main options will likely boil down to the Raspberry Pi 4 Model B and the Raspberry Pi Zero 2 W.
The Raspberry Pi 4 is the undisputed powerhouse. Its quad-core CPU and generous RAM (I recommend 2GB or more) can handle serious computational loads. We’re talking real-time video processing, complex autonomous flight paths, and running multiple scripts at once without a hiccup. But all that muscle comes with a trade-off: it's bigger, heavier, and thirstier for power—all critical considerations for anything you want to get airborne.
On the flip side, the Raspberry Pi Zero 2 W is incredibly tiny and light. This makes it a perfect fit for smaller drone frames where every single gram counts. It has more than enough power to run flight control software and send back telemetry, but it will definitely struggle with heavy processing. For a straightforward build focused purely on flight, the Zero 2 W is a fantastic and efficient choice. If you’re dreaming of a feature-packed autonomous drone, you’ll want the Pi 4.
The Flight Controller: The Pi's Co-Pilot
While the Pi acts as the high-level brain, the flight controller is the drone’s nervous system. It’s responsible for the lightning-fast, low-level adjustments needed to keep the drone stable in the air. The Pi issues a command like, "fly to these coordinates," and the flight controller translates that into thousands of tiny motor corrections per second.
You have two primary routes you can take here:
Integrated HATs: Boards like the NAVIO2 or BlueRobotics Navigator are what we call HATs (Hardware Attached on Top). They plug directly onto the Pi’s GPIO pins, creating a neat, all-in-one unit that drastically simplifies your wiring.
Standalone Controllers: Using a separate flight controller, such as a board from Pixhawk or Matek Systems, gives you more flexibility. It communicates with the Pi over a serial connection, letting you place it anywhere on the frame and choose from a wider range of hardware.
From my experience, if this is your first build, an integrated HAT is usually the path of least resistance. It cuts down on the potential points of failure in your wiring. For a more detailed look at the setup, check out our beginner's guide to building a Raspberry Pi drone.
Expert Tip: Never underestimate the importance of the connection between the Pi and the flight controller. A dodgy connection here can cause intermittent control problems that are a nightmare to diagnose once you’re in the air. Always use high-quality, properly shielded cables.
Frame, Motors, and ESCs
Your drone's frame is its skeleton. It must be rigid enough to kill vibrations yet light enough to fly efficiently. You can always grab a popular off-the-shelf carbon fiber frame like an F450, but we're seeing a huge trend toward custom fabrication. The rise of 3D printing, in particular, goes hand-in-hand with the DIY spirit of building a Raspberry Pi UAV.
This isn't just a niche hobby, either. The 3D-printed drone market is projected to skyrocket from USD 707 million in 2024 to nearly USD 2 billion by 2029. This boom is all about the ability to create highly customized and lightweight parts that were once impossible.
With a frame chosen, it's time to match it with motors and Electronic Speed Controllers (ESCs). Here’s a quick breakdown to guide your thinking:
Component | Key Consideration | Recommendation |
|---|---|---|
Motors | KV Rating: A lower KV (e.g., 920KV) is for larger propellers and longer, more efficient flights. A higher KV (e.g., 2300KV) is for smaller props and agile, acrobatic performance. | For a standard 450mm quadcopter frame, motors in the 900-1200KV range are a solid starting point. |
ESCs | Amperage: The ESC must be rated for more current than the motor can draw at full throttle. A 20-30% buffer is a good rule of thumb for safety. | If your motors have a max draw of 20A, get 30A ESCs. Don't cut this corner. |
Propellers | Size: Must match the frame and motor specifications. Bigger props are efficient; smaller props are more responsive. | Always check the manufacturer's data sheet for your motors to find the recommended prop sizes for that specific KV rating. |
Whenever possible, buy your motors, ESCs, and props as a matched set or use a trusted online tool like eCalc to verify compatibility. A mismatched propulsion system is a recipe for inefficiency, overheating, and disappointingly short flight times. The goal is a balanced, harmonious system where every part works together.
Assembling the Drone Frame and Electronics
With your hand-picked components laid out, it's time to bring your drone to life. This is the moment we go from a pile of parts to a real, functional aircraft. It’s arguably one of the most rewarding parts of any custom build, where theory becomes reality.
The process demands patience and a steady hand. Think of it like building a high-performance PC, but for the sky. Every single part has a specific home, and every connection is critical to performance and safety. A tidy, well-thought-out build isn't just about looking good; it's what prevents a loose wire or a vibrating component from causing a catastrophic failure mid-flight.
The visual below gives you a bird's-eye view of the key assembly steps, showing how everything from the motors to the Raspberry Pi comes together.
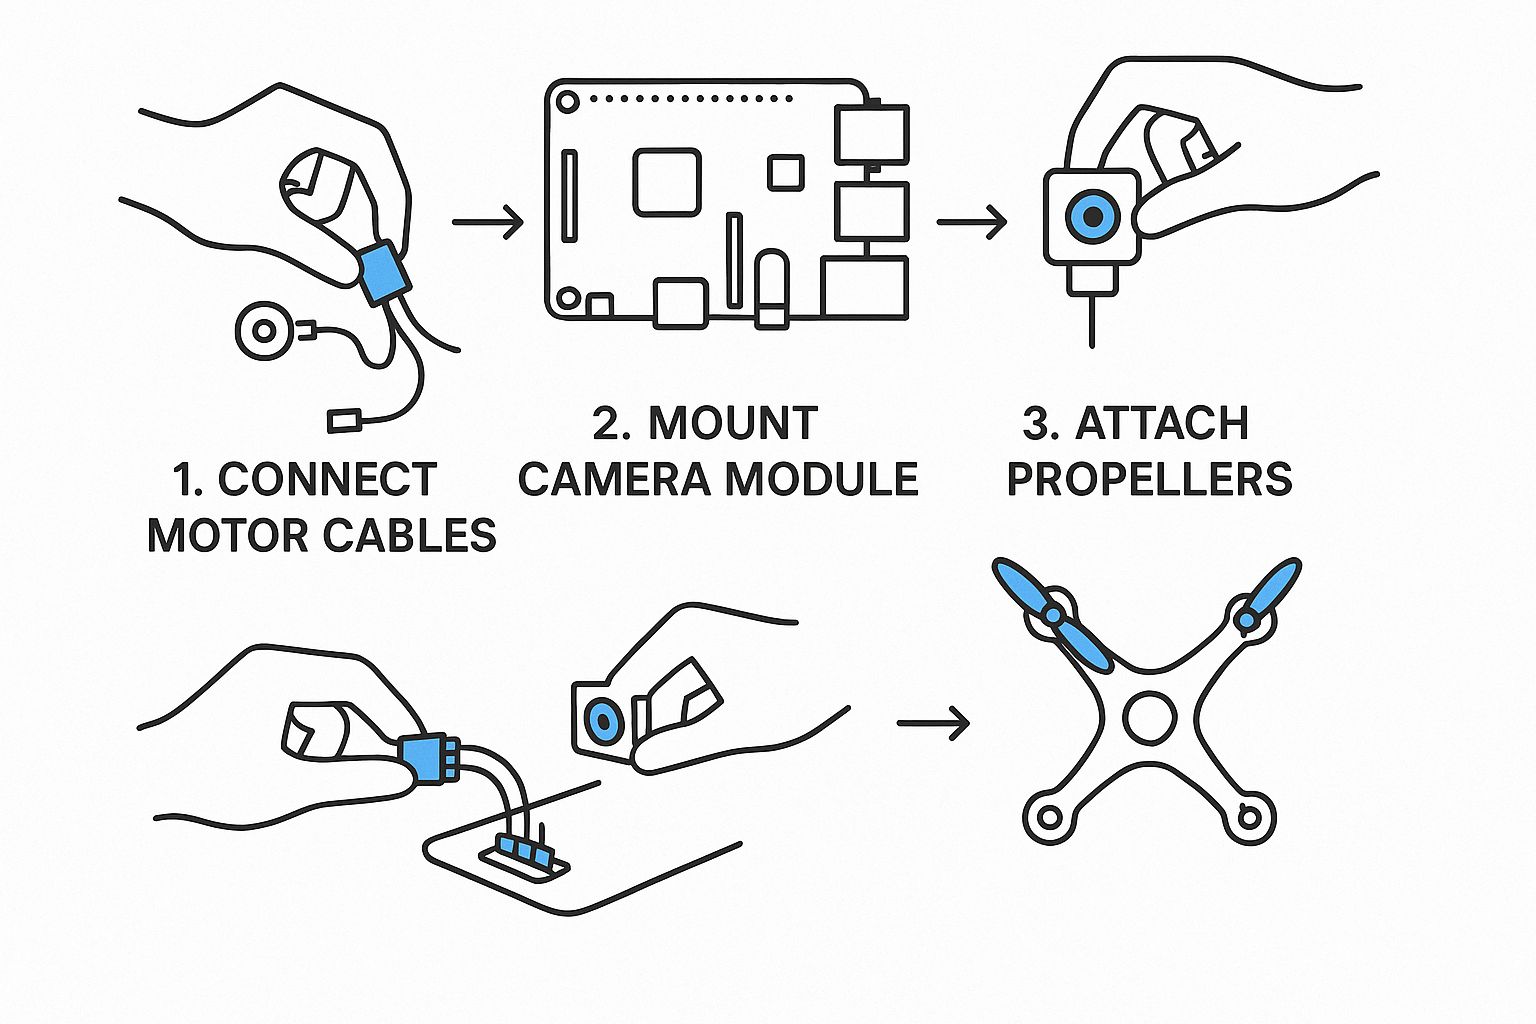
Use this as a reference to see how all the individual pieces form a single, flight-ready system.
Constructing the Airframe
Your drone's frame is its skeleton—the foundation for everything else. Start by putting it together based on the manufacturer's manual. Pay close attention to screw lengths. A screw that's too long can punch right into a motor winding, while one that's too short can pull out under stress. A dab of medium-strength thread locker on any metal-to-metal screws is a must to keep them from vibrating loose.
With the frame assembled, it’s time to mount the motors to the arms. Make sure each motor is bolted down tight and sits perfectly flat on its mount. Even a slight tilt will introduce instability that no amount of software tuning can completely fix.
For those interested in custom frames, it's worth exploring 3D printing applications in the aerospace industry. This can inspire new ways to create incredibly lightweight and integrated designs specifically for your project.
Mastering Your Power System Wiring
Now that the motors are on, we move to the power system. This means connecting your Power Distribution Board (PDB), Electronic Speed Controllers (ESCs), and the main battery lead. This is where your soldering skills are put to the test.
A bad solder joint is a ticking time bomb. A "cold" joint might seem solid on your workbench, but the vibrations and high current draw during flight can easily cause it to fail, leading to a motor cutting out and an immediate crash.
For rock-solid connections, follow these tips:
Tin Your Wires and Pads: Apply a little solder to both the wire tip and the board's pad before you join them. This simple step helps the solder flow evenly for a much stronger bond.
Use the Right Temperature: An iron that's too cold creates weak joints, while one that's too hot can fry your components. A temperature around 350-400°C (660-750°F) is the sweet spot for most drone work.
Heat the Joint, Not the Solder: This is key. Touch the iron's tip to where the wire and pad meet. Apply the solder directly to that hot joint, not the iron, and let it wick in naturally.
After soldering the ESCs to your PDB, secure them to the drone's arms. Zip ties work well, but it’s a good idea to place a small piece of double-sided foam tape underneath to absorb vibrations.
Safety First: Never, ever work on your drone with the propellers attached. An accidental motor spin-up on your bench is incredibly dangerous and can cause serious injury. The moment a battery is plugged in, treat the system as live.
Integrating the Flight Controller and Raspberry Pi
With the power system sorted, it's time to install the brains of the operation. Mount your flight controller right at the drone's center of gravity, ideally using vibration-damping standoffs. It is absolutely critical that the orientation arrow printed on the board points toward the front of the drone.
Next, you'll connect the ESC signal wires to their motor outputs on the flight controller. The numbering is fairly standard across most quadcopters, but always, always check your flight controller's documentation to confirm the correct motor order and spin direction.
Once the flight controller is secure, you can mount the Raspberry Pi. If you’re using a NAVIO2 or a similar HAT, it will sit directly on the Pi's GPIO header. If you're using a separate flight controller, you'll connect it to the Pi over a serial (UART) port. This is usually just three wires:
TX (Transmit) on one board connects to RX (Receive) on the other.
RX on the first board connects to TX on the second.
A shared Ground (GND) wire connects them both.
Finally, plug in your peripherals. Connect the GPS module to its port on the flight controller, and if you're using a Raspberry Pi Camera Module, carefully connect its ribbon cable to the CSI port on the Pi.
Spend some time on cable management. A rat's nest of wires isn't just ugly; it can interfere with sensors like the compass or get chopped up by the propellers. Use zip ties, heat shrink, and braided sleeving to create a clean, professional, and reliable build.
Configuring Your Flight Control Software
With your drone’s hardware meticulously pieced together, it's time to breathe some life into it. This is where your collection of parts truly becomes an intelligent flying machine. We'll walk through setting up the operating system on the Raspberry Pi, installing the flight stack, and calibrating every sensor to ensure stable, predictable performance in the air.
First things first, you need to get your Raspberry Pi up and running. This means flashing the latest version of Raspberry Pi OS onto your microSD card. For almost any Raspberry Pi UAV project, I strongly recommend the "Lite" version. It ditches the graphical desktop, which frees up critical CPU and RAM resources that are much better spent on real-time flight calculations.
Once the OS is installed and you can SSH into your Pi, the real fun begins: installing your chosen flight control software. Two big open-source platforms dominate this space—ArduPilot and PX4. Both are incredibly capable, but they come from slightly different schools of thought. ArduPilot is famous for its massive feature set and broad hardware support, while PX4 is often preferred for its modular design and close ties to academic research. We'll be focusing on the ArduPilot stack for this guide, as it’s a fantastic starting point for most builders.
Installing and Connecting the Flight Stack
Getting the flight stack running means installing the ArduPilot software right onto the Raspberry Pi. This software is the brain that will talk to your flight controller (like a NAVIO2 or Pixhawk) to manage the low-level flight dynamics. The exact installation commands will depend on your specific hardware, but the process usually involves cloning the ArduPilot repository from GitHub and running a script.
This is a point where a lot of new builders hit a wall. The most critical part is establishing a rock-solid communication link between the Pi and the flight controller.
For HATs (e.g., NAVIO2): The connection is physical through the GPIO pins, but you have to enable specific interfaces like SPI and I2C in the Pi's configuration file ().
For Standalone Controllers (e.g., Pixhawk): The connection is typically made over a serial (UART) port. You have to ensure the Pi's UART is enabled and set to the correct baud rate to match what the flight controller expects.
Crucial Tip: Double- and triple-check your wiring and software settings. A swapped TX/RX wire on a serial connection or a mismatched port speed is a classic mistake. It will stop the Pi and flight controller from talking, bringing your project to a dead halt.
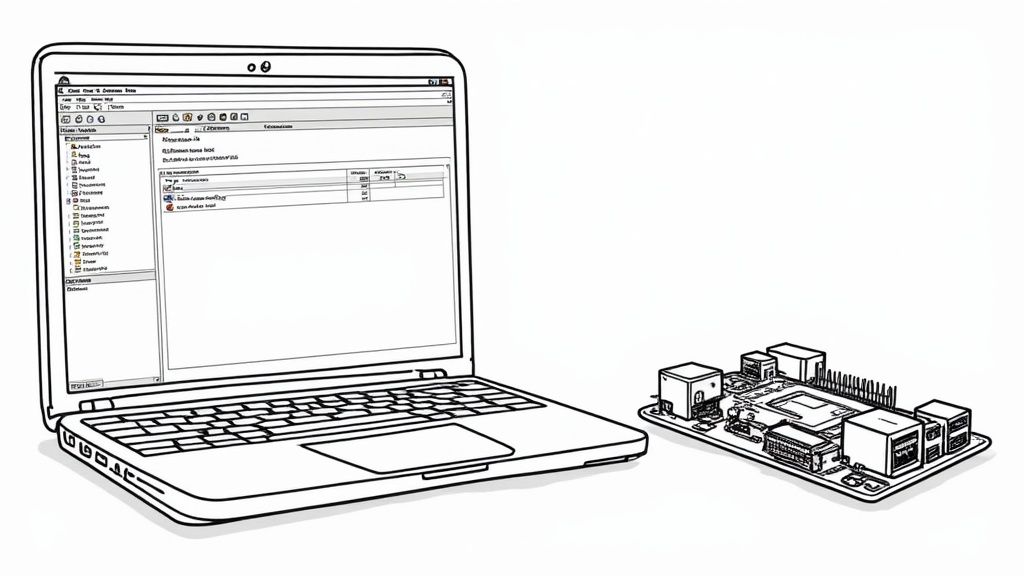
Ground Station Setup and Calibration
Your ground control station (GCS) is your window into the drone’s mind. Software like Mission Planner (for Windows) or QGroundControl (cross-platform) is absolutely essential for setup, mission planning, and watching your drone in real-time. Once you install it on your laptop, you'll connect to your Raspberry Pi UAV over the network, usually via Wi-Fi or a dedicated telemetry radio.
With a GCS connection established, you can start the single most important pre-flight procedure: calibration. This process is how you teach the flight controller about its own physical orientation and the unique characteristics of its components. Rushing this step is a recipe for a very short, very destructive first flight.
The main calibration steps always include:
Accelerometer Calibration: This involves carefully holding the drone and rotating it through every possible axis. The software watches the accelerometer readings to figure out what "level" actually is.
Compass Calibration: Here, you'll slowly rotate the drone in multiple directions, making sure to do it away from large metal objects. This lets the compass map the local magnetic field so it can reliably find its heading.
Radio Controller Calibration: This step is all about mapping the stick movements on your transmitter to the drone's controls—throttle, yaw, pitch, and roll.
ESC Calibration: This synchronizes your electronic speed controllers. It ensures that all motors respond to your throttle commands identically, which is vital for balanced and stable thrust.
This kind of detailed setup is what makes custom builds so powerful and adaptable. It’s this flexibility that’s fueling the massive growth in the commercial drone sector, which hit revenues of USD 30.6 billion in 2022 and is projected to soar past USD 70 billion by 2029. The versatility of a Raspberry Pi-based drone is a key driver of this expansion into fields like agriculture, logistics, and public safety. You can dive deeper into these commercial drone market statistics to see how DIY-style solutions are influencing the entire industry.
With calibration complete, your hardware is now a cohesive, intelligent system. You're ready for your first test flight.
Your First Flight and Pre-Flight Checklist
So, here it is. The moment of truth. After all those hours spent building, wiring, and wrestling with code, your Raspberry Pi UAV is finally ready for its maiden voyage. The urge to just run outside and send it skyward is almost overwhelming, I get it. But hold on. This next part is where discipline separates a successful first flight from a frustrating pile of broken carbon fiber and electronics.
Before those props even think about spinning up, a thorough pre-flight check is absolutely non-negotiable. This isn't about just going through the motions; it's about systematically building confidence in your creation and making sure it’s as safe as it can possibly be. Think of every check as another layer of insurance against the unexpected.
First things first: location. You need space—lots of it. Look for a wide-open park or an empty field, far away from people, buildings, and especially power lines. Always check your local regulations to make sure you're clear to fly there. This is no time to be a backyard hero; you need plenty of room to maneuver if things don't go exactly as planned.
The Essential Pre-Flight Ground Check
Once you're on-site, with the drone still powered down, it's time to get hands-on. Go through your machine systematically. Don't rush this part.
Frame and Hardware Integrity: Give the arms a good wiggle. Check every single screw on the frame and motors. Are they all snug? You’d be surprised how quickly vibrations can work things loose.
Propeller Installation: This is a classic rookie mistake. Double-check that all your props are tightened down securely. More importantly, make sure they’re on correctly. On a quadcopter, this means your clockwise (CW) and counter-clockwise (CCW) propellers must match the right motors as shown in your flight controller's manual. Get this wrong, and your drone will flip over the instant you try to take off.
Wiring and Connections: Gently tug on all your wiring. Are the servo leads, GPS cable, and main power connectors all seated firmly? Scan for any nicks or chafed insulation that might have happened while you were carrying it out to the field.
After the physical inspection is done, power on your transmitter first. Then, and only then, plug the battery into the drone. Step back and let it do its thing while it initializes.
A critical step here is to verify your communication links. Make sure your ground station software connects without a hitch and that you have a solid GPS lock. You're looking for at least 6-8 satellites for a basic lock, but 10+ is what you really want for good positional accuracy.
Your First Hover Test
With all checks passed, you’re ready for that first lift-off. Remember, this isn't about zipping around the sky. It's a simple, controlled test of stability just a few feet off the ground.
Start by placing the drone on a flat, level spot at least 20 feet away from you.
Arm the motors. They should all spin up to a slow, even idle speed. Just listen for a moment. Do you hear any weird sounds or see any excessive vibration?
Now, slowly and smoothly ease up on the throttle until the drone gets light on its landing gear. Keep your finger ready to cut the power instantly.
Gently add a bit more throttle until it lifts into a hover, aiming for about 2-3 feet off the ground. Your only job right now is to hold it steady.
Test your controls with tiny, gentle movements. A small tap on the roll stick should cause a slight drift to the side. A little nudge on pitch should make it drift forward. Confirm every control input does exactly what you expect it to. After a solid 30-60 seconds of stable hovering, gently bring it in for a landing and disarm the motors.
Congratulations, you've just aced your first test flight! To build on this, you'll want a more exhaustive routine for every time you fly. Our detailed [drone pre-flight checklist](https://www.jabdrone.com/post/drone-pre-flight-checklist-essential-safety-tips) offers essential safety tips you can integrate into your workflow. This structured approach is what builds real piloting skill and ensures your Raspberry Pi UAV has a long and successful flying career.
Troubleshooting Your Raspberry Pi UAV
Building your own drone is an incredible experience, but let's be honest—it rarely works perfectly on the first try. When you hit a snag, it's frustrating. You've followed the steps, connected all the wires, and... nothing. Or worse, it gets airborne and flies like it has a mind of its own.
Don't worry, we've all been there. Most of the time, the fix is simpler than you think. Let's walk through some of the most common headaches builders face and how to solve them.
Why Won’t My Drone Arm?
This is the big one. You’ve triple-checked your assembly, the lights are on, but when you go to arm the motors, they just won't spin up. It's easily the most frequent roadblock for first-time builders. Your ground station software is probably flashing an error message, but it can feel like trying to decipher a secret code.
What’s happening is that the flight controller is running a series of pre-arm safety checks. It’s looking for potential problems that could lead to a crash or a flyaway. If even one of these checks fails, it flat-out refuses to arm. Here are the usual suspects:
No GPS Lock: Your drone needs to know its location to fly safely, especially for any kind of autonomous flight. If you're trying to arm it indoors, you're not going to get a satellite signal. You can usually disable this check for bench testing, but never skip it before an outdoor flight.
Calibration Chaos: A poorly calibrated compass or accelerometer is a huge red flag for the flight controller. If the drone doesn't have a reliable sense of its orientation, it can't fly. The only real fix is to redo the entire calibration process in your ground station software. Make sure you do it outside, far away from big metal objects like cars or buildings that can throw off the magnetic readings.
Throttle Isn't Zero: This is a classic safety feature. Your radio transmitter's throttle stick has to be all the way down before the system will arm. Sometimes, the radio's own calibration is a little off, and the flight controller doesn't see the throttle as truly being at 0%. A quick radio recalibration in your transmitter settings almost always clears this up.
Expert Tip: Don't just read the error message—understand what it's telling you. A message like "Compass inconsistent" means the readings from your different compasses (if you have more than one) don't match. This is a dead giveaway for magnetic interference, often because your power wires are running too close to the compass module.
Diagnosing Wobbly or Unstable Flight
Okay, so you got it to arm and take off. Congratulations! But now it's wobbling all over the sky, drifting hard in one direction, or just feels like it's fighting every input you give it. This kind of instability almost always boils down to one of three culprits: vibrations, propulsion problems, or software tuning.
Vibrations are the absolute enemy of a stable drone. Your flight controller's tiny accelerometer is incredibly sensitive. If it's being shaken by unbalanced props or a loose motor mount, it gets confused and sends out all sorts of wrong corrections, creating that wobbly, out-of-control flight. You can confirm this by checking your flight logs for high vibration levels.
An imbalanced propulsion system is another common cause. If one motor isn't spinning at the same speed as the others—maybe due to a bad ESC or because they weren't calibrated correctly—the drone will constantly struggle to keep itself level. Make sure you calibrate all your ESCs at the same time so they respond identically to your commands.
Finally, while the default PID settings in the software are a decent place to start, every drone frame is different. Your custom-built Raspberry Pi UAV is unique in its weight, balance, and power. It's almost certainly going to need some PID tuning to get that crisp, locked-in flight performance you're looking for.
And before you even think about that first real flight, make sure you know the rules. Flying a drone comes with real legal responsibilities. For our US-based builders, our guide on [mastering the FAA Part 107 test](https://www.jabdrone.com/post/mastering-the-faa-part-107-test-in-2024-your-ultimate-guide-to-success) is a fantastic place to start learning the rules of the sky.
At JAB Drone, we're committed to providing the expert insights and hands-on guidance you need to succeed in your aerial projects. Whether you're building your first FPV racer or a complex autonomous system, explore our guides and reviews to stay ahead in the world of drone technology. Discover more at https://www.jabdrone.com.
Comments