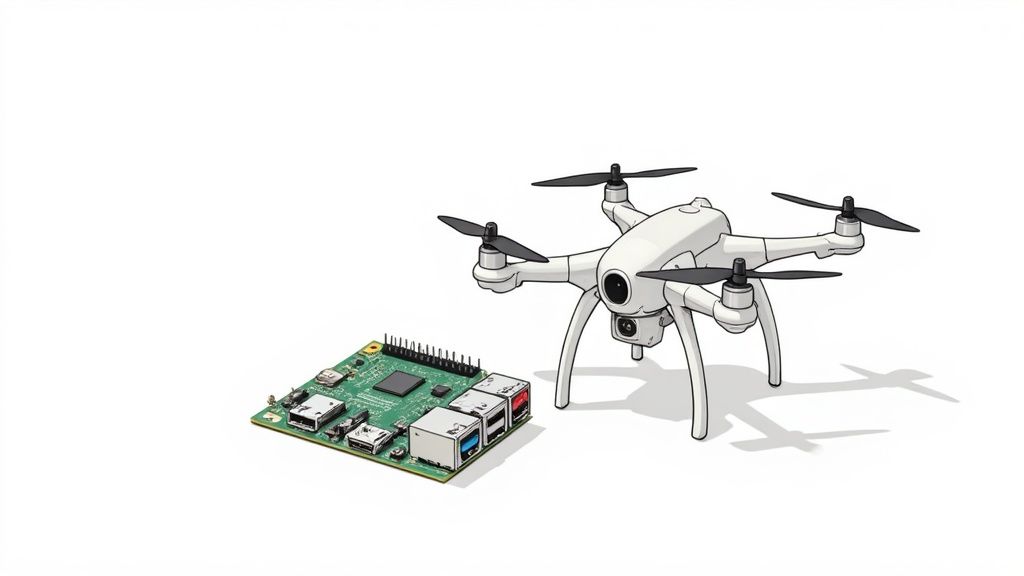
How to Build a Raspberry Pi Drone: Beginner's Guide
- Nickolas Williams

- Jun 5, 2025
- 16 min read
Why Your First Raspberry Pi Drone Build Will Actually Succeed
Building a Raspberry Pi drone might seem intimidating initially, but many makers have successfully completed this project. This section explores why the Raspberry Pi has become the go-to platform for DIY drone enthusiasts, emphasizing its adaptability and the supportive community behind it.
The Power of the Pi
The Raspberry Pi offers incredible flexibility thanks to its GPIO (General Purpose Input/Output) pins. These pins enable you to connect and control a wide range of components, from motors and sensors to LEDs and cameras, providing precise control over your drone's functionality. This level of customization is difficult to achieve with standard flight controllers. For instance, you could program your Raspberry Pi drone to autonomously follow a GPS route or react to sensor data in real time.
The Raspberry Pi also benefits from a vibrant community of makers and developers. This active network provides invaluable resources, including tutorials, forums, and open-source software libraries like those available on GitHub. This support system ensures you're never truly alone in your build. You can access a wealth of knowledge and receive guidance from experienced builders who've already tackled the challenges you may encounter.
Realistic Expectations and Safety First
It's important to set realistic expectations for your first Raspberry Pi drone build. This isn't a plug-and-play experience like flying a consumer drone; it’s an engineering project. This means encountering obstacles and adapting along the way are part of the learning experience. The satisfaction of watching your creation take flight, however, makes the effort worthwhile.
Safety should always be your top concern. Implementing basic safety measures protects both you and your drone investment. Always double-check your wiring and component connections before every test flight. Also, consider incorporating safety features, such as an emergency landing system, to reduce potential risks.
Workspace Setup and Mindset Shift
Setting up a dedicated workspace for your drone build will streamline your project. It simplifies organizing components and tools. A well-organized workspace also minimizes the chance of losing crucial parts or creating a disorganized environment. This organized approach is especially important when working with complex electronics.
Building a Raspberry Pi drone requires a change in perspective from simply flying a drone to engineering one. Embrace the learning curve, and remember that every challenge overcome enhances your understanding of drone technology. The development of Raspberry Pi technology in drones has greatly impacted the drone market's growth. The global drone market is expected to hit $42.8 billion by 2025, driven by commercial applications. This growth is partly due to the accessibility and versatility of platforms like Raspberry Pi, empowering hobbyists and developers to create advanced drone systems. Learn more about the growth of the drone market: Find more detailed statistics here. By understanding this context, you become part of a larger community pushing the limits of drone technology.
Smart Component Selection That Actually Works Together
Building a successful Raspberry Pi drone requires more than just buying expensive parts; it demands careful selection of compatible components that work together seamlessly. This guide, informed by experienced drone builders, breaks down the essentials, helping you avoid common pitfalls.
The Heart of Your Drone: Choosing the Right Raspberry Pi
The Raspberry Pi model you choose depends on your project's complexity. For basic flight control, the lightweight and affordable Raspberry Pi Zero 2 W is a great option. However, if you're planning on incorporating computer vision or autonomous navigation, the Raspberry Pi 4, with its quad-core processor and ample RAM, is highly recommended. This processing power is essential for handling complex operations.
Motors, ESCs, and Propellers: Powering Your Flight
A drone's lift capacity and maneuverability depend heavily on its motors, Electronic Speed Controllers (ESCs), and propellers. Brushless motors offer better efficiency and performance than their brushed counterparts. Make sure your ESCs are compatible with your chosen motors and can handle the expected current draw. Propeller size matters too: larger propellers generate more lift at the expense of higher power consumption.
Battery Configuration: Balancing Power and Flight Time
Lithium Polymer (LiPo) batteries are the standard for drones due to their high energy density. Calculating the correct mAh (milliampere-hour) rating is crucial. A higher mAh rating translates to longer flight times, but adds weight. Experimentation is key to finding the right balance for your needs. Check out this resource for more information on getting started: DIY drone kits for beginners.
Sensors: Ensuring Stable Flight
Essential sensors, such as gyroscopes, accelerometers, and barometers, provide critical data for flight stabilization. A GPS module enables autonomous navigation and position hold, while an altimeter allows for precise altitude control, which is especially important for autonomous missions. Investing in high-quality sensors ensures accurate data and reliable flight performance.
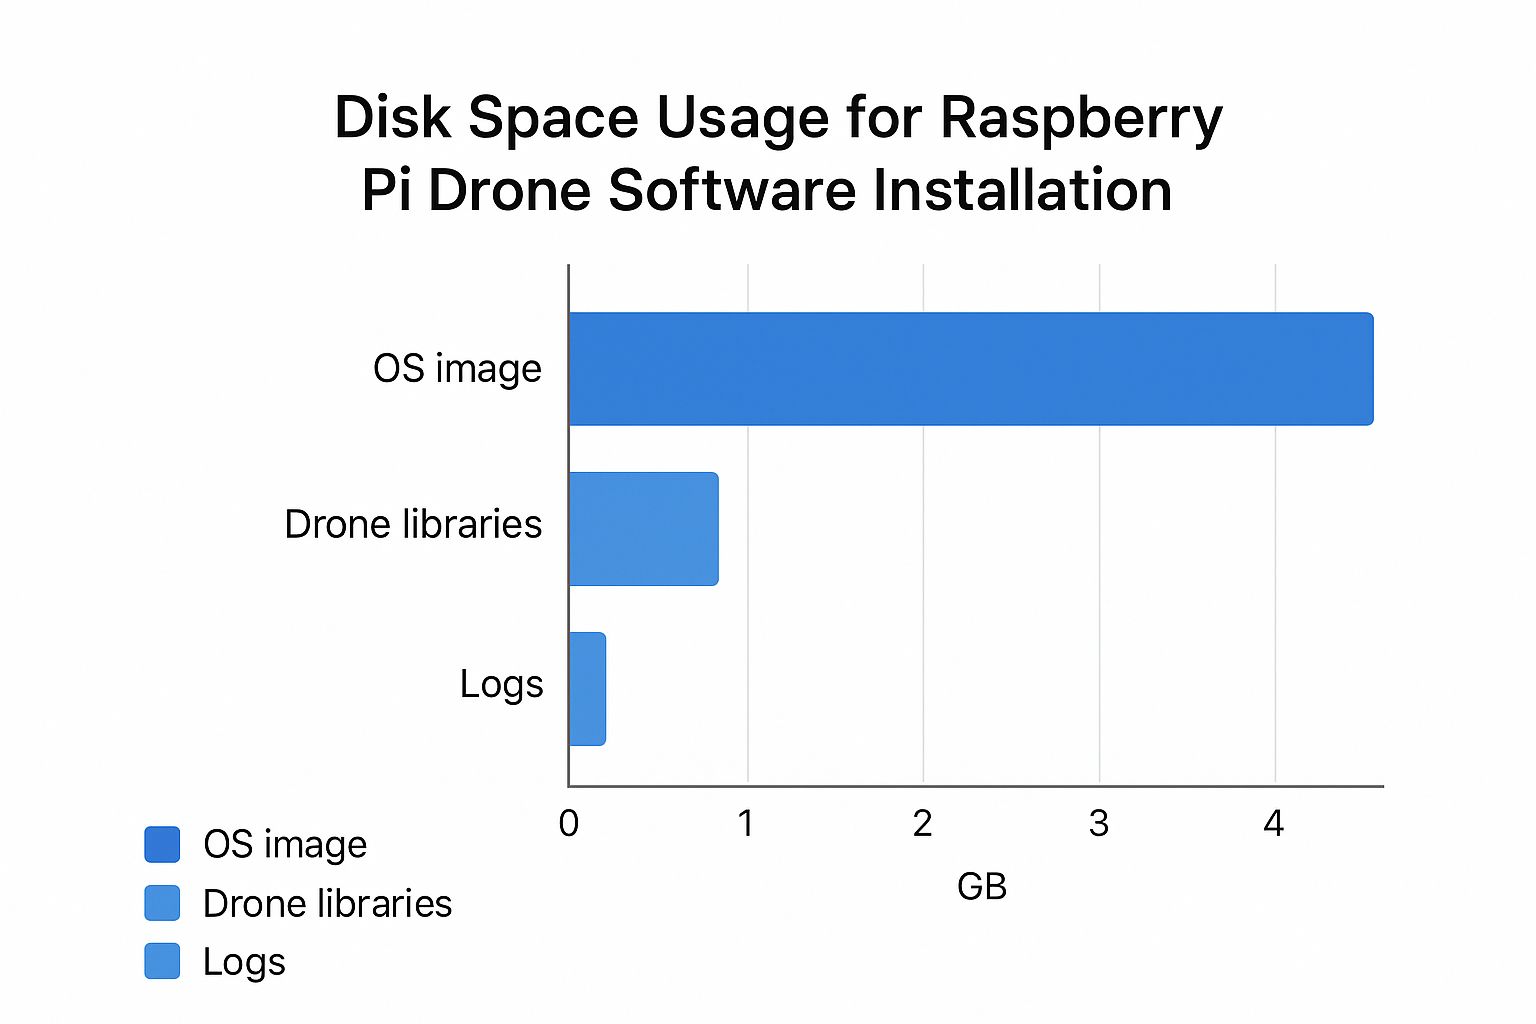
This infographic illustrates typical disk space usage for Raspberry Pi drone software. The OS image takes up the most space at 4 GB, while drone-specific libraries and log files use 0.5 GB and 0.1 GB respectively. This generally leaves plenty of room on a standard microSD card for other software and data.
Budget Considerations and Trusted Suppliers
Balancing performance with budget is a critical aspect of any drone build. While some components allow for cost savings, investing in high-quality motors and ESCs is crucial for reliability and preventing mid-flight failures. Researching reputable suppliers is essential for accessing quality components and reliable customer support.
Component Compatibility and Future Upgrades
Thinking about future upgrades is key. Choose components that are flexible and compatible with potential additions. A Raspberry Pi with sufficient GPIO pins allows you to integrate more sensors or peripherals down the line. Consulting component compatibility matrices can save you from costly mismatches. Understanding the power requirements of each component is crucial for choosing the right power distribution board and preventing system overload. This careful planning ensures your drone performs reliably and adapts to future advancements.
To help you further, here's a comparison table summarizing key components:
To help you select the right components, the following table provides a detailed comparison of essential elements for your Raspberry Pi drone build:
Raspberry Pi Drone Component Comparison
Detailed comparison of essential components including Raspberry Pi models, motors, batteries, and sensors with specifications and price ranges
Component | Recommended Model | Specifications | Price Range | Best Use Case |
|---|---|---|---|---|
Raspberry Pi | Raspberry Pi 4 Model B | Quad-core Cortex-A72 1.5GHz processor, 2/4/8GB RAM | $35-$75 | Demanding tasks, computer vision, autonomous navigation |
Raspberry Pi | Raspberry Pi Zero 2 W | Single-core Arm Cortex-A53 1GHz processor, 512MB RAM | $15-$25 | Basic flight control, limited processing |
Motors | Brushless motors | Various KV ratings, sizes | $10-$50 each | Efficient and powerful propulsion |
ESCs | 30A ESC | Compatible with brushless motors | $15-$30 each | Powering and controlling brushless motors |
Propellers | Dependent on drone size and desired flight characteristics | Various sizes and pitch | $5-$20 per set | Generating lift and controlling flight |
Battery | LiPo Battery | Various mAh ratings, voltage | $20-$50 | Providing power to the drone |
GPS Module | Ublox NEO-M8N | High accuracy positioning | $20-$40 | Autonomous navigation, position hold |
Gyroscope/Accelerometer/Barometer | MPU6050 | Provides orientation and altitude data | $5-$15 | Flight stabilization |
This table highlights the various options available for each component and provides a price range and suggested best use cases. Remember to carefully consider your specific requirements and budget when making your selections. Choosing compatible components and planning for future upgrades will ultimately lead to a more successful and enjoyable drone building experience.
Transforming Your Pi Into A Reliable Flight Controller
This is where your Raspberry Pi goes from basic computer to the core of your drone. We'll guide you through installing and setting up popular flight control software like ArduPilot and PX4, with practical advice that actually works. This section is all about making your Pi a dependable flight controller, the key to a stable and successful drone build.
Installing Flight Control Software
First, install your flight control software. Both ArduPilot and PX4 have detailed Raspberry Pi installation guides. These often include pre-built images for a simpler process. Alternatively, compiling from source gives you more control but requires more Linux knowledge. Knowing basic Linux commands helps with navigating the file system, managing software, and fixing problems. For example, the package manager makes installing and updating software packages on your Pi a breeze.
GPIO Pin Configuration
The GPIO (General Purpose Input/Output) pins on your Raspberry Pi are crucial for controlling your drone's motors. Each pin needs the right configuration to talk to the Electronic Speed Controllers (ESCs). Think of the GPIO pins as the nerves connecting the Pi's "brain" to the drone's "muscles" (the motors). Accurate configuration is essential for making sure the motors respond correctly to the flight controller's commands. This means carefully mapping the pins and understanding PWM (Pulse Width Modulation) signals, which control motor speed.
Sensor Calibration
Accurate sensor readings are the foundation of stable flight. Calibrating sensors like the gyroscope, accelerometer, and magnetometer is essential. This involves positioning the drone in specific ways to make sure the sensors give accurate data to the flight controller. Imagine a miscalibrated accelerometer: your drone would constantly think it’s tilted, causing erratic flight. Proper calibration gives these sensors a baseline, allowing stable flight.
Performance Optimization and Troubleshooting
Experienced builders use various optimization strategies for reliable performance. This might include tweaking software parameters, fine-tuning sensor settings, and optimizing power management. Troubleshooting skills are also essential. Common problems include software conflicts, driver issues, and communication problems between the Pi and other parts. Knowing how to diagnose and fix these problems is key to a successful build. Further reading: How to master 3D mapping with your drone.
Configuration Management and Backups
Managing your configuration files keeps your system organized. Backups prevent losing hours of setup work from accidents or software glitches. System monitoring tools let you watch resource usage, spot potential issues, and make sure your Pi isn’t overloaded. These practices improve reliability and simplify troubleshooting. This careful approach creates a strong foundation for a dependable flight controller. Building a reliable Raspberry Pi drone relies on meticulous attention to detail. By mastering these techniques, your Pi becomes a powerful and dependable brain for your drone, setting you up for a successful and rewarding flight experience.
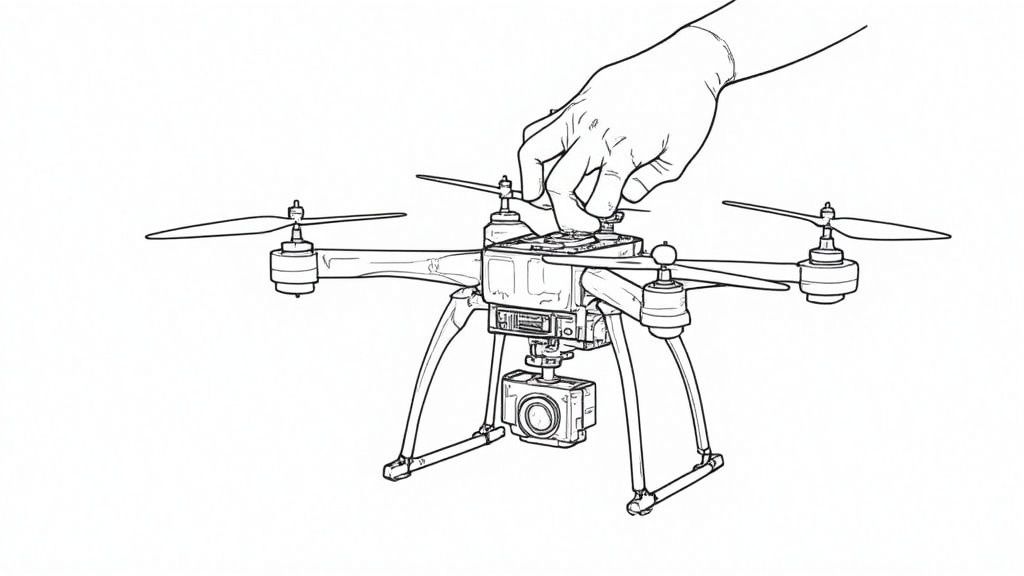
Professional Assembly Techniques That Prevent Failures
Building a Raspberry Pi drone that consistently performs well involves more than just connecting the parts. It requires professional assembly techniques. The difference between a stable, reliable drone and one that's constantly malfunctioning often comes down to the finer points of construction. This section focuses on the techniques that will help ensure your drone performs reliably, flight after flight.
Soldering for Vibration Resistance
Soldering is the foundation of your drone's electrical system. Using the correct temperature and technique is crucial for creating strong, vibration-resistant joints. Cold solder joints, identifiable by their dull, grainy appearance, are notoriously weak and prone to breaking under the stress of flight. A good solder joint, on the other hand, should look shiny and smooth, indicating a strong, reliable connection.
Cable Management: Preventing Interference and Streamlining Maintenance
Effective cable management is about more than just aesthetics. It’s crucial for preventing electromagnetic interference, which can disrupt sensitive electronics. Use zip ties or specialized drone cable organizers to neatly secure and route wires. This not only improves reliability but also simplifies maintenance and troubleshooting down the line. Well-organized wiring makes it much easier to trace faults and perform repairs or upgrades.
Component Positioning: Optimizing Weight Distribution and Performance
The placement of your components directly impacts your drone’s center of gravity, which in turn affects its stability and maneuverability. Distribute weight evenly, making sure the center of gravity aligns with the drone’s geometric center. This balanced weight distribution ensures stable flight and reduces stress on the frame and motors. For instance, positioning the battery too far forward or backward can create an imbalance, making controlled flight challenging.
Vibration Dampening for Sensitive Electronics
The vibrations generated by the motors and propellers can damage sensitive electronics like the Raspberry Pi and other sensors. Implement vibration dampening using specialized mounts or foam padding. This protects components from the constant stress of vibration, extending their lifespan and ensuring consistent performance. Consider using anti-vibration mounts designed specifically for flight controllers for enhanced stability.
Power Distribution Best Practices: Preventing Brownouts
A reliable power distribution system is essential to prevent brownouts – temporary drops in voltage that can lead to unpredictable behavior or even total system failure. Use a Power Distribution Board (PDB) specifically designed for drone applications and choose appropriately sized wiring to ensure sufficient current flow to all components. Proper grounding also prevents ground loops, which can introduce electrical noise and interference.
Redundancy and Safety Systems
Think about incorporating redundant systems for critical components like the power supply. This could involve a dual-battery setup with an automatic switchover if one battery fails. This significantly increases the drone's reliability, especially during long or complex missions. Safety features like automatic return-to-home functionality further enhance the drone’s operational safety. The versatility of the Raspberry Pi also allows developers to experiment with advanced drone features like autonomous navigation and AI-powered systems, increasingly important in the commercial drone sector. Learn more about the commercial applications of drones here.
Inspection and Quality Control
Before your first flight, conduct a thorough inspection using a quality control checklist. This checklist should cover every aspect of the assembly, from soldering and wiring to component placement and sensor calibration. A meticulous inspection can catch potential problems early, preventing them from becoming major issues during flight.
Maintaining Wiring Harnesses
Creating maintainable wiring harnesses simplifies future repairs and upgrades. Use labeled connectors and document your wiring scheme clearly. This organized approach streamlines troubleshooting and allows for quick identification of faulty connections or components, minimizing downtime and ensuring the drone is always ready for its next flight.
Troubleshooting Assembly Issues: Pre-Flight Diagnostics
Developing troubleshooting skills is essential for identifying and resolving assembly problems before they affect flight performance. Create a systematic approach to diagnosing issues, starting with basic checks like power connections and progressing to more complex tests like sensor readings. Practice identifying common assembly errors such as loose wires, faulty solder joints, or incorrect component configurations.
By mastering these professional assembly techniques, you can transform your Raspberry Pi drone from a collection of parts into a robust and reliable flying machine capable of reaching its full potential. This attention to detail and commitment to quality is the key to a successful build.
Programming Advanced Features That Impress Everyone
This section will help you take your Raspberry Pi drone from a simple remote-controlled gadget to a smart, autonomous aircraft. This impressive upgrade is achieved through careful programming and the development of advanced features. Let's delve into some key functionalities that can drastically improve your drone’s abilities.
GPS Navigation: Beyond Basic Waypoints
A solid GPS navigation system is much more than just plotting waypoints. It requires integrating the GPS module with your flight control software, filtering out inaccurate data for precise positioning, and creating algorithms to correct for GPS drift. Using libraries like `gpsd` and connecting them with your current flight controller software is a good starting point. Accurate GPS navigation is essential for autonomous missions and more advanced flight features, allowing your drone to hold its position accurately even in challenging conditions.
Computer Vision: Giving Your Drone Eyes
Computer vision opens a world of possibilities for your Raspberry Pi drone. Using libraries like OpenCV, you can implement object tracking. This allows the drone to automatically follow a moving target. This technology allows for features like obstacle avoidance, where the drone identifies and navigates around obstacles. Imagine training your drone to recognize specific objects and react accordingly. This improves safety and enables autonomous operation in complex environments.
Camera Stabilization: Smooth Footage, Every Time
Shaky video can ruin the best drone footage. Implementing camera stabilization algorithms corrects for drone movement and vibrations, leading to professional-looking results. These algorithms utilize sensor data from the gyroscope and accelerometer to calculate the necessary adjustments for the camera gimbal. This ensures steady and smooth video capture, regardless of wind gusts or quick maneuvers. It’s like having a tiny Steadicam built right into your drone.
Python Programming: The Language of Drones
Python is the go-to language for drone programming thanks to its readability and extensive libraries. It's crucial for implementing customized flight patterns, designing failsafe measures, and incorporating advanced features like machine learning. A failsafe measure, for example, might automatically land the drone if the battery drops below a set level, preventing expensive crashes. This level of control allows you to perfectly tailor your drone's behavior to your exact needs.
Machine Learning: Adaptive Flight
Integrating machine learning elevates your Raspberry Pi drone to an entirely new level. By training machine learning models, your drone can adjust to changing flight conditions, improve its performance, and even learn new tricks. For instance, you could train a model on a range of wind conditions. This allows the drone to automatically adjust its flight parameters to maintain stability in turbulent air. This adaptability creates a more robust drone capable of managing challenging scenarios.
Remote Monitoring and User Interfaces
Developing remote monitoring systems gives you access to real-time flight data, such as battery life, GPS location, and sensor readings. A user-friendly interface makes controlling complex features and operating the drone simpler and more intuitive. This not only enables longer flights but also provides valuable data about your drone's performance. A customized interface lets you tailor the controls and feedback to your specific needs. The micro drone market, including those potentially using Raspberry Pi technology for control, is rapidly growing. Using a Raspberry Pi in these small drones can boost their capabilities, leading to more refined control systems and potentially more sophisticated sensor integration. Learn more: Find more detailed statistics here.
Debugging and Performance Optimization
Debugging flight software is an essential skill in drone development. Mastering techniques like logging and remote debugging allows you to identify and resolve problems quickly. Optimizing code for performance gets the most out of your Pi's processing power without sacrificing flight stability. This is similar to fine-tuning your drone's brain for maximum performance, guaranteeing smooth handling of complex tasks without bottlenecks.
By becoming proficient in these advanced programming techniques, you can transform your Raspberry Pi drone into a sophisticated, high-performing autonomous system. This opens up exciting opportunities to explore the limits of DIY drone technology.
Testing And Tuning For Perfect Flight Performance
This stage marks the transformation of your Raspberry Pi drone from a collection of parts into a functioning aerial vehicle. Meticulous testing and adjustments are essential for optimal performance and preventing crashes. This guide covers ground tests, flight tests, and fine-tuning methods to ensure your drone becomes a reliable platform.
Ground Testing: Catching Problems Early
Before taking to the skies, ground testing is paramount. This involves individually checking each system. Start by testing the motors and ESCs, ensuring they respond correctly to the Raspberry Pi's commands. Next, calibrate the essential sensors: the gyroscope, accelerometer, magnetometer, and barometer. Accurate sensor readings are fundamental for stable flight. Finally, verify the communication links between the Raspberry Pi and all peripherals. Thorough ground testing identifies and resolves issues early, preventing potential mid-flight problems.
Progressive Flight Testing: Building Confidence Gradually
After completing ground tests, commence progressive flight testing. Begin with brief, low-altitude hover tests in a secure, open space. Observe the drone's behavior and adjust the Proportional-Integral-Derivative (PID) gains. PID tuning is essential, adjusting how the flight controller reacts to sensor input. It's akin to fine-tuning the drone’s reflexes. Correct PID values guarantee a stable hover and predictable flight.
Gradually increase flight time and altitude as you become more comfortable. Test maneuvers like forward, backward, and lateral movement. Note the drone's responsiveness and adjust control settings as needed. Documenting test results helps track progress and simplifies troubleshooting.
Parameter Tuning: Optimizing for Your Build
Each Raspberry Pi drone build has unique characteristics. Weight, component placement, and even the environment influence flight performance. Therefore, fine-tuning parameters is necessary for optimal results. This includes further PID gain adjustments, optimizing battery settings for desired flight duration, and adjusting the camera for optimal video quality. You might find this helpful: How to master drone flying for beginners.
Pre-Flight Inspections and Flight Log Analysis
Conduct a pre-flight inspection before each flight. Check the battery level, inspect propellers for damage, and ensure secure connections. Analyzing flight logs offers valuable insights into performance. Look for anomalies in sensor data, motor performance, and battery usage. These logs can uncover hidden issues and help optimize the drone for peak efficiency.
Diagnostics and Troubleshooting: Resolving Flight Issues Quickly
Despite thorough testing, problems can occur. Develop a systematic approach to diagnosis and resolution. This includes understanding error messages from the flight control software, checking sensor readings for discrepancies, and visually inspecting the drone. A methodical troubleshooting approach saves time and prevents further damage.
Safety Protocols and Iteration Strategies
Safety should always be paramount during test flights. Fly in open areas away from people and obstructions. Incorporate a return-to-home function as a safety net. Continuously iterate on your design and testing process. Document your findings and improve based on data analysis and flight observations.
Documentation: Replicating Success
Maintain thorough documentation of your build, testing procedures, and parameter settings. This proves invaluable for replicating successful configurations and troubleshooting future issues. It provides a clear record of your progress and allows you to share your knowledge. This systematic approach will help make your Raspberry Pi drone a predictable, reliable, and high-performing aircraft.
Scaling Your Success Into Advanced Applications
Your Raspberry Pi drone build is a fantastic accomplishment, but it's really just the starting point. This section explores exciting ways to expand your drone knowledge and delve into more advanced applications.
Enhancing Performance: Strategic Upgrades
Building a Raspberry Pi drone is an ongoing journey, not a destination. You can continuously improve its performance with targeted upgrades. Swapping out the motors for more powerful versions or using a higher-capacity battery can drastically increase flight time and how much weight your drone can carry. A better GPS module enables more precise autonomous navigation, allowing for more complex flight paths. These incremental upgrades refine your drone's abilities over time.
Payload Integration: Specialized Applications
The real power of a Raspberry Pi drone comes from its adaptability with different payloads. Imagine mounting a high-resolution camera and a gimbal for stunning aerial photography. You could also integrate sensors for environmental monitoring, gathering data on air quality or creating terrain maps. This transforms your drone into a specialized tool for scientific research or other practical uses.
Advanced Sensor Fusion: Autonomous Behaviors
Sensor fusion, the process of combining data from multiple sensors, unlocks sophisticated autonomous capabilities. Integrating data from the GPS, IMU (Inertial Measurement Unit), and barometer creates a much more robust and accurate flight control system. Add computer vision via a camera for obstacle detection and avoidance, and you're on your way to truly autonomous flights. This allows your drone to navigate complex environments and react intelligently in real-time.
Contributing to the Open-Source Community
The Raspberry Pi drone community flourishes thanks to open-source collaboration. Sharing your designs, code, and experiences helps others learn and accelerates the development of new technologies. Consider contributing to projects on platforms like GitHub. Your contributions benefit countless fellow drone enthusiasts. Sharing knowledge strengthens the community and drives the evolution of Raspberry Pi drone technology.
Turning Your Hobby Into a Venture
Your Raspberry Pi drone project has the potential to become more than just a hobby. Think about teaching others how to build and program drones through educational workshops or courses. With the proper licensing and by following regulations, you could even turn your skills into a business, providing services like aerial photography, surveying, or other drone-based operations. Here’s a resource you might find helpful: How to master your Part 107 drone license exam. This could turn a passion into a rewarding and potentially profitable career.
Networking and Continued Learning
Connecting with other makers through online forums, local groups, and conferences provides valuable networking opportunities and resources for continual learning. Stay informed about the latest drone technology through online publications and industry events. This allows you to learn from experienced builders and keep pace with this quickly evolving field.
Regulatory Considerations
As you explore more advanced drone applications, understanding and adhering to drone regulations, such as those set by the FAA (Federal Aviation Administration) in the United States, is crucial. These regulations cover important aspects of drone operation, including safety procedures, airspace restrictions, and licensing requirements for different types of drone activities. Staying informed ensures responsible and legal drone use.
Building a Sustainable Drone Development Practice
A successful long-term approach to drone development involves meticulous project documentation, regular backups of your code and settings, and a systematic approach to testing and refinement. This organized approach not only saves you time and trouble but also contributes to a more professional and satisfying drone building experience.
The following table outlines several upgrade paths you can explore:
Raspberry Pi Drone Upgrade Options
Comprehensive overview of advanced upgrades and modifications for enhancing your raspberry pi drone capabilities
Upgrade Category | Components Required | Difficulty Level | Expected Benefits | Cost Range |
|---|---|---|---|---|
Enhanced Propulsion | Upgraded motors and ESCs, higher-pitch propellers | Medium | Increased speed, maneuverability, payload capacity | $50 - $150 |
Extended Flight Time | Higher capacity LiPo battery | Easy | Longer flight durations | $30 - $80 |
Improved Navigation | Advanced GPS module with RTK capabilities | Medium | More precise positioning, enhanced autonomous navigation | $50 - $200 |
Advanced Sensing | Obstacle avoidance sensors, LiDAR, multispectral camera | Medium to Hard | Enhanced safety, autonomous obstacle avoidance, specialized data acquisition | $100 - $500+ |
Increased Computing Power | More powerful Raspberry Pi model (e.g., Raspberry Pi 5) | Easy | Faster processing for complex algorithms and computer vision tasks | $60 - $100 |
This table provides a starting point for enhancing your drone. Research component compatibility and adjust your budget accordingly.
For more resources and guidance on your drone journey, check out JAB Drone. They offer expert advice, in-depth product reviews, and the latest news in the drone world. From beginner guides to advanced tutorials, JAB Drone is a valuable resource for all things drone related.
Comments