DIY Drone Kit for Beginners: Build & Fly Now
- James Baptiste

- Apr 19, 2025
- 12 min read
Why Building Your Own Drone Beats Buying Ready-to-Fly
Building a drone from a DIY kit offers unique advantages compared to buying a ready-to-fly model. This hands-on process transforms you from a simple user into a true creator. You gain a deeper understanding of how these incredible machines work.
This understanding leads to some important benefits. Let's explore why building your own drone can be such a rewarding experience, especially if you're just starting out.
Understanding the Inner Workings
One of the biggest advantages of a DIY drone is the intimate knowledge you'll develop about its parts. You'll see how each component contributes to the drone's overall function, from the frame and motors all the way to the flight controller and power system.
This isn't just theoretical knowledge. It's practical and empowering. Understanding how, for example, the motors work with the propellers will give you insights into flight dynamics and control. This foundation is essential for troubleshooting and repairs later on.
Mastering Troubleshooting and Repair
Crashes are a part of learning to fly. But with a DIY drone, a mishap doesn't mean you're grounded. Because you understand the internal components, you can diagnose problems quickly and efficiently.
You can often fix your drone yourself, saving you the time and expense of sending a ready-to-fly model back to the manufacturer. This ability to troubleshoot and repair becomes incredibly valuable as you continue flying.
Cost-Effectiveness and Accessibility
Another great reason to build your own drone is the significant cost savings. You can build a first-person-view (FPV) drone for under $150. This is much less expensive than many ready-to-fly options, which can cost hundreds of dollars.
This low barrier to entry makes drone technology more accessible. The DIY approach also equips you with valuable repair skills, reducing long-term costs. Learn more about affordable FPV drone builds here.
Developing Transferable Skills
Building a DIY drone isn't just about flying. It's about developing valuable skills that extend beyond this hobby. You'll gain experience in electronics, engineering, and problem-solving.
These skills are valuable in our tech-driven world and can open up new opportunities. From soldering and wiring to programming and calibration, the learning curve is surprisingly manageable, thanks to plentiful online resources and communities. Before your first flight, be sure to consult a comprehensive preflight checklist drone for a safe and successful takeoff.
Customization and Upgradability
Finally, building your own drone gives you amazing customization options. You're not stuck with the features of a pre-built model. As your skills and interests grow, you can upgrade parts to boost performance or add new capabilities.
This flexibility lets you tailor your drone to your specific needs, whether for photography, racing, or programmable features. This level of personalization is a defining aspect of the DIY drone experience.
The Building Blocks: Understanding Drone Components
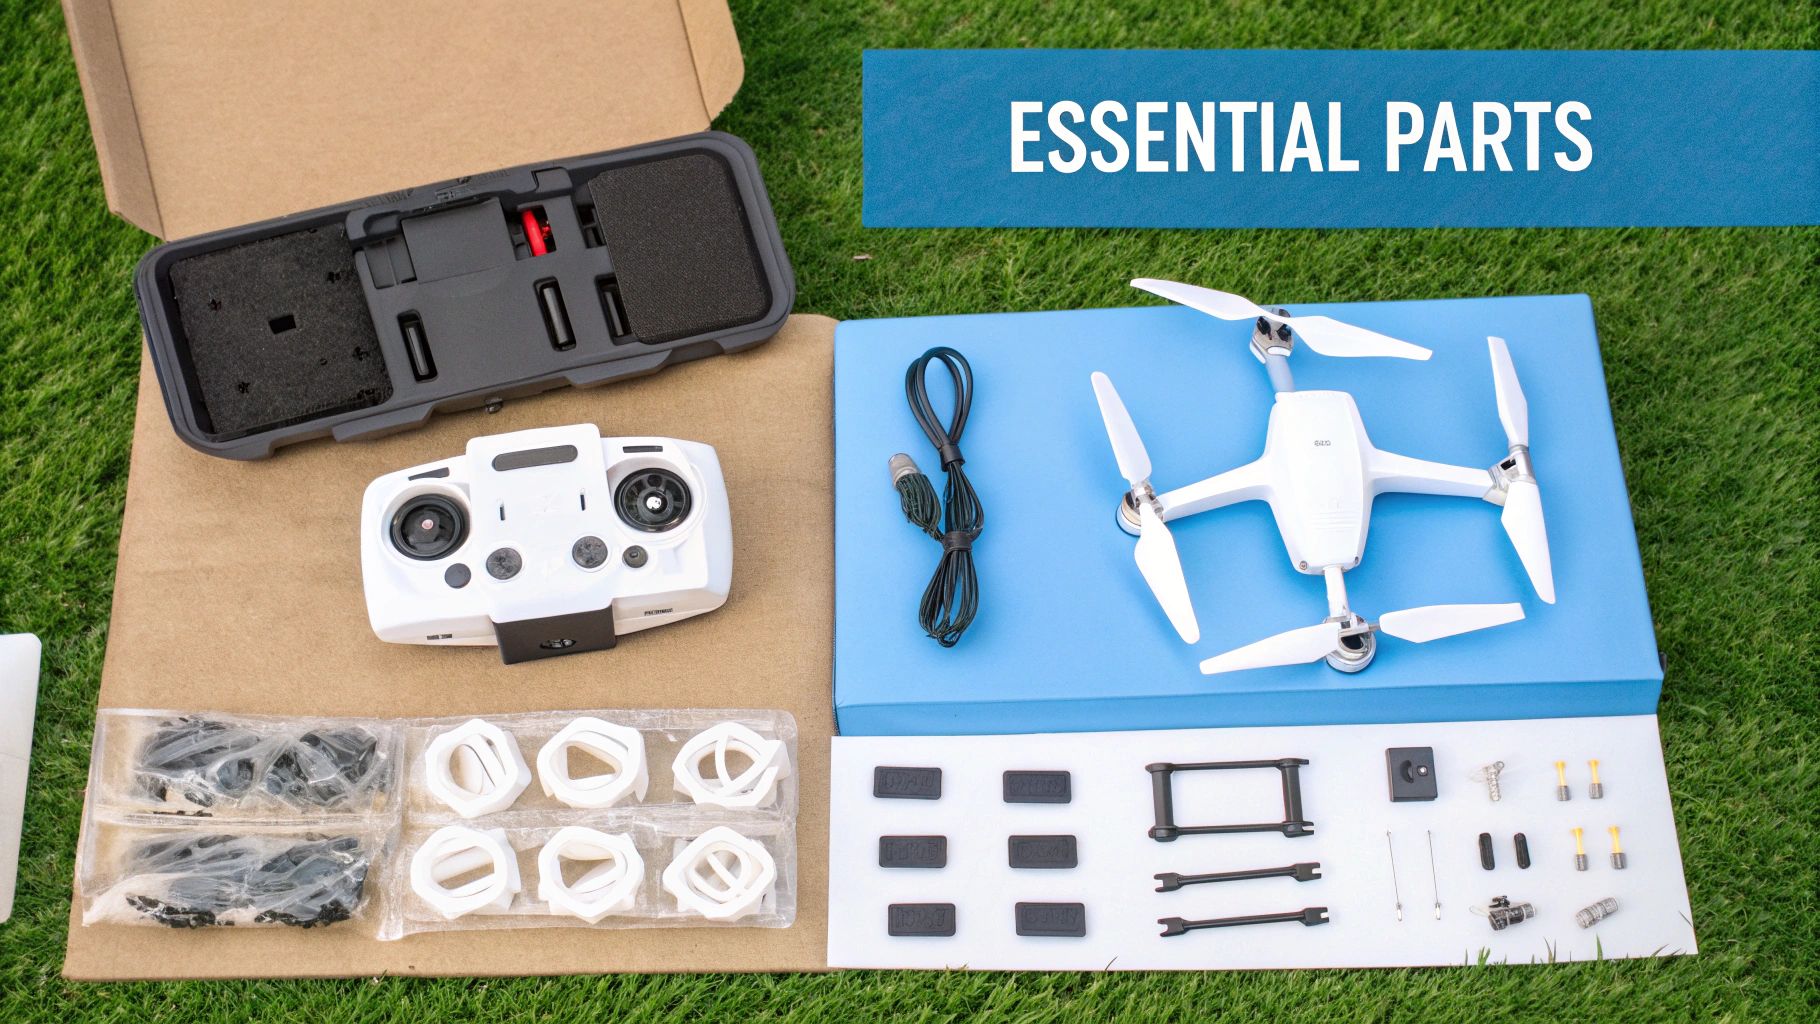
Building your first DIY drone can feel like a daunting task. Understanding the core components is the first step towards a successful build. This section breaks down the essentials, providing a solid foundation for your drone-building journey. We'll explore each part's function, helping you choose the right components and avoid common beginner mistakes.
The Frame: Your Drone's Foundation
The frame is the backbone of your drone. It provides the structure that supports all the other components. Durability and lightweight construction are key factors for beginners. Common frame materials include carbon fiber, plastic, and even wood for DIY enthusiasts. Frame size is also crucial. Micro frames (100-150mm) and small frames (150-250mm) are generally recommended for beginners due to their easier handling characteristics.
Motors: Powering Your Flight
Motors are the driving force behind your drone, responsible for spinning the propellers to generate lift and control movement. There are two primary types of motors: brushed and brushless. While brushless motors are typically more expensive, they offer significant advantages in terms of durability, efficiency, and quieter operation. This makes them the preferred choice for most DIY drone kits.
Propellers: Generating Lift and Control
Propellers translate the rotational energy from the motors into thrust, enabling your drone to take flight. Propellers come in various sizes and pitches. These specifications affect the drone's lifting capacity and maneuverability. Matching the propeller size and pitch to your motors and frame is essential for optimal performance.
Electronic Speed Controllers (ESCs): Precision Power Management
Electronic Speed Controllers (ESCs) act as the bridge between the flight controller and the motors. They precisely regulate the power flow to the motors, controlling their speed and responsiveness. This allows for accurate control and stable flight.
Flight Controller: The Brain of the Operation
The flight controller is the central processing unit of your drone. It receives input from the remote control and onboard sensors, processing this information to control the ESCs and motors. This sophisticated component is responsible for maintaining stability and responsiveness during flight.
Power System: Fueling Your Drone
The power system consists of the battery and the power distribution board (PDB). The battery provides the energy to power all the components, while the PDB distributes that power effectively. Choosing the right battery capacity is vital for achieving your desired flight times.
To help you navigate the world of drone components, we've compiled a comparison table outlining the options available to beginners.
Beginner Drone Component Comparison: A comparison of different component options for beginner drone builders, highlighting the pros, cons, and typical costs of each.
Component Type | Options | Pros | Cons | Price Range | Beginner Recommendation |
|---|---|---|---|---|---|
Frame | Carbon Fiber, Plastic, Wood | Carbon Fiber: Lightweight, Durable; Plastic: Affordable, Easy to Repair; Wood: DIY-friendly | Carbon Fiber: Expensive; Plastic: Less Durable; Wood: Requires Expertise | $20-$100 | Plastic or Carbon Fiber depending on budget |
Motors | Brushed, Brushless | Brushless: Durable, Efficient, Quiet | Brushless: More Expensive | $10-$50 per motor | Brushless |
Propellers | Various Sizes and Pitches | Optimized for specific flight characteristics | Requires careful selection to match motors and frame | $5-$20 per set | Consult online resources and guides |
ESCs | Various Amperage Ratings | Control motor speed and responsiveness | Need to match motor and battery specs | $10-$30 per ESC | Choose based on motor and battery requirements |
Flight Controller | Various Flight Controllers (e.g., Ardupilot) | Stability and control features | Requires configuration and setup | $30-$100 | Start with a user-friendly flight controller |
Battery | LiPo Batteries (Various Capacities) | High energy density | Requires careful handling and charging | $20-$50 | Choose a capacity that balances flight time and weight |
This table highlights the variety of options available for each component, along with their respective advantages and disadvantages. Careful consideration of these factors will help you build a drone that meets your specific needs.
Furthermore, understanding component compatibility is essential for a successful build. Ensure your chosen frame, motors, propellers, ESCs, and flight controller work together seamlessly. Consulting online resources or guides like this one and this sitemap can help you verify compatibility. This careful planning will pave the way for a successful and rewarding drone-building experience.
Five DIY Drone Kits That Actually Work for Beginners
So, you're ready to embark on the exciting journey of building your own drone? Choosing the right kit is the first crucial step. This guide cuts through the noise, offering a practical look at five DIY drone kits that truly deliver for beginners. We'll cover everything from the quality of the components and clarity of the instructions to upgrade possibilities and that exhilarating first flight.
Understanding Your Needs
Before we delve into the specifics of each kit, it's important to consider your drone goals. Are you interested in aerial photography, fast-paced racing, or exploring the world of programmable drones? Identifying your objectives will help you select a kit that aligns with your interests. For instance, if you're passionate about photography, you'll want a kit with a stable frame and a camera mount. If racing is your calling, then a lightweight frame and powerful motors are key.
Top 5 DIY Drone Kits for Beginners
To help you compare and contrast, we've compiled a table summarizing the key features of our top five picks. This table offers a snapshot of each kit's skill level, flight time, build time, price, key features, and ideal use case.
Kit Name | Skill Level | Flight Time | Build Time | Price | Key Features | Best For |
|---|---|---|---|---|---|---|
Flybrix Basic Kit | Beginner | 5-7 minutes | 1-2 hours | $149 | Modular, durable, easy to repair | Kids and absolute beginners |
Holybro Kopis Cinewhoop | Intermediate | 8-10 minutes | 2-3 hours | $249 | Pre-tuned for cinematic shots, stable flight | Aerial photography and videography |
iFlight Nazgul5 V2 | Intermediate | 6-8 minutes | 3-4 hours | $299 | Durable, agile, great for freestyle flying | FPV racing and freestyle |
Eachine Tyro129 | Advanced | 10-12 minutes | 4-5 hours | $199 | Long flight time, GPS, programmable features | Long-range flights and autonomous missions |
DIY FPV Combo Kit from JAB Drone (Hypothetical Kit based on JAB Drone's focus) | Beginner to Intermediate | Variable, dependent on build | Variable, dependent on chosen components | Variable, dependent on chosen components | Customizable, scalable, component options cater to different budgets and skill levels | Users who want to tailor their drone to their exact specifications, learn about component selection, and upgrade over time. Resources and support available through the JAB Drone community (Sky Squad) |
Kit Breakdown
Let's take a closer look at each kit. The Flybrix Basic Kit is an excellent choice for beginners due to its simplicity. Its modular design using LEGO-like bricks makes it incredibly user-friendly, especially for kids and those brand new to drone building.
If capturing breathtaking aerial footage is your passion, the Holybro Kopis Cinewhoop is a fantastic option. It comes pre-tuned for cinematic shots, ensuring smooth and stable footage.
For thrill-seekers and aspiring racers, the iFlight Nazgul5 V2 is a top contender. Its durable frame and agile handling make it perfect for FPV racing and freestyle aerobatics.
The Eachine Tyro129 caters to those seeking longer flight times and more advanced features. With GPS and programmable capabilities, this kit opens up exciting possibilities for long-range flights and autonomous missions.
Finally, if you crave complete control over your drone's specifications, the hypothetical DIY FPV Combo Kit from JAB Drone offers the ultimate flexibility. This kit (still under development) embodies JAB Drone's philosophy of customization, allowing you to select individual components based on your budget, skill level, and desired features. This approach fosters deeper learning and a truly personalized build. The supportive JAB Drone community provides valuable resources and guidance throughout the process. You can check out their blog categories and event pages for the latest news and community happenings.
By carefully weighing these options and considering your individual needs, you'll find the perfect DIY drone kit to kickstart your drone-building adventure.
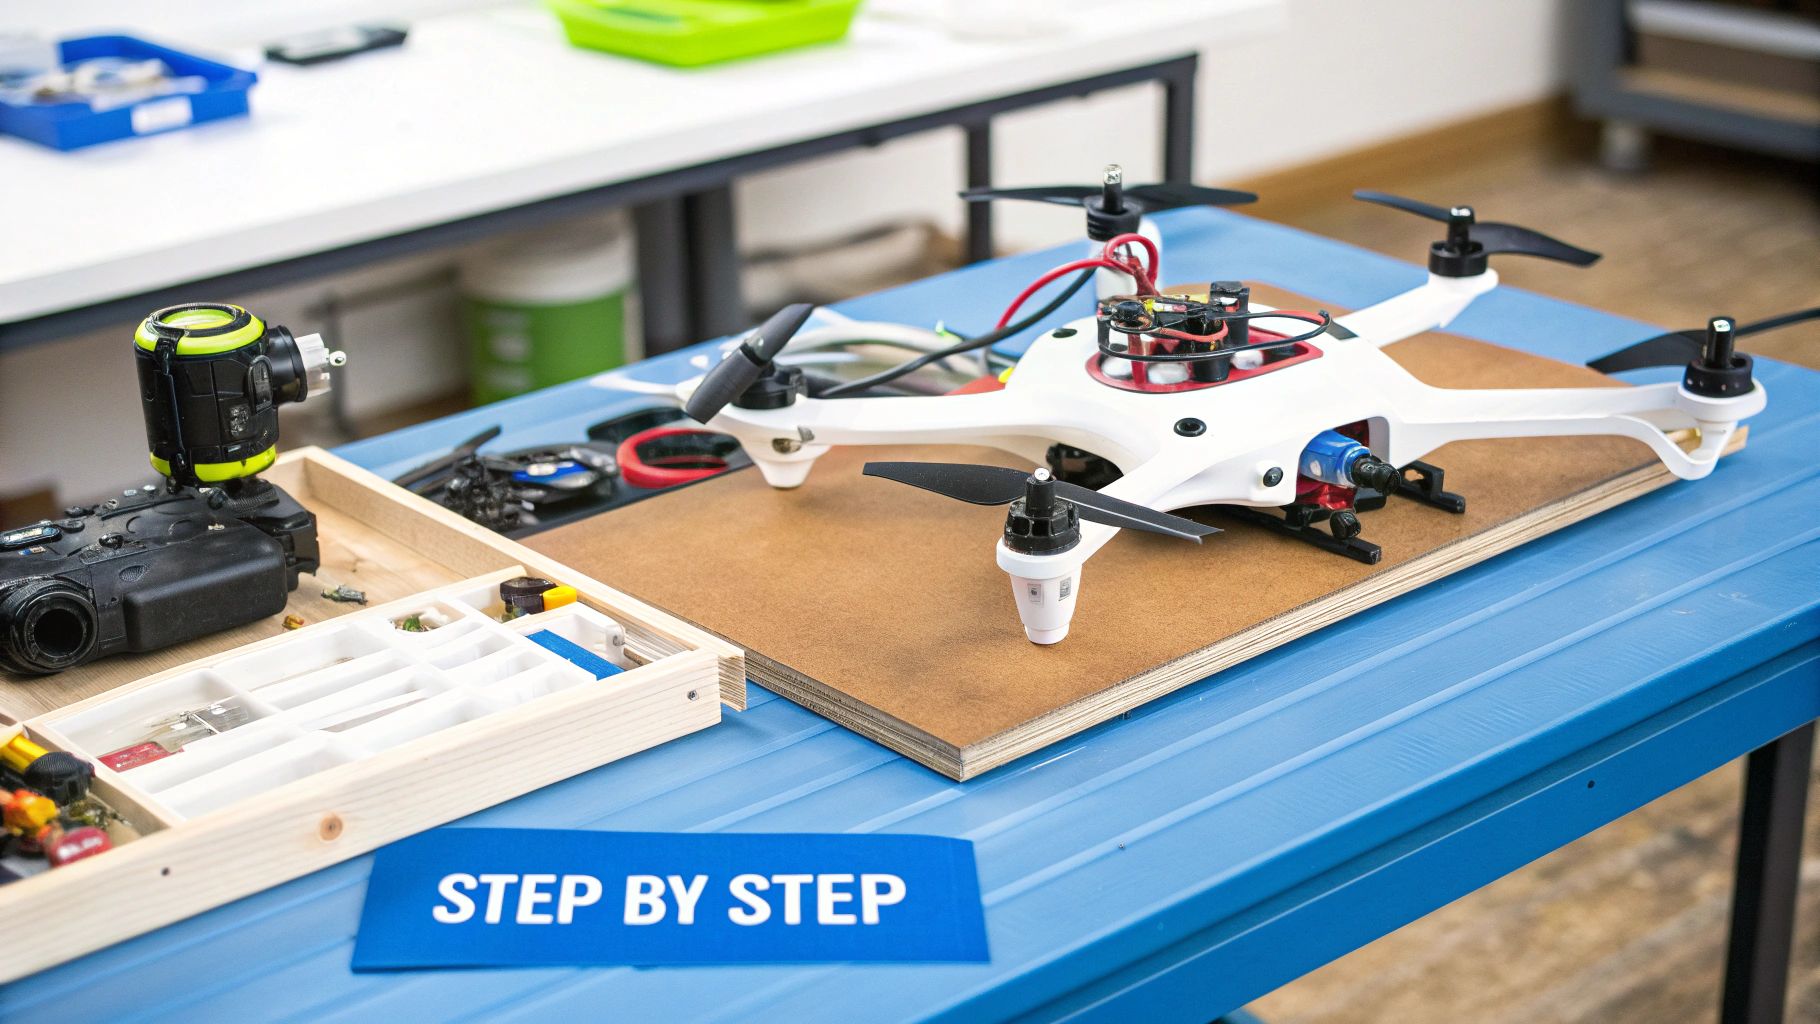
From Parts to Flight: Your Step-by-Step Assembly Guide
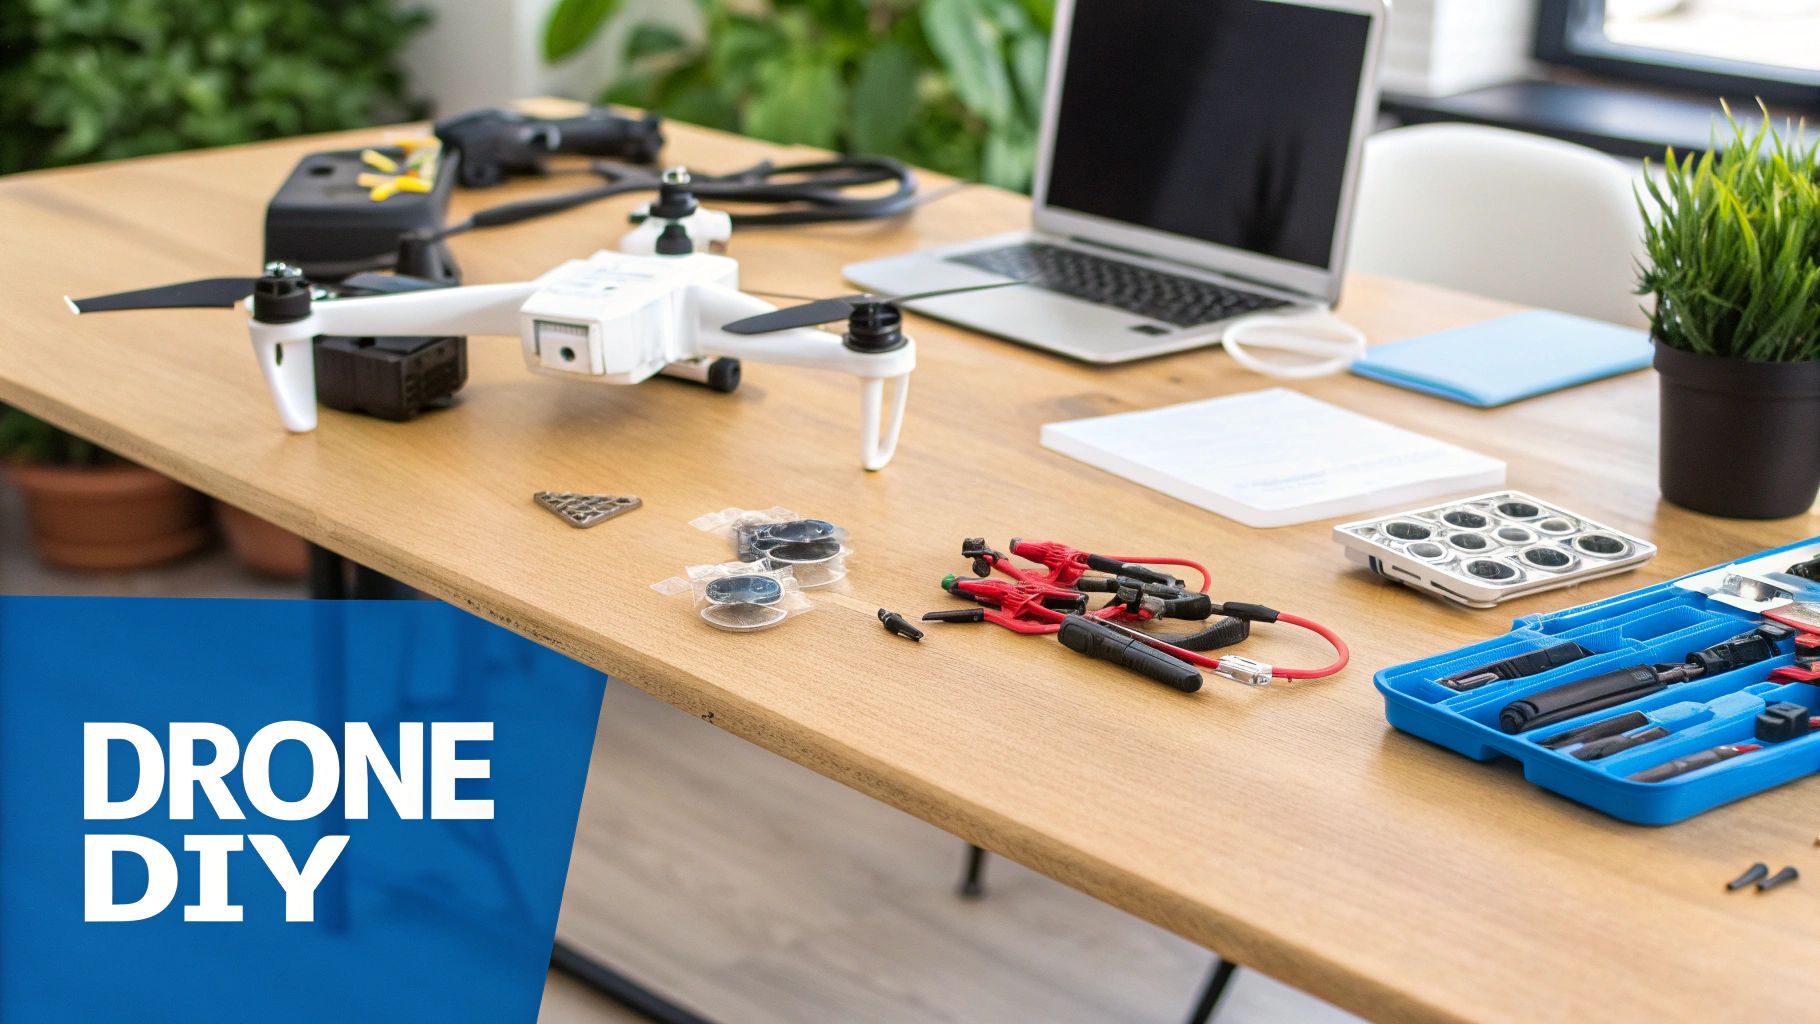
Now that you know the individual parts of a beginner's DIY drone kit, let's get to the exciting part: assembly! This guide provides a detailed, step-by-step roadmap, anticipating common challenges and offering solutions. By the end, you'll have a working drone and the confidence to tackle more complex projects.
Setting Up Your Workspace
Before you start, prepare a clean, organized, and well-lit workspace. This will streamline the assembly process and prevent losing small parts. Gather your tools, including a soldering iron, wire strippers, screwdrivers, and zip ties. Having everything readily available will improve your building experience.
Assembling the Frame
Begin by assembling the frame, the core structure that holds everything together. Carefully follow the instructions included with your specific DIY drone kit. Secure all frame components tightly for a stable and robust base.
Motor Installation and Wiring
Next, install the motors onto the frame. Note the motor rotation direction (clockwise or counter-clockwise). Incorrect orientation will prevent proper flight. Connect the motor wires to the Electronic Speed Controllers (ESCs), ensuring correct polarity to avoid damage. Neatly route and secure the wires to prevent tangles and potential problems during flight. Good wire management is key.
Mounting the Flight Controller
The flight controller acts as the drone's brain. Carefully mount it onto the frame, ensuring it's secure. Connect the ESC wires, receiver wires, and battery connector to the flight controller, following the provided wiring diagram. Double-check all connections to prevent issues.
Connecting the Radio Receiver
The radio receiver allows communication between your drone and the transmitter (remote control). Connect the receiver to the flight controller, following the correct channel mapping for accurate control inputs. This ensures your drone responds correctly to your commands.
Propeller Attachment
Attach the propellers to the motors, noting the correct propeller type for each motor (pusher or puller). Secure them tightly to prevent detachment during flight. Check out our guide on blog categories for more information on drone components and assembly. For inspiration on selling your creations, explore ideas for a DIY Kits Shopify store.
Calibration and Configuration
After assembling the hardware, calibrate the ESCs, radio, and flight controller. This crucial step ensures all components work together smoothly. Use the provided software or consult online resources for specific calibration procedures. Many kits utilize Betaflight, an open-source flight controller firmware, for configuration and tuning.
Final Checks and Safety Precautions
Before your first flight, perform a thorough pre-flight check. Ensure all connections are secure, propellers are correctly attached, and the battery is fully charged. Familiarize yourself with local drone regulations and safety guidelines for a safe and successful first flight.
Beyond Basic Flight: Programming Your DIY Drone
Building your own DIY drone kit is a rewarding experience, but the real journey begins with programming. This unlocks a new level of control, transforming your drone from a simple flyer into a smart aerial platform. Surprisingly, even for beginners, drone programming is more accessible than it seems.
Programming Languages and Platforms
Python is the most popular and beginner-friendly language for drone programming. Its clear syntax and extensive libraries make it perfect for controlling flight, automating tasks, and integrating sensors. Many DIY drone kits are designed with Python compatibility in mind.
Platforms like DroneKit and ROS (Robot Operating System) offer powerful tools and frameworks for building sophisticated drone applications. Even with minimal coding experience, you can achieve a lot. For instance, DroneKit simplifies complex tasks like waypoint navigation and autonomous flight, letting you focus on the creative side of programming.
Programming Basic Automation
Start with simple projects to understand how code translates into real-world drone actions. A classic beginner project is programming a square flight path. This involves defining waypoints and commands for takeoff, flight to each waypoint, and landing.
Another foundational project is altitude hold, where you program the drone to maintain a specific altitude using barometer readings. These projects introduce core programming concepts with visible results.
Advanced Programming and Sensor Integration
As your skills develop, explore advanced features like sensor integration. DIY drone kits often include GPS, barometers, and ultrasonic sensors. Programming these sensors allows for autonomous behaviors based on environmental feedback.
For example, program your drone to avoid obstacles using ultrasonic sensor data or follow a GPS-defined route autonomously. The affordability, educational value, and customization possibilities of DIY drone kits, especially programmable ones, have fueled significant global interest. Learn more about the rise of programmable drones here.
Custom Flight Patterns and Behaviors
Programming allows you to create custom flight patterns beyond basic waypoints. Program spiral patterns, figure-eights, or even choreographed flight routines. This level of customization lets you express your creativity and personalize your drone. Further exploration into Python libraries and frameworks like ROS opens up possibilities from computer vision-based navigation to swarm robotics.
Troubleshooting and Debugging Your Code
Like building the hardware, programming has its challenges. Learning to troubleshoot and debug is essential. Online forums, communities, and tutorials offer valuable resources for overcoming coding hurdles. Embrace the learning process; each bug is a chance to deepen your understanding. This persistence will strengthen your connection with your DIY drone and unlock its full potential.
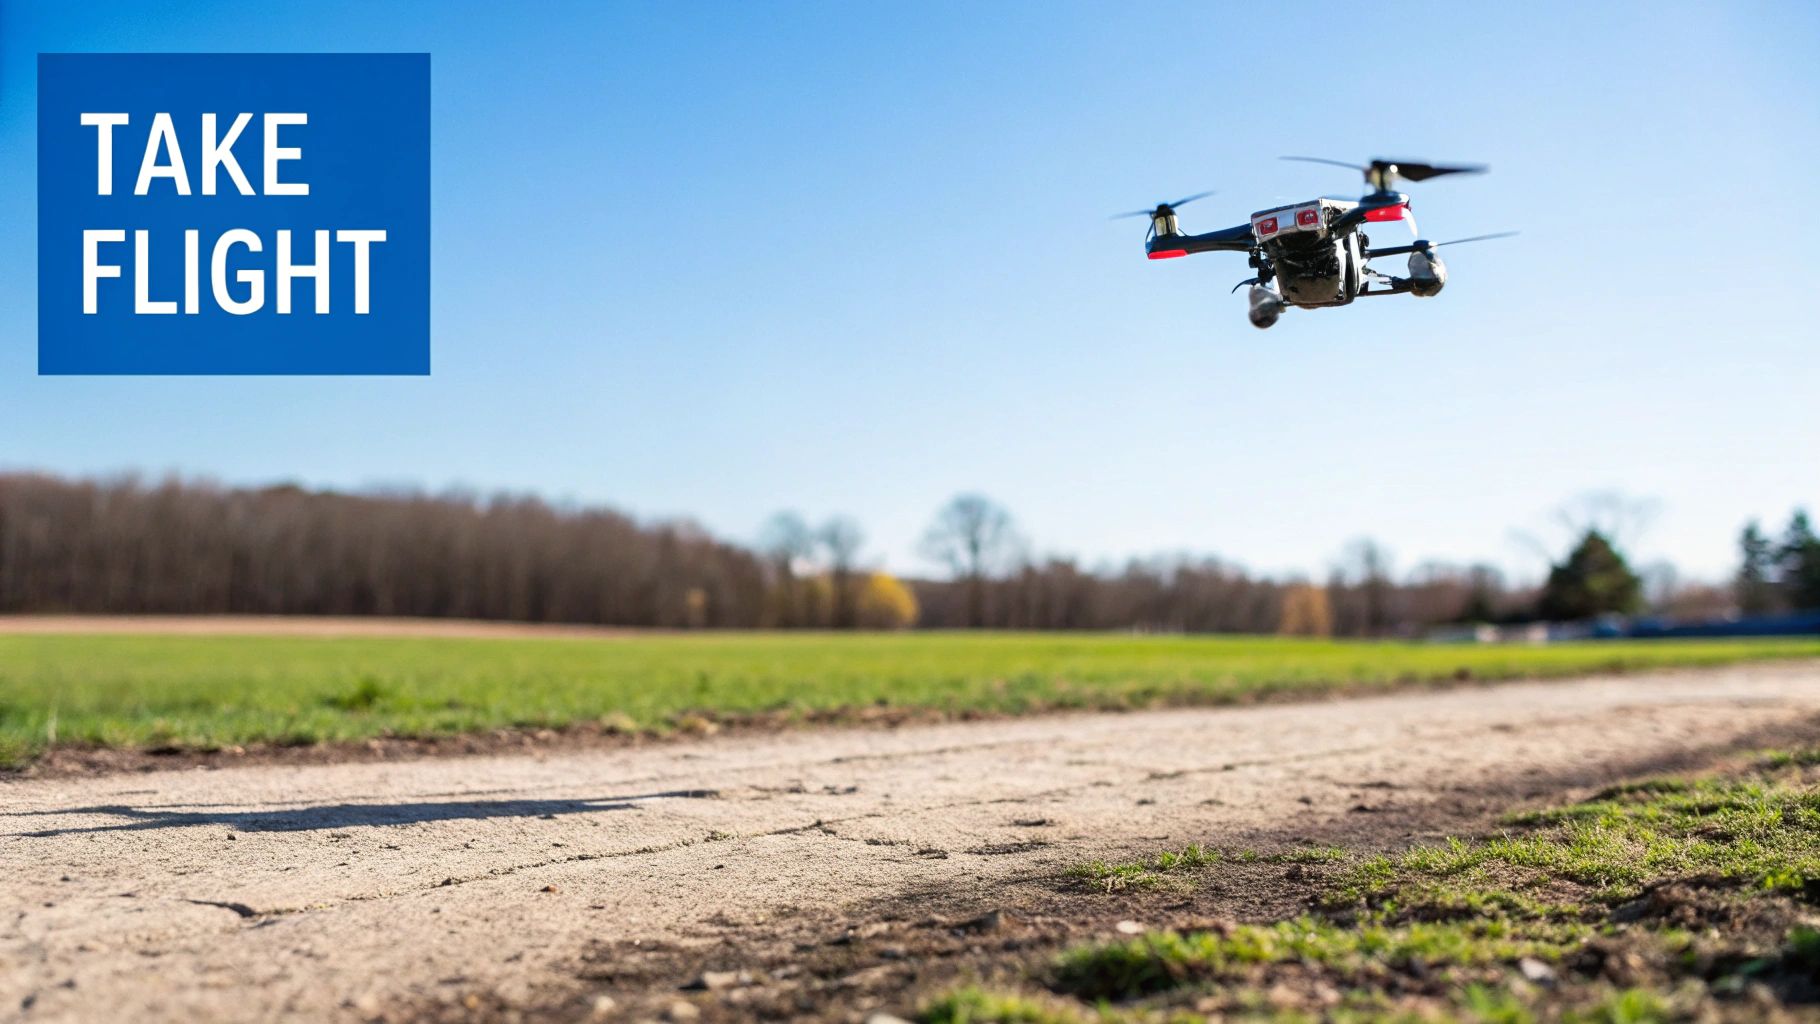
Your First Flight: Success Strategies and Safety Essentials
Building your DIY drone kit is a huge accomplishment. Now, the exciting part: flying! Your first flight requires careful planning. This section covers pre-flight checks, location selection, legal requirements, and practice exercises for a successful and safe maiden voyage.
Pre-Flight Checklist: Don't Skip the Essentials
Just like airline pilots, you need a pre-flight checklist. This confirms everything is ready and minimizes potential issues.
Battery Check: Make sure your battery is fully charged. A low battery can cause unexpected landings or crashes.
Propeller Check: Look for any damage or loose fittings on your propellers. Secure propellers are essential for stable flight.
Motor Check: Briefly run your motors to ensure they spin correctly and smoothly.
Radio Check: Test your transmitter and receiver connection. Verify that all controls respond correctly.
Frame Check: Examine the frame for cracks or weaknesses. A strong frame is vital for safe flight.
Choosing the Right Environment
Your first flight's location is important. Find a large, open area free of obstacles like trees, buildings, and power lines. A park or field is ideal. Avoid flying in windy conditions, which can make controlling the drone difficult, especially for new pilots.
Begin with short flights close to the ground. This helps you get used to the controls before flying higher or further. Gradually increase flight time and distance as you become more confident.
Know the Legal Requirements
Before taking off, understand local drone regulations. Many areas require drone registration, particularly for drones over a certain weight. Be aware of no-fly zones, such as airports and military bases.
Altitude limits also exist. Regulations often restrict drones to 400 feet above ground level. Know these rules to avoid penalties.
Skill-Building Exercises: Mastering the Controls
Drone piloting requires coordination and practice. Start with basic maneuvers: hovering, forward/backward flight, and gentle turns. As you improve, try more advanced maneuvers like banked turns and figure eights.
Consider checking out JAB Drone's event page for workshops and meetups related to drone piloting. These events offer practical experience and connect you with seasoned pilots.
Handling Emergencies and Post-Flight Analysis
Even with perfect planning, problems can occur. Learn recovery techniques, like how to regain control if the drone drifts or how to execute an emergency landing. After every flight, review your performance. What went well? What could be better? This post-flight analysis will make you a better pilot.
Ready for more? Explore drone possibilities with JAB Drone. We provide expert advice, product reviews, and a community of drone enthusiasts.
Comments