Build a Drone with Raspberry Pi and Drones
- James Baptiste

- Aug 13, 2025
- 15 min read
Updated: Aug 13, 2025
Ever wondered what it takes to build a drone that's more than just an off-the-shelf toy? This guide is all about tackling the rewarding challenge of combining a Raspberry Pi and a drone. Taking the DIY route opens up a world of unmatched flexibility for projects like custom aerial photography rigs or fully autonomous navigation systems. You're not just flying; you're creating a smart, programmable machine that leaves standard models in the dust.
Your Guide to Building a Custom Drone
Welcome to the exciting world of custom drone building, where you call all the shots. Commercial drones are great, but they often come with locked-down software that limits what you can do. Using a Raspberry Pi as the brain of your build blows those limitations wide open.
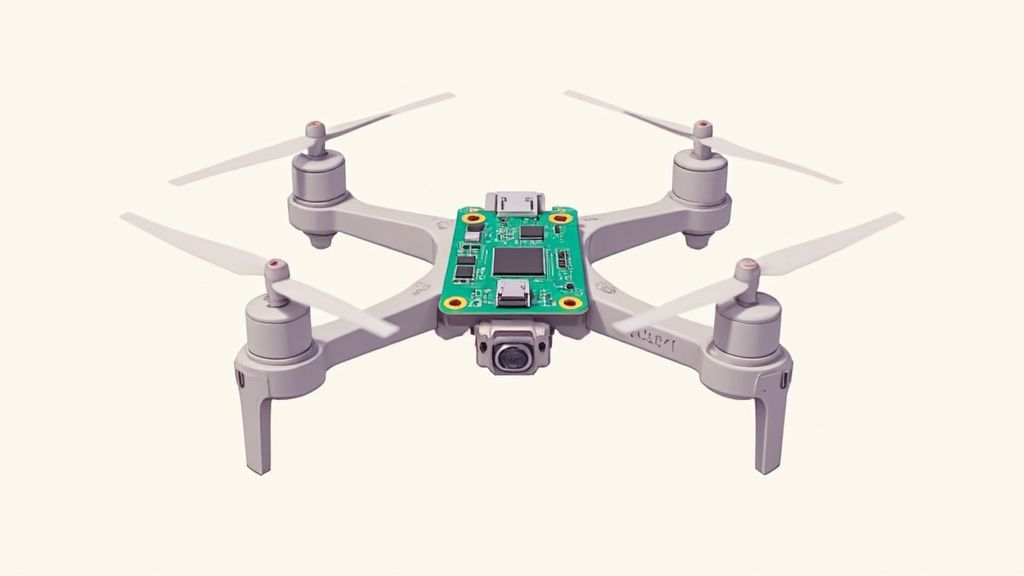
Think of the Raspberry Pi as more than just a component—it's the powerful, programmable core of your entire drone. This tiny single-board computer transforms a standard quadcopter into a platform for genuine innovation. You're not just snapping parts together; you're architecting a system you can code and command from the ground up.
Why Choose a Raspberry Pi Build?
The biggest win for integrating a Raspberry Pi into your drone is one word: customization. Sure, off-the-shelf drones are fantastic for getting in the air quickly, but you're stuck playing in the manufacturer's sandbox.
A Raspberry Pi drone, on the other hand, lets you take complete control.
Implement Custom Flight Logic: You can program autonomous flight paths from scratch, create sophisticated follow-me modes, or even design your own stabilization algorithms using Python or C++.
Integrate Advanced Sensors: Need to add a high-resolution camera, LiDAR for true obstacle avoidance, or specialized sensors for agricultural mapping? The Pi makes it straightforward.
Process Data Onboard: The Pi’s processing muscle means you can run real-time video analysis, object detection, or data logging directly on the drone itself, reducing the need to constantly stream data to a ground station.
This kind of project is the perfect intersection of hardware, software, and aerodynamics, offering an incredible hands-on learning experience. It's about taking full ownership of your creation, from soldering the electronics to writing the very code that tells it how to fly.
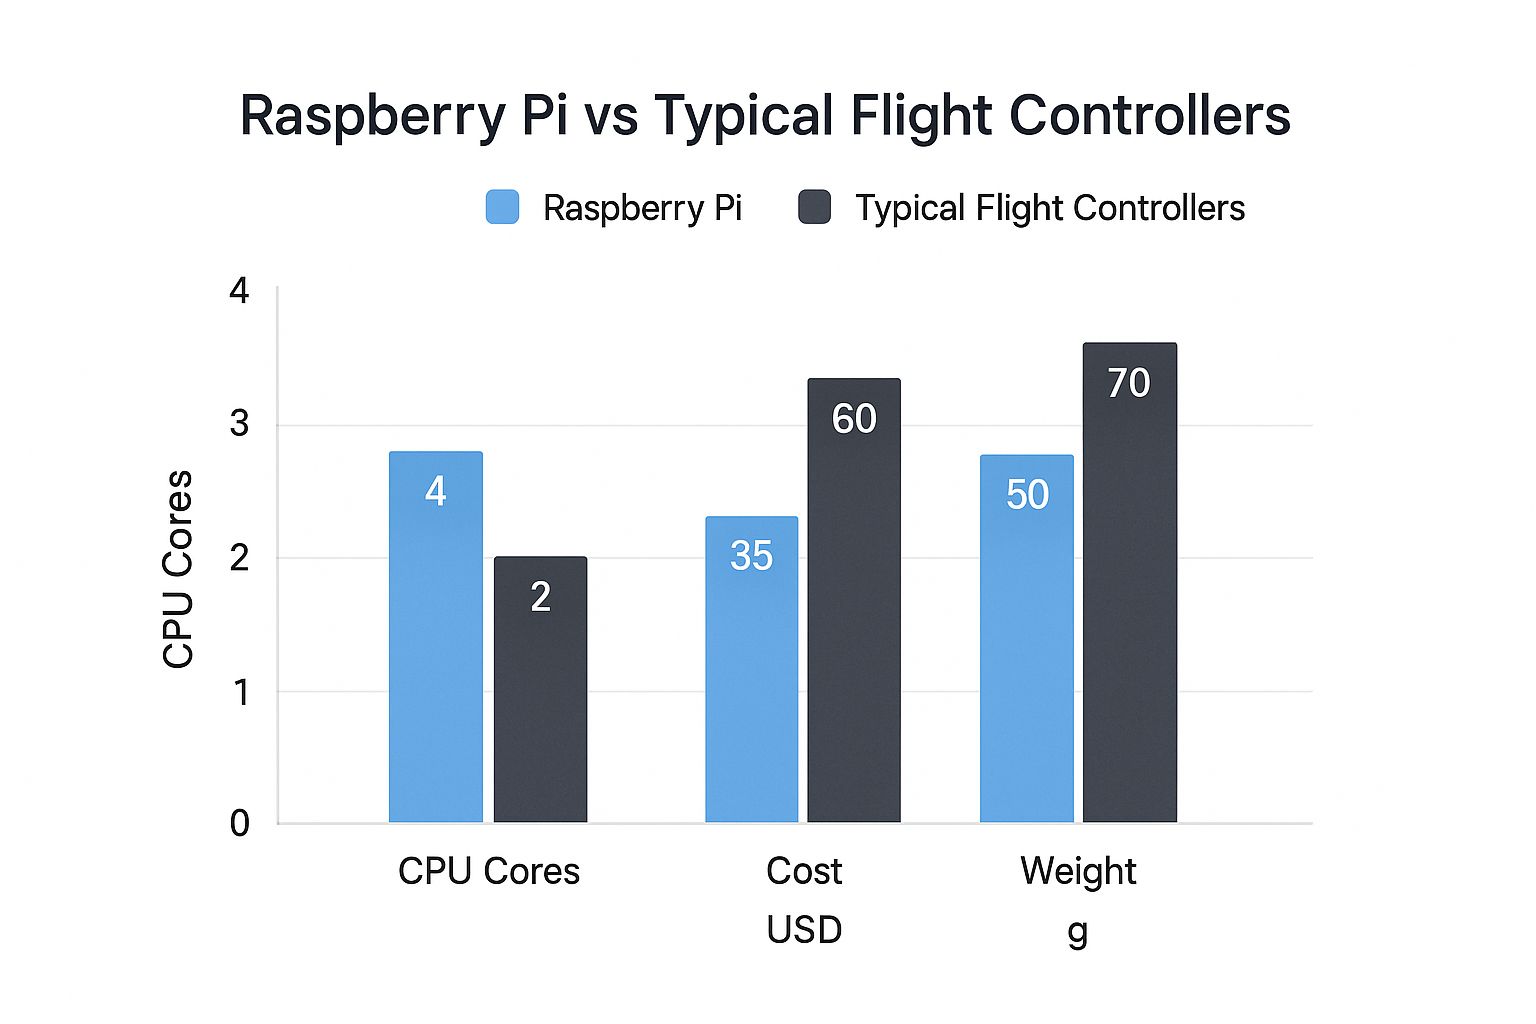
The Raspberry Pi has been a game-changer in making advanced tech accessible. Since its launch in 2012, it has become a favorite for hobbyists and researchers alike. By the end of 2019, over 30 million boards had been sold, with countless of them ending up as the brains of custom flight controllers.
The real magic happens when you realize you’re not limited by pre-installed software. If you can code it, you can make your drone do it. This is the core appeal of the Raspberry Pi and drones combination.
This guide is designed to walk you through the whole process, from picking your components all the way to that triumphant first flight. For an even deeper look into the specifics of this kind of project, you might find our guide to building a Raspberry Pi UAV helpful. Let’s get started.
Choosing Your Core Drone Components
Now that you’ve got the brains of the operation—your Raspberry Pi—it’s time to give it a body. Picking the right hardware is a delicate balancing act. You're constantly weighing your budget against performance goals and the specific flight characteristics you're after. Every single component plays a crucial role in how your drone will ultimately perform in the air.
Core Component Selection Guide
To get started, you need to understand how the essential parts work together. This table breaks down the core components, what they do, and what you should look for when making your selections for a Raspberry Pi-based build.
Component | Function | Key Selection Criteria |
|---|---|---|
Drone Frame | The structural skeleton that holds all components. | Configuration (quadcopter for agility, hexacopter for stability), material (carbon fiber for durability, plastic for beginners), and size (to accommodate all your hardware). |
Motors | Provide the thrust needed for lift and maneuverability. | Thrust output (must exceed drone's total weight), and kV rating (RPM per volt), which must match your propellers and battery voltage. |
ESCs | Control the speed of each motor based on signals from the flight controller. | Amperage rating (must be higher than the motor's maximum current draw) and firmware (BLHeli_S or BLHeli_32 are common). |
Propellers | Generate lift by spinning and pushing air downward. | Size and pitch must be compatible with your motor's kV rating and the frame's maximum propeller size. |
Flight Controller | The drone's nervous system; stabilizes flight and processes sensor data. | Compatibility with Raspberry Pi (e.g., NAVIO2, Pixhawk), and the sensors it includes (gyroscope, accelerometer). |
Power System | The LiPo battery and Power Distribution Board (PDB). | Battery voltage and capacity (determines flight time and power), and a PDB that can handle the total current draw. |
Building a high-performing drone is all about synergy. Each component on this list needs to be carefully matched with the others to create a stable, efficient, and reliable flying machine.
The foundation of any drone build is its frame. This is the skeleton holding everything together. While frames come in all shapes and sizes, for most DIY projects, you'll be looking at either a quadcopter (four motors) or a hexacopter (six motors).
Quadcopters: There's a reason these are the most popular choice. They hit a sweet spot, offering a fantastic balance of agility, simplicity, and affordability. This makes them the perfect starting point for most projects, whether you're building an FPV racer or a simple aerial photography rig.
Hexacopters: With those two extra motors, you get a significant boost in stability and redundancy. If a motor gives out mid-flight, a hexacopter can often stay in the air and land safely. This makes them a much better choice if you plan on carrying more expensive payloads like high-end cameras.
The material of the frame is just as important as its shape. Carbon fiber is the go-to for serious builders—it's incredibly lightweight and strong, but it'll cost you more. For a first build, don't be afraid to go with a cheaper plastic or nylon frame. They are much more forgiving in a crash, and let's be honest, those first few flights often involve a few bumps and scrapes.
Matching Your Powertrain
Your drone's "powertrain" is the combination of its motors, Electronic Speed Controllers (ESCs), and propellers. These three parts absolutely must work in harmony. It's a classic rookie mistake to mismatch them, which inevitably leads to terrible performance, disappointingly short flight times, or even fried electronics.
Think about it like picking an engine for a car. You wouldn’t drop a tiny four-cylinder into a massive truck and expect it to work well. You have to match the motor's thrust output to the all-up weight of your drone. From there, the propellers need to be sized correctly for the motor's kV rating (a measure of its RPM per volt), and the ESCs must be rated to handle the maximum current your motors will ever pull.
Getting this synergy right is what separates a drone that barely gets off the ground from one that flies beautifully. Thankfully, you can find detailed spec sheets and thrust test data online for most popular motors to help you make the right call. For a more detailed walkthrough, our beginner's guide on how to build a Raspberry Pi drone breaks down this entire process.
The Flight Controller Bridge
The Raspberry Pi is an amazing little computer, but it lacks the specialized hardware needed to directly manage the motors. This is where a dedicated flight controller (FC) or a purpose-built Raspberry Pi "hat" steps in. This component is the essential bridge between the Pi's high-level thinking and the drone's low-level muscle.
A flight controller is the drone's central nervous system. It takes commands from the Pi, interprets data from its own onboard sensors like the gyroscope and accelerometer, and then fires off precise signals to the ESCs thousands of times a second to keep the drone perfectly stable.
Popular options like the NAVIO2 or a Pixhawk are designed to interface directly with the Raspberry Pi. These boards handle all the real-time flight stabilization, which frees up the Pi to focus on the heavy lifting—things like autonomous navigation, object tracking, or running complex computer vision scripts.
This modular approach is what makes building advanced raspberry pi and drones systems so powerful. The growing availability of components like these has been a huge factor in the commercial drone market's explosive growth, which is projected to hit $12.6 billion by 2025.
Assembling Your Drone Frame and Electronics
With a pile of carefully selected components in front of you, it's time to get hands-on. This is my favorite part of any build—where the abstract collection of parts starts to look like an actual flying machine. The key here is to work methodically. Rushing is your enemy, so take your time and double-check every connection as you go.
The first order of business is building the drone’s skeleton. Start by putting together the main plates and arms of your frame, following the instructions that came with it. Here’s a little pro tip I learned the hard way: add a small dab of thread-locking compound to the motor mount screws. It’s a simple step that prevents flight vibrations from shaking them loose.
Once the frame feels solid, go ahead and mount your four motors to the ends of the arms. You’ll want to pay close attention to the motor rotation direction. You should have two that spin clockwise (CW) and two that spin counter-clockwise (CCW). These are typically installed in an "X" pattern, which is crucial for stable, balanced flight.
Mounting and Wiring Core Electronics
With the motors secured, let's move on to the Electronic Speed Controllers (ESCs). I like to secure one ESC to each arm, placing it somewhere it will catch a bit of airflow from the propellers to stay cool. Now, break out the soldering iron. Carefully solder the three wires from each motor to the corresponding pads on its ESC. Don't stress about the order just yet; we can easily reverse the motor direction in the software later if one is spinning the wrong way.
Next up is the power system. You'll connect the power leads from all four ESCs to your Power Distribution Board (PDB) or the 4-in-1 ESC. This is what routes power from the battery to everything else. Your soldering needs to be clean and strong here, as a bad joint could fail mid-flight with disastrous results. Solder the positive (red) wires to the ‘+’ pads and the negative (black) wires to the ‘-’ pads.
CRITICAL SAFETY WARNING: Before you do any wiring or even think about plugging in a battery for the first time, take the propellers off. Seriously. A motor spinning up unexpectedly on your workbench is incredibly dangerous. This is the single most important safety rule in drone building.
After you've finished soldering, grab a multimeter and switch it to continuity mode. Touch the probes to the main positive and negative terminals on your PDB. This two-second check tells you if you have a short circuit. If that multimeter beeps, you have a short that needs to be fixed immediately before you even think about plugging in a battery. It's a simple test that can save you from frying hundreds of dollars worth of electronics.
For a more detailed look at this process, our https://www.jabdrone.com/post/fpv-drone-build-guide-build-your-first-drone-today has extra visuals and tips that can help.
Integrating the Raspberry Pi and Flight Controller
Now it's time to mount the brains of the operation: your flight controller (like a Pixhawk or NAVIO2) and the Raspberry Pi. Once they're securely attached to the frame, connect the ESC signal wires to the correct output pins on the flight controller, usually labeled M1 through M4.
The final, and most important, connection for this Raspberry Pi and drones project is linking the Pi to the flight controller. This is what makes the whole thing work. You'll typically use a UART or USB connection, which lets the Pi send high-level flight commands and receive telemetry data back. This kind of advanced integration is a huge reason the drone market, valued at USD 73.06 billion in 2024, is projected to hit USD 163.60 billion by 2030.
The structural integrity of your frame is paramount for both safety and performance. For those truly passionate about pushing the envelope in this area, you might find opportunities in fields like aircraft structural integrity research.
To wrap things up, use a few zip ties to neaten up any loose wires and keep them from getting snagged by the propellers. With that, your drone is fully assembled and ready for the software setup.
Configuring Your Flight Software
With all the hardware meticulously screwed and soldered into place, it's time to breathe life into your drone's brain. This is where your pile of parts truly becomes an intelligent flying machine. The software bridges the gap between the physical electronics and the flight commands that will soon get your creation airborne.
First things first, we need to prep the Raspberry Pi itself. This means flashing a microSD card with a suitable operating system. Raspberry Pi OS (what we used to call Raspbian) is the gold standard and has the best support. I strongly suggest using the "Lite" version. It keeps the system lean, dedicating as many resources as possible to the demanding job of flying.
Once the OS is installed and you've booted up the Pi, you'll need to enable a couple of critical communication interfaces: SPI and I2C. You can do this easily using the tool in the terminal. These are non-negotiable, as they're how the Pi will talk to your flight controller hat or breakout board.
Installing a Flight Stack
Your Raspberry Pi is powerful, but it needs a dedicated flight stack to handle the thousands of real-time calculations required for stable flight. You're not expected to code this from scratch! Instead, you'll lean on a powerful, open-source autopilot software suite.
For a Raspberry Pi and drones project like this, the two heavy hitters are ArduPilot and PX4.
ArduPilot: This is the old guard—a highly mature and feature-packed flight stack with a massive, active community. Its reliability and fantastic documentation make it a perfect choice for your first build.
PX4: Also incredibly powerful, PX4 focuses on a more modular architecture. It’s a favorite in research and commercial circles for its flexibility and clean codebase.
Honestly, for most DIY builds, ArduPilot is a fantastic place to start. The installation usually involves cloning the ArduPilot repository from GitHub and then running a setup script that compiles everything for your specific hardware, like a Raspberry Pi paired with a NAVIO2.
Calibration with Ground Control Software
With the flight stack installed, your drone still won't fly correctly—or safely. It needs to be calibrated. This is a critical step that tunes the software's sensors to the unique physical reality of your specific build. Don't skip it.
To do this, you’ll connect your drone (usually wirelessly over Wi-Fi) to a piece of Ground Control Station (GCS) software. Think of it as the mission control for your drone. Great options include Mission Planner or QGroundControl.
Inside the GCS, you'll follow guided wizards to calibrate a few key systems:
Accelerometer & Gyroscope: You’ll be asked to hold the drone in various poses—level, on its nose, on its side, etc. This process teaches the flight controller what "level" feels like and how to measure its orientation in 3D space.
Compass (Magnetometer): This involves a slow, deliberate dance where you rotate the drone around all its axes. The goal is to map out any magnetic interference from the motors or power wires, which is crucial for accurate GPS navigation.
Electronic Speed Controllers (ESCs): This procedure syncs the throttle range for all your motors. It ensures they all spin up at the same rate and respond identically. If you skip this, you're asking for a drone that immediately flips over on takeoff.
A common rookie mistake is treating calibration as a one-time thing. If you crash your drone or even just swap out a major component like a motor, you must re-calibrate. The physical properties of your drone have changed, and the software needs to know about it.
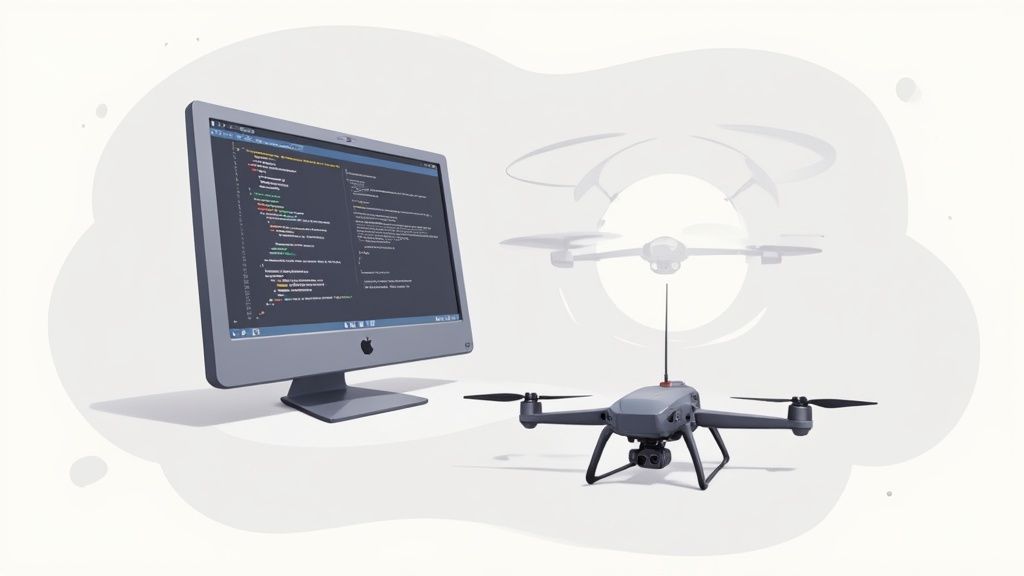
Programming Your First Flight Commands
Now for the really fun part—actually telling the drone what to do with code. This is where the power of a Raspberry Pi truly shines. We'll use a simple Python script and an amazing library called [DroneKit](http://dronekit.io/) to talk directly to the ArduPilot flight stack. DroneKit gives you a straightforward API to read sensor data and send high-level commands.
First, get DroneKit installed on your Pi using pip:
Next, let's create a "Hello, World!" script for our drone. This simple Python code will connect to the vehicle, print out some basic stats like its GPS lock and battery level, and then close the connection. It’s the perfect sanity check.
from dronekit import connect, VehicleModeimport time
Connect to the Vehicle (in this case a UDP endpoint)
vehicle = connect('127.0.0.1:14550', wait_ready=True)
print("Autopilot Firmware version: %s" % vehicle.version)print("GPS: %s" % vehicle.gps_0)print("Battery: %s" % vehicle.battery)print("Mode: %s" % vehicle.mode.name)
Close connection
vehicle.close()
When you run this script, you should get immediate feedback from your drone's systems. This confirms your entire software stack is humming along and ready for commands. From here, the sky's the limit. You can expand this script to arm the motors, take off to a specific altitude, and fly a basic pattern—the building blocks of your first autonomous mission.
Your First Flight and Pre-Flight Checklist

Let's start with the hardware. Go over every connection and give it a gentle wiggle to make sure nothing has vibrated loose. Confirm your battery is fully charged and, just as importantly, strapped securely to the frame. A battery that shifts its weight mid-flight is a surefire recipe for disaster.
Most critically, double-check your propellers are installed correctly. You should have two clockwise (CW) and two counter-clockwise (CCW) props, and they absolutely must match the rotation direction of the motors they're attached to. Getting this wrong is a classic rookie mistake.
The Tethered Test
Before you commit to a full, free flight, a "tethered test" is an invaluable safety step. This is as simple as it sounds: secure your drone to the ground with a strong cord, leaving just enough slack for it to lift an inch or two off the ground. This little trick creates a safe bubble where you can check motor responses and stability without any risk of it taking off on an unplanned adventure.
From your ground control station, slowly ease up on the throttle. Watch how it behaves. The drone should try to lift off evenly. If it immediately tilts hard to one side, you've likely got a motor configured backward or a prop on the wrong motor. This tethered setup is the perfect, low-stakes environment to spot and fix these exact kinds of problems.
Once you’re feeling good about the setup, you can dive deeper into building out a full flight routine with our comprehensive drone pre-flight checklist, which walks through even more safety items.
Your very first flight should always be in a massive, wide-open space. Stay far away from people, buildings, and trees. An empty park or a farmer's field is ideal. Give yourself at least 50 meters of clear space in every single direction.
With your drone in the field and all your checks complete, it's finally time to fly. Arm the motors and gently increase the throttle until the drone lifts cleanly off the ground into a stable hover. I know the temptation is there, but resist the urge to do any aggressive maneuvers. Spend your first few battery packs just getting a feel for the basics: flying gently forward, backward, left, and right.
As your confidence grows, you can start dipping your toes into the autonomous modes that make a Raspberry Pi and drones setup so powerful. Try switching to Loiter mode, which uses GPS to lock the drone in its current position. Test the Return to Launch (RTL) function from a safe distance to see it reliably navigate back to its takeoff point. Mastering these foundational skills is what will pave the way for more complex and exciting autonomous missions down the road.
Frequently Asked Questions About Pi Drones
When you're jumping into a custom drone build, especially one with a Raspberry Pi at its core, a lot of questions pop up. It’s totally normal. Let's tackle some of the most common ones I hear from builders to get you on the right track.
Which Raspberry Pi Model Is Best for a Drone Project?
For any drone project that you want to take seriously, the Raspberry Pi 4 Model B is really the only way to go. The reason comes down to pure processing power and memory.
If you grab a version with 4GB of RAM or more, you’re giving yourself enough breathing room to run the flight control software, process all that incoming sensor data, and still have power left for your own custom scripts. Anything less and you'll quickly run into performance bottlenecks.
The Pi 4's CPU is a beast, which is exactly what you need for more advanced stuff like streaming real-time video or doing on-the-fly object detection with a library like OpenCV. Sure, an older model might get a very basic quadcopter off the ground, but the Pi 4 ensures your build has room to grow and can handle the complex autonomous tasks you're probably dreaming of.
Your choice of Raspberry Pi directly impacts the drone's potential. A more powerful model like the Pi 4 unlocks the ability to process more data faster, which is the foundation for creating a truly smart, autonomous drone.
Can I Make My Raspberry Pi Drone Fully Autonomous?
Absolutely. In fact, that's one of the biggest draws of using a Raspberry Pi in the first place. Achieving full autonomy is completely within your grasp.
The most common way to do this is by pairing the Pi with a GPS module and a good flight controller running a mature firmware like ArduPilot or PX4. This setup allows you to create and upload pre-planned missions that the drone can execute all on its own—no human pilot needed.
Typically, you'll write Python scripts using a library like DroneKit to command the drone. You can define waypoints, tell it what altitude to fly at, and even trigger actions like snapping a photo at a specific GPS coordinate. As you start thinking bigger, you might even look into how cloud computing for IoT devices like drones can offload heavy processing and help scale up your applications. The sky is literally the limit here.
Common Mistakes to Avoid When Building
Building a custom drone is incredibly rewarding, but it’s also a process that demands precision. I’ve seen a few common mistakes trip up even seasoned makers. Here’s what to watch out for:
Mismatched Components: Don't just buy parts that look good. Make sure your motors, ESCs, and battery are all properly rated for each other. An overpowered motor will absolutely cook an undersized ESC, and a weak battery will give you disappointing—and short—flights.
Skipping Calibration: I can't stress this enough: this step is non-negotiable. Taking the time to properly calibrate your accelerometer, compass, and ESCs is the single most important thing you can do to get a stable, predictable flight.
Incorrect Wiring: A single reversed wire can let the magic smoke out of your electronics, permanently frying them. Before you ever plug in a battery, double and triple-check every single connection against your wiring diagram.
Neglecting Safety: This is a big one. Always remove propellers when you're working on the bench, configuring software, or doing any kind of testing. An accidental motor spin-up is no joke and can cause serious injury.
At JAB Drone, we're passionate about empowering builders like you with the knowledge to succeed. From in-depth guides to the latest industry news, find everything you need to take your drone projects to the next level at https://www.jabdrone.com.
Comments