Drone Photography for Beginners: Tips to Get Started
- James Baptiste

- Jun 15, 2025
- 15 min read
Updated: Jun 16, 2025
Why Drone Photography Changes Everything For Creators
There's something truly magical about seeing the everyday from a completely different perspective. Imagine looking down at your street from 200 feet up, noticing details you've walked past a thousand times without ever seeing. That's the power of drone photography, and it's making creative possibilities accessible to everyone. For many, it's unlocking a passion they never knew they had.
This shift in perspective isn’t just about getting cool pictures; it fundamentally alters how you approach photography itself. Composition becomes a whole new game. Light and shadow play out in ways you just can't appreciate from ground level. Suddenly, you're telling stories with a dynamism that used to require expensive equipment and complicated logistics. I’ve spoken with photographers who’d spent years with traditional cameras and only found their true creative voice when they took to the skies. They describe it as both exhilarating and challenging, a process that pushes their artistic boundaries in unexpected directions.
The Democratization of Aerial Photography
One of the most exciting things about drone photography is its accessibility. Shots that once required hiring a helicopter crew are now within reach for anyone. This affordability has been a huge factor in the explosion of drone photography in recent years. In fact, the drone photography services market was projected to hit $0.93 billion by 2025, up from $0.78 billion in 2024, a 19.4% compound annual growth rate (CAGR). You can find more data on this growth here. This democratization of aerial perspectives is giving rise to a whole new wave of visual storytellers.
Now, let’s be honest: drone photography takes effort. It’s not just point-and-shoot. But it's also not nearly as difficult as some people think. With the right guidance and a little practice, you can unlock some incredible creative potential. We'll address some of the myths surrounding the difficulty and cost, and dive into what it really takes to capture stunning images from above. This journey will give you the skills and knowledge to turn your creative visions into breathtaking realities.
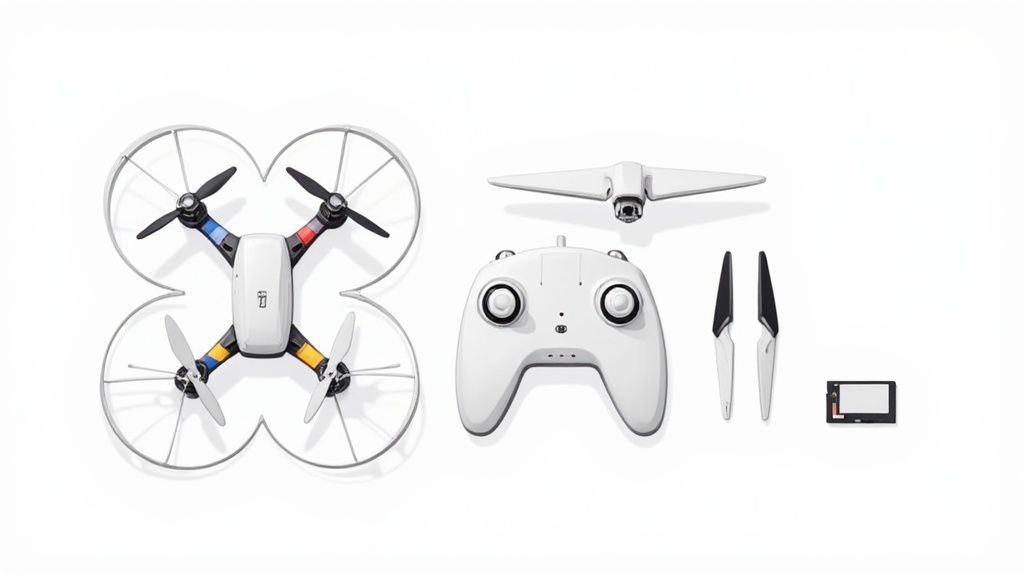
Finding Your Perfect First Drone Without the Overwhelm
Walking into a drone store or browsing online can feel like stepping into a whirlwind. So much technical jargon, a dizzying array of models, and prices that swing wildly from budget-friendly to "mortgage-payment" territory. Trust me, I've been there. After putting dozens of drones through their paces and chatting with photographers who've upgraded their gear multiple times, I've learned one thing: a lot of those fancy features are just expensive extras. Let's cut through the marketing noise and get down to what really matters for capturing stunning photos.
Essential Features for Beginner Drone Photography
When you’re starting out, flight time is key. Fifteen minutes may seem like a decent chunk of time, but it disappears surprisingly fast when you’re still getting the hang of things. Aim for a drone that offers at least 20 minutes of flight time. This gives you breathing room to practice, experiment with different angles, and compose your shots without constantly stressing about a low battery warning. To illustrate this, take a look at this quick comparison:
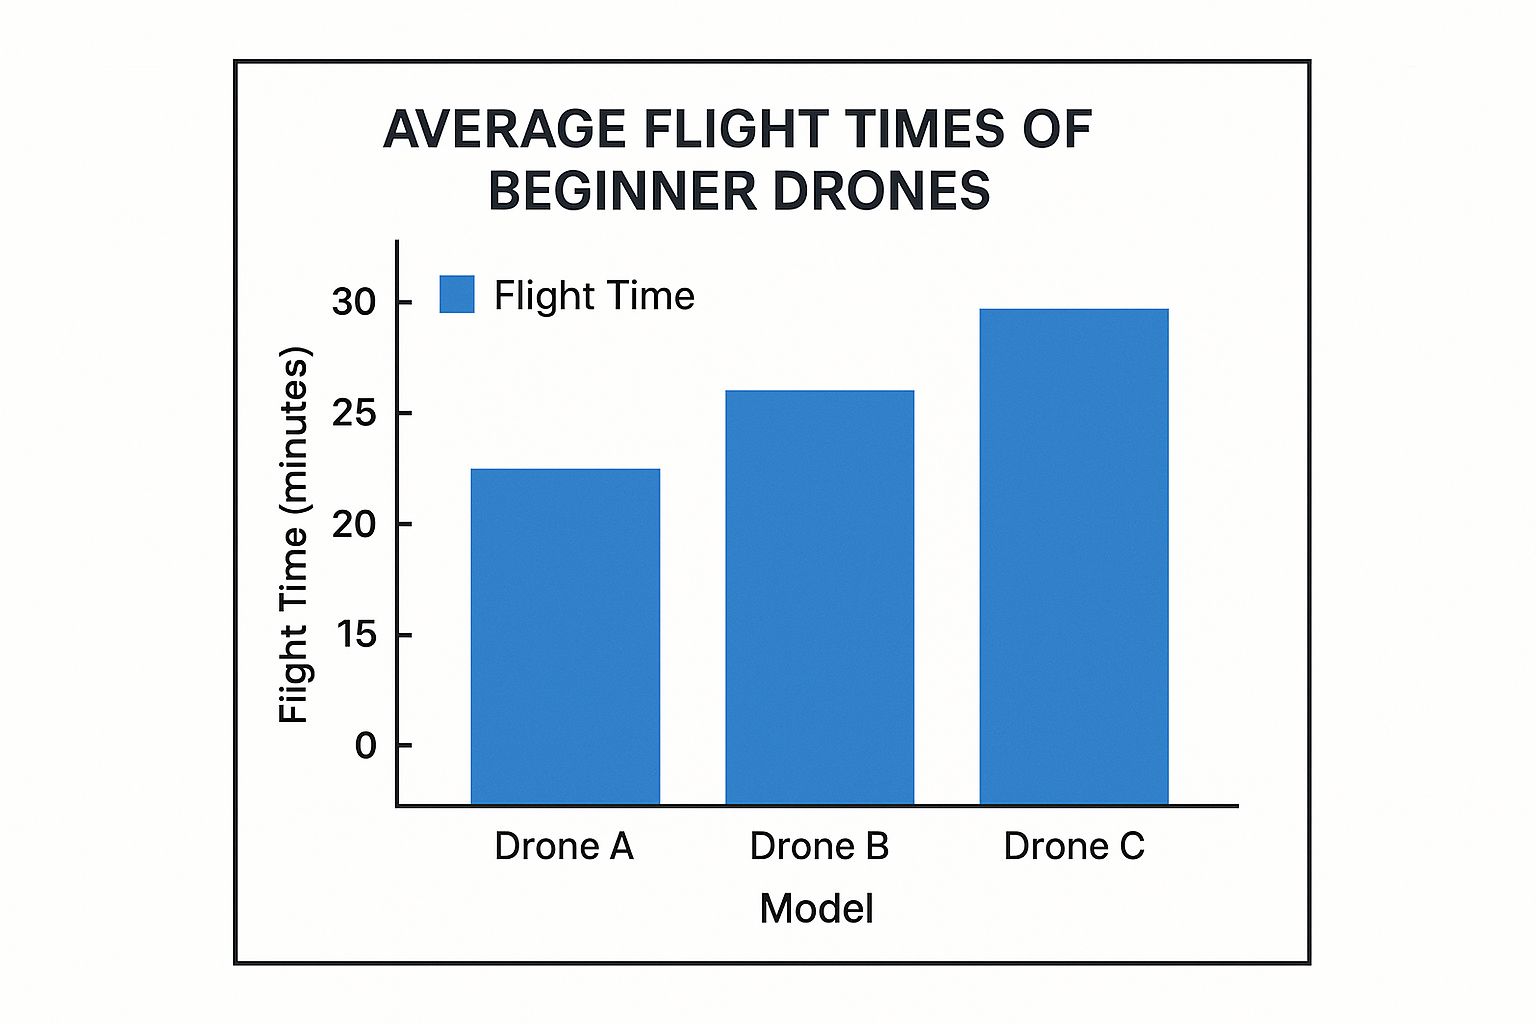
Even a seemingly small difference, like the 5 minutes between Drone A and Drone C, makes a world of difference in your actual shooting experience. Beyond flight time, camera quality is obviously important. While megapixels contribute to image detail, image stabilization is even more critical for capturing smooth, clear footage, especially when dealing with wind or less-than-perfect flying conditions. Don’t underestimate the importance of the controller either. A comfortable, intuitive controller makes a huge difference in how much you enjoy flying and how easily you can control your drone.
Smart Spending and Hidden Costs
One of the biggest traps beginners fall into is overspending on their first drone. There’s a sweet spot between features and affordability, and it’s rarely the most expensive model. Trust me, there are plenty of excellent drones under $1000 that offer amazing image quality and all the essential features you need to get started. My advice? Talk to other drone photographers! Learn from their experiences, what they love about their current drones, and, more importantly, what they wish they’d known before they bought their first one.
Don't forget about the hidden costs that can sneak up on you. Spare batteries (a must-have for longer shoots), propeller guards (highly recommended, especially when you’re learning), and the potential for repairs can add up fast. Factor these into your budget from the start. And don't overlook insurance. It may seem like an added expense, but it provides invaluable peace of mind, especially in those early days of flying. Understanding these often-overlooked costs will help you avoid any financial surprises and allow you to focus on enjoying the amazing world of drone photography.
To help you get started, I've put together a comparison of some of the best beginner drones on the market.
To help you navigate the options, I've put together a comparison table showcasing some popular beginner-friendly drones. It highlights key features, price points, and what each drone excels at, so you can make an informed decision.
Best Beginner Drones for Photography Comparison Side-by-side comparison of top beginner-friendly drones including price, camera specs, flight time, and key features
Drone Model | Price Range | Camera Quality | Flight Time | Best For |
|---|---|---|---|---|
DJI Mini 3 Pro | $759 - $909 | 48MP, 4K/60fps video, 3-axis gimbal | Up to 34 minutes | Portability, ease of use, excellent image quality |
Autel Evo Nano+ | $799 - $949 | 50MP, 4K/30fps video, 3-axis gimbal | Up to 28 minutes | Compact size, good value, obstacle avoidance |
Ryze Tello | $99 - $149 | 5MP photos, 720p video, electronic image stabilization | Up to 13 minutes | Extremely budget-friendly, learning the basics |
DJI Air 2S | $999 - $1299 | 20MP, 5.4K/30fps video, 3-axis gimbal | Up to 31 minutes | Excellent image quality, advanced features, obstacle avoidance |
Parrot Anafi | $699 - $799 | 21MP, 4K/60fps video, 3-axis gimbal | Up to 25 minutes | Unique camera angle, good value |
This table provides a snapshot of some popular choices, but remember to do your own research based on your specific needs and budget. Reading reviews and comparing specs across different models will help you find the perfect drone to kickstart your aerial photography journey. Now, let’s talk about building your confidence before your first flight…
Building Confidence Before Your First Flight
I remember my first drone flight. Butterflies in my stomach, palms sweating… I was a mess. The difference between a successful first flight and a mangled heap of plastic really comes down to how much prep work you put in. Sure, reading the manual is important, but truly confident pilots go the extra mile. They build a strong foundation of practical knowledge before even thinking about taking off. Let me share some wisdom I've picked up along the way.
Understanding Weather and Location
Weather is everything in drone photography. Wind is your biggest enemy, especially when you’re starting out. Even a light breeze can seriously mess with a smaller drone’s stability. Learn to read wind forecasts and always be overly cautious. Overcast days are actually fantastic for aerial photography – the diffused light softens those harsh shadows. For more tips on getting started, check out this helpful guide: How to Fly a Drone for Beginners: Get Started Today.
Finding a safe and legal spot to fly is just as crucial. Get to know your local drone rules and no-fly zones. The B4UFLY app is a lifesaver for this – it shows you where you can and can’t fly.
Mastering Your Controller and Pre-Flight Routine
Getting comfortable with your controller is key. Find a wide-open space, free of trees and power lines – your backyard, a park, even an empty parking lot works. Practice basic maneuvers until they become second nature. Muscle memory is your friend here.
Treat these practice sessions like real flights. Run through your pre-flight checklist every single time. This builds good habits, so when you’re actually out shooting, you’re not fumbling around under pressure.
Learning From Others' Mistakes
One of the best ways to get confident is to learn from other people’s screw-ups. Experienced pilots have a treasure trove of near-miss stories. These aren’t just funny anecdotes; they’re valuable lessons.
For example, a friend of mine almost lost his drone because he didn’t account for a sudden gust of wind. Now, he checks wind conditions religiously. These real-world experiences teach you situational awareness – anticipating problems before they happen. This is what separates nervous beginners from confident pilots.
Remember, understanding your drone’s limits is vital. Pushing the boundaries of its range or flight time is a recipe for disaster. Start small, gradually build your skills, and master the basics before trying anything fancy. This will make you a better photographer and keep your drone (and everyone around you) safe.
Camera Settings That Transform Your Aerial Shots
Let's ditch the technical jargon and talk real-world camera settings for drone photography. I've spent countless hours fine-tuning my own setup, and I'm happy to share the secrets to getting truly stunning aerial photos. Especially if you're just starting out, there's a lot you can simplify.
Understanding Your Camera Modes
You'll quickly come across the Auto vs. Manual mode dilemma. Auto mode is tempting – who doesn't love point-and-shoot simplicity? But for truly consistent aerial shots, I almost always opt for manual.
Why? Altitude plays a huge role in exposure. As your drone ascends or descends, the light changes dramatically, and Auto mode struggles to keep up. This leads to unevenly exposed images. Manually controlling your ISO, aperture, and shutter speed puts you in the driver's seat and helps you get consistent results no matter the altitude. You might find this helpful: Understanding Drone Sensors and Camera Capabilities.
Mastering Shutter Speed and ISO
Sharp images are key, and shutter speed is your best friend here. A simple trick I use is to keep my shutter speed at least twice my frames-per-second (fps) for video. This keeps things smooth and blur-free.
ISO controls brightness. In bright daylight, a lower ISO keeps noise minimal. As the light drops, you’ll need to bump up the ISO, but keep an eye on the noise levels, especially in the shadows.
The Power of ND Filters
ND filters are game-changers for drone photography. Think of them as sunglasses for your drone's camera. They cut down the light entering the lens, letting you use slower shutter speeds for artistic effects, even in bright sunlight.
This opens up a world of possibilities. Want that dreamy motion blur on a waterfall? ND filters are your answer. Plus, they help you maintain correct exposure while getting creative. It's interesting to note, the drone market is booming. By 2030, it's projected to hit $57.8 billion globally, with the commercial segment seeing a 7.9% compound annual growth rate (CAGR). Discover more insights. This growth just highlights the importance of mastering these techniques.
Histogram Reading and Focus Techniques
Learning to read your histogram is like gaining x-ray vision for your images. It shows you the distribution of tones, from dark to light, helping you spot overexposed highlights or underexposed shadows. Then you can tweak your settings for a perfectly balanced image.
Manual focus is another powerful tool. While autofocus is usually pretty good, switching to manual for certain shots gives you ultimate control over sharpness. This is especially helpful for landscapes or subjects at different distances. With a bit of practice, you'll nail the focus every time.
Composition Secrets That Make Aerial Photos Captivating
Owning a drone doesn't automatically grant you the title of "amazing aerial photographer." It's a tool, much like a high-performance sports car. Just because you have the keys doesn't mean you can instantly drift around corners like a pro. You need to understand how to harness its potential. That's where composition comes in. Especially for those starting out with drone photography, mastering composition is the key to turning ordinary snapshots into stunning works of art. Let's delve into some techniques specifically for aerial photography that go beyond the basics.
Scouting Locations and Finding Unique Perspectives
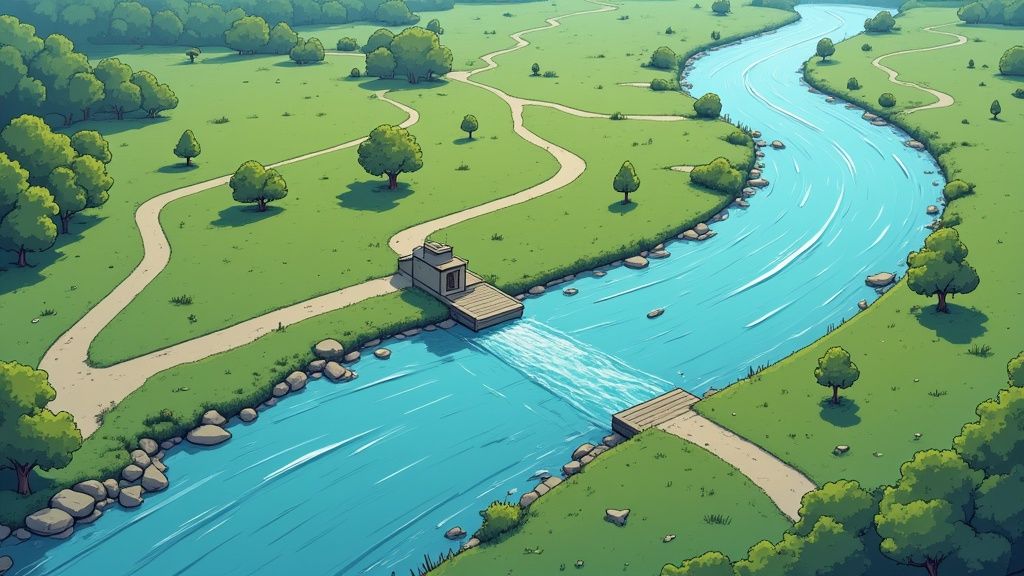
The best aerial photographers I know don’t just launch their drones and hope for the best. They plan their shots. Scouting locations – both virtually using tools like Google Maps and physically on the ground – helps you visualize how the scene will appear from above. This pre-flight prep allows you to find interesting leading lines, geometric shapes, and patterns that are often invisible from ground level. Honestly, taking the time to pre-plan makes a huge difference.
For instance, a winding river takes on a completely new personality when viewed from 200 feet. Suddenly, the curves, the reflections, the surrounding landscape – it all comes together in a way you’d never appreciate from the ground. Even a simple field of crops can transform into an abstract masterpiece, bursting with color and geometric patterns when viewed from the sky.
Leveraging Natural Elements and Light
Light and shadow are your best friends in aerial photography. Learning how they interact with the landscape is essential for creating truly captivating images. The angle of the sun can dramatically change your photo, casting long shadows that add depth and drama, or highlighting textures in surprising ways. The golden hour, that magical time just after sunrise or before sunset, can bathe your scene in a warm, ethereal light. For more tips, check out this helpful guide: Top Drone Photography Tips to Elevate Your Shots.
Consider how shadows fall across a cityscape, or how the sun glints off a lake. These elements can completely shift the mood and feeling of your aerial photographs. By paying attention to these natural elements, you can elevate your work from simple snapshots to evocative images. As a side note, the use of drones for professional services, particularly in construction and real estate, is booming. In fact, the construction segment of the drone photography services market is projected to grow at a CAGR of 18.1% between 2025 and 2035. For a deeper dive into these market trends, see this report.
Analyzing Successful Aerial Photography
One of the quickest ways to improve your own aerial photography is to study the work of others. Scroll through Instagram, browse professional portfolios – find images that grab your attention. What makes them so compelling? Is it the use of leading lines? The interplay of light and shadow? The unique perspective?
By analyzing successful aerial photos, you'll begin to develop a keen eye for composition. You'll start to see potential for amazing shots in everyday locations. Try practicing by identifying interesting compositions from different heights and angles. It’s like training your brain to see the world through the eyes of a drone. Trust me, it will transform your photography.
To help you further develop your compositional eye, here's a handy table summarizing key techniques:
The following table offers a quick guide to different aerial composition techniques and when to use them. It also provides a difficulty rating and some pro tips to help you get started.
Aerial Composition Techniques and When to Use Them
Technique | Best Used For | Difficulty Level | Pro Tips |
|---|---|---|---|
Leading Lines | Roads, rivers, fences | Beginner | Use lines to draw the viewer's eye towards a point of interest. |
Rule of Thirds | Landscapes, cityscapes | Beginner | Place key elements off-center for a more balanced composition. |
Symmetry | Buildings, patterns, reflections | Intermediate | Look for mirroring elements or repeating patterns for visual impact. |
Framing | Natural arches, overhanging trees | Intermediate | Use natural elements to frame your subject and add depth. |
Negative Space | Minimalist scenes, vast landscapes | Advanced | Emphasize the subject by surrounding it with empty space. |
This table provides a starting point for experimenting with different compositional techniques. Don't be afraid to try them out and develop your own unique style. The more you practice, the better you'll become at capturing truly captivating aerial photographs.
Simple Editing That Brings Out Your Best Work
Great aerial photos often benefit from a little touch-up in post-processing. Don't sweat it, you don't need expensive software or a Photoshop wizardry degree to make your images shine. Let's chat about some practical editing techniques that will elevate your drone photography without making it look artificial or over-processed. These are the tweaks I use daily in my own workflow.
Essential Edits for Maximum Impact
Some adjustments have a more noticeable effect than others. Exposure correction is a great starting point. Sometimes your drone's light meter gets confused, leaving you with images that are too bright or too dark. A quick adjustment to the brightness, contrast, and shadows can restore the balance. White balance is another key element, especially if your photos have a noticeable color cast, leaning too blue or too yellow. Most editing software, like Adobe Photoshop and Adobe Lightroom, makes this correction simple.
Then, there's perspective adjustments. Drones can occasionally produce slightly warped perspectives, particularly when shooting tall buildings or other structures. Lens correction tools or perspective warping can straighten things out and create a more natural look. For video editing software suggestions, take a look at our guide on the best drone video editing software.
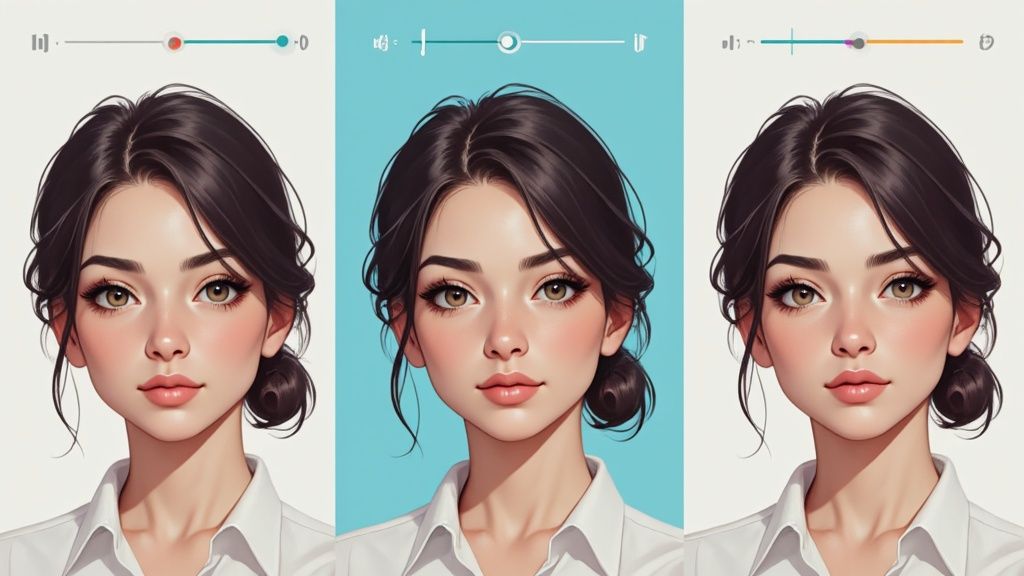
Color Grading for a Professional Look
Color grading is where you inject your personality and develop a distinct style. It's about adjusting colors to craft a specific mood or aesthetic. For instance, bumping up the saturation makes colors more vivid, while lowering it results in a softer, almost film-like appearance. Experiment with color temperature to add a warmer or cooler feel. Subtlety is key here; aim to enhance the scene's existing beauty, not overwhelm it.
Personally, I often warm up the shadows and cool down the highlights just a tad for a cinematic touch. I find this adds depth and subtly separates the elements of the photo. Play around with various color combinations and discover what pleases your eye. There's no single correct approach – it’s about developing your own artistic vision.
Avoiding Common Beginner Mistakes
One frequent mistake I see is over-sharpening. This creates a harsh, artificial appearance – almost like the image is vibrating. A gentle touch is usually sufficient. Another trap is cranking the clarity slider too high, which gives a crunchy, unnatural texture. It’s tempting to go overboard, but dialing it back typically leads to a much more appealing result.
Also, many beginners try to fix everything in post-processing. Editing can definitely improve a photo, but it's not magic. Prioritizing a good shot in-camera – nailing composition, exposure, and focus – is the most effective way to capture amazing aerial images. Editing enhances a good photo; it doesn't create one.
Developing Your Editing Workflow
Discovering an editing workflow that suits you is crucial, especially as you're starting out. Don't try to master everything at once. Choose a few key adjustments, practice them until you're comfortable, then gradually incorporate new techniques. Building a solid base makes learning much more enjoyable and keeps you from feeling overwhelmed.
Keep your expectations realistic. Honing your editing skills takes time and practice, just like learning to fly your drone. Don't be discouraged if your early efforts aren't perfect. Learn from your missteps, experiment, and in time, you'll create an efficient workflow and a unique editing style that makes your aerial photography stand out. Remember, the aim is to enhance your work, not completely transform it. With a bit of practice, you'll discover that post-processing is a powerful tool that can truly bring your aerial photography to life.
Your Roadmap to Aerial Photography Mastery
So, you've got the drone basics down. Now what? Whether you're flying for fun or thinking about going pro, let's map out the next steps in your aerial photography journey. We'll cover finding your niche, connecting with other pilots, setting goals, upgrading your gear (smartly!), building a killer portfolio, and even how to make some money with your drone.
Exploring Specialization Paths
Drone photography isn’t a one-size-fits-all thing. You might love capturing vast landscapes, or maybe you're drawn to the intricate details of buildings. Perhaps you enjoy shooting events like weddings or concerts from above. Even commercial work, like real estate photography or industrial inspections, could be in your future. The point is, exploring different niches helps you find what truly clicks. For me, I discovered a love for capturing the energy of live music events, something I never would have guessed starting out.
Community and Continued Learning
The drone community is amazingly supportive. Think of online forums, social media groups, and local drone clubs as your secret weapon. These are goldmines of info and inspiration. Connecting with other drone photographers opens doors to collaborations, mentorships, and sharing experiences. Don't be shy! Ask questions, show off your work, and learn from others' mistakes (and successes!). I still remember getting invaluable advice from a seasoned pilot in a Facebook group about dealing with tricky wind conditions.
Setting Achievable Goals and Challenges
To really grow as a drone photographer, set achievable goals. Instead of a vague goal like "become a pro," try something more concrete like, "Master manual camera settings," or "Build a portfolio of 10 strong landscape shots." Small wins keep you motivated. I used to challenge myself to nail a specific shot each week, which really helped me improve.
Creative challenges are also a fantastic way to push your skills. Try a 30-day photo challenge with daily themes. Or, limit yourself to a single location and see how many different perspectives you can find. These self-imposed limits often lead to creative breakthroughs.
Leveling Up Your Gear (Smartly)
It's tempting to always want the newest drone, but trust me, resist the urge to constantly upgrade. Focus on mastering what you have. When you do decide to upgrade, think about your specific needs. Do you need a better camera, or is longer flight time more important? Don’t just buy the most expensive model—choose the drone that truly fits your photography goals. When I upgraded, I prioritized image quality over everything else, and it made a huge difference in my work.
Building a Portfolio That Stands Out
A strong portfolio is a must-have, especially if you're considering professional work. Choose your absolute best images – the ones that showcase both your technical skills and your artistic vision. Quality over quantity, always. A curated collection of your strongest work will make a much stronger impression. I learned this the hard way early on. A smaller, more impactful portfolio is much more effective.
Turning Your Passion into Income
If you dream of making money with your drone, start small. Offer your services to friends and family, or volunteer to shoot for local businesses. Building a network and getting real-world experience is priceless. As you gain confidence and build your portfolio, you can start exploring paid opportunities. My first paid gig came from a friend who saw my drone photos on Instagram – you never know where opportunities will come from!
Ready to take your drone photography to new heights? Check out the resources and articles at JAB Drone. They have everything from in-depth product reviews to expert advice and the latest news. It's a great place to find inspiration and take your aerial photography to the next level.
Comments