Master Drone Photography Techniques for Stunning Aerial Shots
- Nickolas Williams

- Aug 3, 2025
- 14 min read
Updated: Aug 4, 2025
Welcome to the future of photography, where your creative vision is no longer bound by gravity. Drones have revolutionized how we see the world, unlocking angles and perspectives once reserved for helicopters and Hollywood budgets. But simply owning a drone is just the first step. To truly capture breathtaking images that stop the scroll and tell a compelling story, you must master the art behind the technology. It’s not just about flying high; it’s about understanding light, composition, and movement from an entirely new vantage point.
This guide moves beyond the basics to explore seven powerful drone photography techniques that will transform your aerial shots from simple snapshots into professional-grade art. We will delve into specific, actionable methods for composing your frame, manipulating perspective, and harnessing the unique capabilities of your aerial platform. You'll learn how to apply principles like the rule of thirds from hundreds of feet in the air, create stunning top-down patterns, and use altitude to build incredible depth.
Whether you're a seasoned photographer adding a drone to your kit or a hobbyist pilot looking to improve your stills, these proven strategies are designed to provide immediate, tangible results. Prepare to elevate your work and capture the world in ways you’ve never imagined.
1. Rule of Thirds Aerial Composition
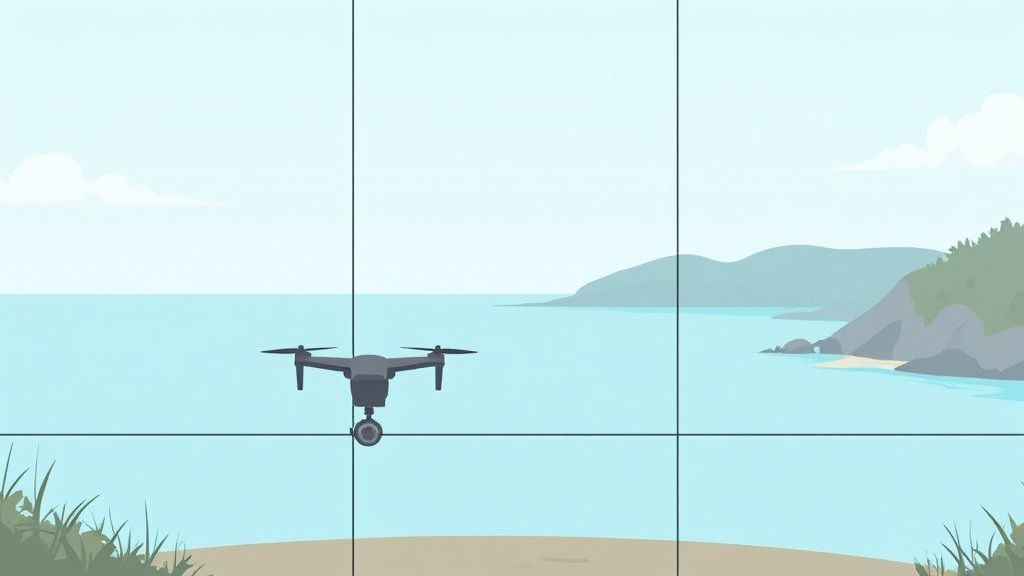
One of the most foundational and powerful drone photography techniques is the Rule of Thirds. This principle involves mentally dividing your frame into nine equal segments using two horizontal and two vertical lines. By placing key elements of your scene along these lines or at their intersections, you create a more dynamic, balanced, and engaging photograph than one with the subject centered.
From an aerial perspective, this technique helps bring order and visual appeal to vast landscapes or complex cityscapes. Instead of centering a lone building, positioning it at one of the four intersection points gives the surrounding environment context and creates a more compelling narrative. This method guides the viewer’s eye through the image naturally, making the composition feel intentional and professionally executed.
How to Implement the Rule of Thirds
Applying this rule is straightforward with modern drone technology. Most flight apps, including those from DJI, have a built-in grid overlay feature.
Enable the Grid: Before you take off, dive into your drone’s camera settings and turn on the "Grid Lines" or "Rule of Thirds Grid" option. This will superimpose the lines directly onto your live video feed, making composition simple.
Position Your Subject: Place your primary subject, like a winding river, a lighthouse, or a prominent skyscraper, along one of the vertical or horizontal lines. For smaller, specific points of interest like a boat on a lake or a car on a road, position them at an intersection point.
Manage the Horizon: When shooting landscapes, avoid placing the horizon in the dead center of the frame. Position it along the top third line to emphasize the land or water below, or place it on the bottom third line to draw attention to a dramatic sky.
Pro Tip: Combine the Rule of Thirds with leading lines. Use a road, coastline, or river to guide the viewer’s eye from one part of the frame toward your subject, which is strategically placed at a power point (intersection).
This classic compositional tool is a cornerstone of great photography, and mastering it from the air is a critical step in elevating your work. If you are looking to explore more foundational concepts, you can dive deeper into the art and techniques of drone photography on jabdrone.com.
2. Top-Down Orthogonal Photography
One of the most visually striking drone photography techniques is the top-down or orthogonal view. This method involves positioning your drone's camera directly above a subject at a 90-degree angle to the ground. This "bird's-eye" perspective flattens the scene, removing traditional depth cues and transforming familiar landscapes into abstract patterns, compelling textures, and intricate geometric designs.
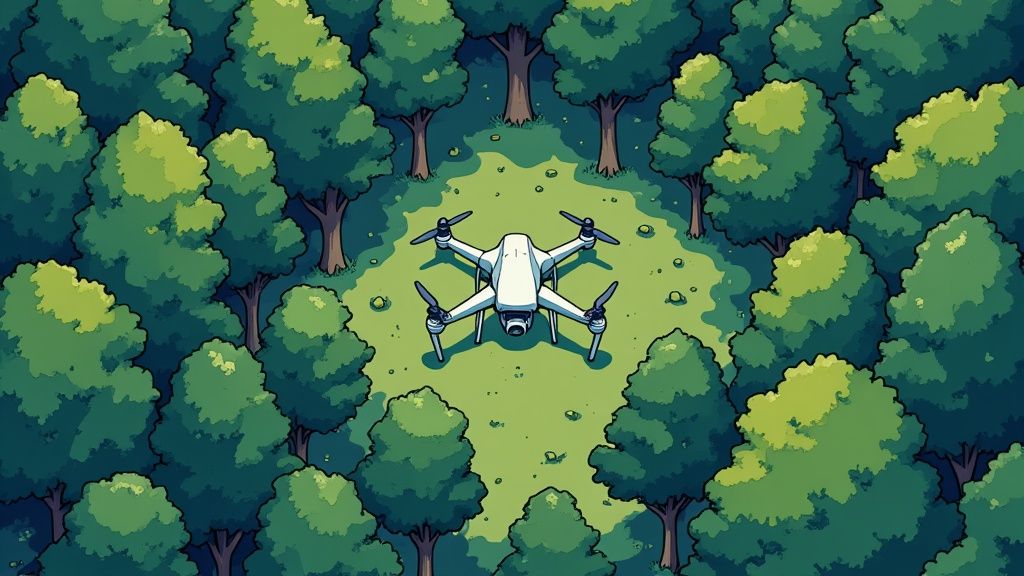
This technique is powerful because it reveals relationships and symmetries that are completely invisible from the ground. An ordinary parking lot becomes a grid of colorful shapes, a forest canopy turns into a textured blanket, and a beach scene with people looks like a dynamic, living mosaic. Popularized by platforms like Instagram, this approach allows photographers to create unique and artistic compositions from everyday subjects.
How to Implement Top-Down Photography
Achieving a perfect top-down shot requires careful positioning and a keen eye for abstract composition. Most drone flight interfaces offer a gimbal pitch indicator to help you align correctly.
Achieve a 90-Degree Angle: Fly your drone directly over your point of interest. Carefully tilt your camera gimbal downward until it reaches -90 degrees, pointing straight at the ground. Use your flight app’s display to confirm the angle.
Hunt for Patterns and Textures: The best subjects for this technique have strong visual elements. Look for the intersecting lines of a city street, the repeating patterns of agricultural fields, or the contrasting textures of waves washing over a rocky shore.
Incorporate a Sense of Scale: While abstract shots are powerful, adding a human element, a car, or a boat can provide a crucial sense of scale. This contrast helps the viewer appreciate the vastness of the scene and connects them to the image on a personal level.
Pro Tip: Shoot during the golden hour (early morning or late afternoon). The low-angle sunlight creates long shadows that accentuate textures and add a three-dimensional quality to the otherwise flat, two-dimensional composition, making your image pop.
Mastering this perspective is a key skill in modern drone photography techniques, allowing you to move beyond conventional landscapes and capture the world in a graphic, artistic way.
3. Leading Lines and Aerial Perspective
One of the most effective drone photography techniques for creating depth and narrative is the use of leading lines. This compositional tool involves using natural or man-made linear elements in your frame to guide the viewer’s eye through the image, typically toward a focal point. From the air, elements like roads, rivers, coastlines, and even architectural patterns become powerful visual pathways.
An aerial perspective uniquely enhances this technique, revealing lines that are often invisible or less impactful from the ground. A winding mountain road, a river carving through a valley, or airport runways converging in the distance add a sense of movement and scale to your shot. By carefully composing your frame around these lines, you can transform a static landscape into a dynamic and engaging visual journey.
How to Implement Leading Lines
Mastering leading lines from above involves identifying these elements and framing them to maximize their visual impact. The key is to make their path clear and intentional within your composition.
Identify and Position: Before shooting, fly your drone to different altitudes and angles to find the most compelling lines. Position the line so it starts near a corner or edge of the frame and leads toward your primary subject, such as a mountain peak, a building, or a boat.
Embrace the S-Curve: Look for S-curves in rivers, roads, or coastal paths. These gentle, flowing lines are particularly pleasing to the eye and create a more dynamic and organic composition than straight lines.
Vary Your Altitude: The prominence and feel of a leading line can change dramatically with altitude. A low-altitude shot might make a road feel more immediate and dominant, while a high-altitude, top-down perspective can reveal intricate patterns of multiple converging lines.
Shoot in Different Conditions: Leading lines can be emphasized by weather and light. A road wet from rain can create a strong, reflective line, while the long shadows cast during golden hour can create new lines or accentuate existing ones.
Pro Tip: Don't let your leading line lead to nowhere. Ensure the line guides the viewer to a point of interest. Without a destination, the line loses its purpose, and the composition can feel unresolved and empty.
4. Altitude Layering and Depth Creation
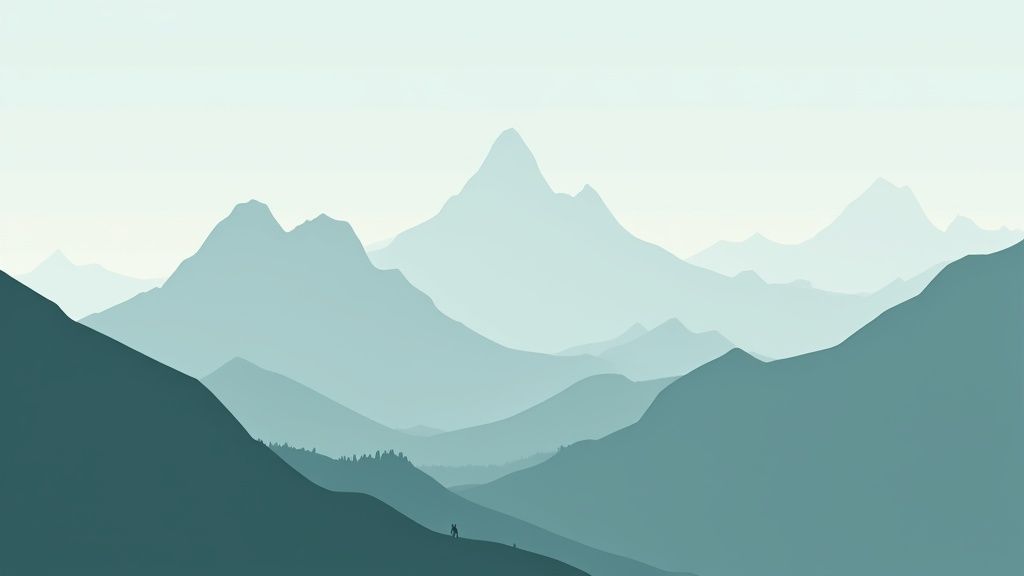
One of the most effective drone photography techniques for transforming a flat, top-down view into a dynamic, three-dimensional scene is altitude layering. This method involves strategically positioning your drone to capture distinct layers of elements at different distances from the camera. By including a clear foreground, middle ground, and background, you create a powerful sense of depth and scale that pulls the viewer into the image.
From the air, it's easy for landscapes to appear compressed and one-dimensional. Altitude layering counteracts this by using natural separation between elements like mountain ridgelines, coastal features, or urban structures. For example, a photo featuring a rocky shoreline in the foreground, waves in the middle ground, and the vast ocean stretching to the horizon in the background feels far more immersive and grand than a simple overhead shot of the water.
How to Implement Altitude Layering
Mastering this technique requires you to think like a landscape painter, carefully arranging elements to build a scene with compelling depth.
Identify Your Layers: Before launching, or while scouting with your drone, identify potential foreground, middle ground, and background elements. Look for mountain ranges with receding peaks, a forest that opens into a field with a distant city, or a coastline with a beach, surf, and open sea.
Adjust Your Altitude and Angle: This is not a top-down technique. Fly at a lower to mid-range altitude and shoot at an angle to create separation between the layers. Experiment by flying higher, lower, left, and right to see how the relationship between the layers changes. The goal is to make each layer distinct.
Embrace Atmospheric Conditions: Haze, fog, or morning mist are your best friends for this technique. This atmospheric perspective naturally causes distant elements to appear lighter and less detailed, enhancing the illusion of depth and separating the background from the foreground.
Anchor the Foreground: Include a strong, interesting element in the foreground to anchor the entire composition. This could be a unique rock formation, a single tree, or the edge of a cliff. This gives the viewer a starting point before their eyes travel deeper into the image.
Pro Tip: Use the principles of atmospheric perspective to your advantage during post-processing. Subtly decrease the contrast and saturation of the background layers while keeping the foreground sharp and vibrant to amplify the sense of distance and depth.
Altitude layering is a sophisticated skill that separates good drone photos from breathtaking ones. It moves beyond simple documentation and into the realm of artistic landscape composition, making it a critical technique for any serious aerial photographer to master.
5. Dynamic Movement and Motion Blur
While many drone photography techniques focus on capturing a perfectly sharp, static moment, embracing dynamic movement can introduce a powerful sense of energy and artistry to your work. This advanced technique involves using longer shutter speeds to create motion blur, transforming moving elements like cars or water into beautiful, artistic streaks and textures. It's a method that captures the passage of time in a single frame, adding a cinematic and professional quality to your aerial shots.
Instead of freezing a highway with static cars, this technique turns them into vibrant trails of light. It can smooth crashing ocean waves into a misty, dreamlike surface or capture the motion of clouds streaking across a mountain landscape. This approach is less about documenting a scene and more about interpreting it, adding an element of surreal beauty that sets your work apart.
How to Create Motion Blur
Achieving high-quality motion blur from a drone requires control over your camera settings and often some essential accessories.
Use ND Filters: Neutral Density (ND) filters are crucial for long exposure photography during the day. They act like sunglasses for your drone's lens, reducing the amount of light entering the sensor and allowing you to use a much slower shutter speed without overexposing the image.
Switch to Manual Mode: To control your shutter speed, you must be in Manual (or Shutter Priority) mode. Start with a shutter speed of 1/2 to 2 seconds and adjust based on the speed of your subject and the ambient light. A stable, hovering drone is key to keeping the static parts of your image sharp.
Plan Your Timing: The "blue hour," the period just after sunset or before sunrise, is perfect for capturing light trails from traffic. The low ambient light makes it easier to achieve long exposures, and the contrast between the dark environment and bright vehicle lights creates a stunning visual effect.
Practice Smooth Movements: You can also create blur by moving the drone itself during the exposure. This is an advanced skill that involves executing a smooth, deliberate pan or tilt to blur the background while keeping a moving subject relatively sharp, a technique known as panning. You can learn more about tracking moving subjects by exploring a comprehensive guide to Follow Me mode drone filming on jabdrone.com.
Pro Tip: Look for scenes with a mix of static and moving elements. A city street corner, a coastline with waves, or a bridge over a busy river are perfect subjects. The contrast between the sharp, unmoving structures and the soft, blurred motion is what makes these images so captivating.
Mastering motion blur is one of the most rewarding drone photography techniques, allowing you to move beyond simple documentation and into the realm of fine art aerial photography.
6. Golden Hour and Blue Hour Timing
Among the most impactful drone photography techniques is not about how you fly, but when. Harnessing the natural light of the "golden hour" and "blue hour" can transform a mundane aerial shot into a masterpiece. The golden hour is the period shortly after sunrise and before sunset, known for its soft, warm, and directional light that creates long, dramatic shadows. The blue hour is the brief window just before sunrise and after sunset, when the sky is filled with deep, cool, and ambient blue light.
From the air, these periods offer a breathtaking color palette that enhances any subject. A cityscape during the blue hour glows with a beautiful contrast between the cool sky and the warm artificial lights of buildings and streets. Similarly, a sprawling agricultural landscape or a rugged mountain range bathed in the golden hour’s warm light appears rich with texture and depth, creating a powerful emotional impact.
How to Implement Golden and Blue Hour Timing
Timing is everything, and preparation is key to capitalizing on these fleeting moments. Unlike other drone photography techniques, this one is entirely dependent on the sun's position.
Plan Your Shoot: Use apps like PhotoPills or Sun Surveyor to determine the exact start and end times for the golden and blue hours at your specific location. Arrive early to scout the area and set up your drone, ensuring you’re ready to fly the moment the light is perfect.
Adjust Camera Settings: During these low-light conditions, you may need to increase your ISO slightly or use a slower shutter speed. To capture the full spectrum of color and light, shoot in RAW format. Also, experiment with your white balance; you can use a "Cloudy" or "Shade" preset to enhance warm tones or adjust it manually to capture the scene as your eye sees it.
Manage Your Batteries: Colder temperatures during sunrise and sunset can drain drone batteries faster than usual. Keep your batteries warm in a pocket or insulated bag before flight to maximize your airtime.
Pro Tip: Use the blue hour to capture stunning urban aerials. The balance between the fading ambient light and the city's artificial lighting creates a dynamic and vibrant scene that is impossible to replicate at any other time of day.
Mastering light is a crucial skill, and timing your flights for these magical hours is a guaranteed way to elevate your aerial imagery. The rich colors you capture will provide excellent material for post-processing, where you can further enhance your shots. For those looking to perfect their final images, you can find the best drone video editing software on jabdrone.com to bring your footage to life.
7. Symmetry and Pattern Recognition
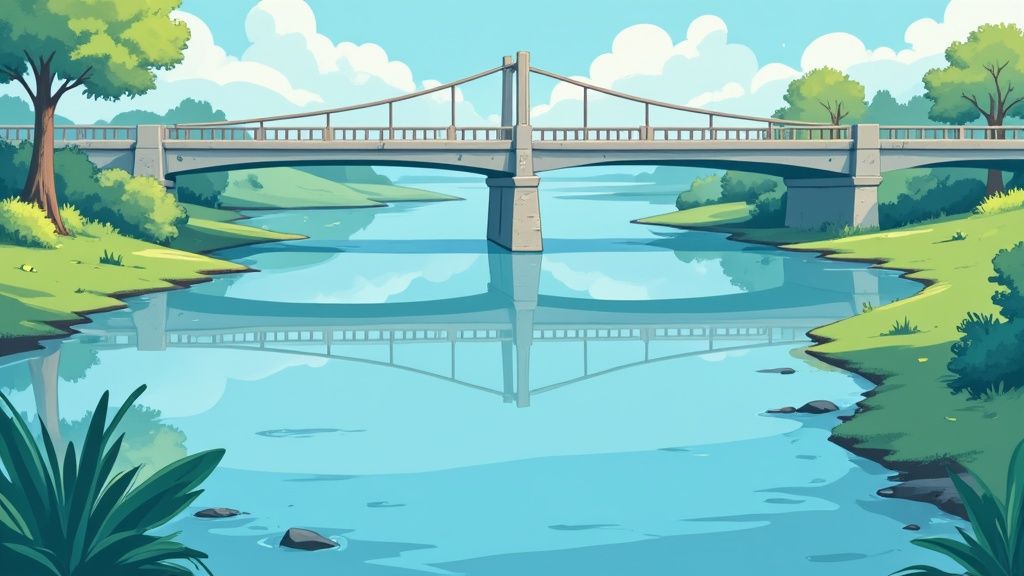
One of the most visually satisfying drone photography techniques is leveraging symmetry and patterns. This approach involves identifying and capturing compositions where elements mirror each other or repeat in a predictable way. From an aerial perspective, you can reveal hidden geometries in both natural and man-made landscapes that are completely invisible from the ground, creating images with incredible balance, harmony, and visual impact.
The world is filled with these hidden designs, from the perfect reflection of a bridge in calm water to the intricate tessellations of agricultural fields or urban parking lots. Capturing these scenes effectively requires a keen eye and precise drone control. By centering these symmetrical elements or filling the frame with a repeating pattern, you create a powerful shot that feels deliberate, clean, and aesthetically pleasing.
How to Implement Symmetry and Pattern Recognition
Finding and framing these compositions is a rewarding challenge that combines scouting with precise piloting. Modern drone features make achieving perfect alignment much easier.
Scout from Above: Use satellite imagery tools like Google Earth or Google Maps before your flight. These top-down views are perfect for spotting potential symmetrical layouts, such as unique road intersections, architectural designs, or natural formations.
Use Grid Overlays: Enable your drone’s grid lines in the flight app. A 3x3 grid or a center-point overlay is invaluable for ensuring your subject is perfectly centered and your horizon or dividing lines are perfectly straight.
Seek Reflective Surfaces: Water is your best friend for creating natural symmetry. Look for calm lakes, rivers, or even large puddles after rain to create a perfect mirror image of a subject, effectively doubling the visual impact.
Fine-Tune Your Position: Small, precise movements are key. Once you have a potential shot framed, make tiny adjustments to your drone’s yaw, altitude, and position to achieve perfect alignment. Even a slight offset can break the illusion of perfect symmetry.
Pro Tip: Look for "broken symmetry" or "interrupted patterns" to create a compelling focal point. A single red car in a parking lot full of white cars, or a boat rippling a perfectly still reflection, can add a narrative element and draw the viewer's eye.
This technique is especially powerful in architectural and real estate photography, where showcasing the clean lines and organized layout of a property is crucial. To see how these principles apply in a commercial context, explore the top tips for drone real estate photography on jabdrone.com.
7 Key Drone Photography Techniques Compared
Technique | Implementation Complexity 🔄 | Resource Requirements ⚡ | Expected Outcomes 📊 | Ideal Use Cases 💡 | Key Advantages ⭐ |
|---|---|---|---|---|---|
Rule of Thirds Aerial Composition | Low | Minimal (grid overlay) | Balanced, visually pleasing compositions | Horizons, coastlines, architecture, landscapes, urban scenes | Easy to implement; consistent results; natural compositions |
Top-Down Orthogonal Photography | Medium | Moderate (gimbal angle control) | Unique bird's-eye abstracts; pattern reveal | Mapping, documentation, abstract art, urban patterns | Eliminates distortion; reveals hidden symmetries |
Leading Lines & Aerial Perspective | Medium | Moderate | Strong visual flow, depth, organized scenes | Roads, rivers, shorelines, architectural features | Guides viewer’s eye; adds movement and depth |
Altitude Layering & Depth Creation | High | High (strategic positioning) | Compelling 3D depth, dynamic, storytelling | Mountain ranges, urban layers, coastal zones | Engaging, layered complexity; overcomes flatness |
Dynamic Movement & Motion Blur | High | Advanced (manual controls, steady flying) | Energetic, artistic, unique motion effects | Moving subjects, water, clouds, traffic | Adds dynamism; shows passage of time; artistic uniqueness |
Golden Hour & Blue Hour Timing | Medium | Moderate (timing, planning) | Dramatic mood, warm/cool light, rich colors | Urban skylines, landscapes, coastal scenes, mountains | Enhances lighting quality; mood creation; texture enhancement |
Symmetry and Pattern Recognition | Medium | Moderate | Powerful, harmonious, balanced imagery | Symmetrical architecture, fields, reflective surfaces | Visually striking; reveals hidden geometry; social media appeal |
From Technique to Artistry: Your Next Flight Awaits
We have journeyed through a powerful collection of seven foundational drone photography techniques, moving from the classic Rule of Thirds to the striking geometry of Top-Down Orthogonal shots. We've explored how to guide the viewer's eye with Leading Lines, create immense depth with Altitude Layering, and inject energy into our images with Dynamic Movement. By harnessing the ethereal light of the Golden and Blue Hours and seeking out compelling Symmetry and Patterns, you now possess a comprehensive toolkit for transforming your aerial captures from simple snapshots into compelling works of art.
However, the true mastery of these methods isn't found in isolation. The real creative breakthrough occurs when you begin to combine these concepts into a seamless workflow. Imagine capturing a perfectly symmetrical pattern from a top-down perspective, but timing your flight during the golden hour to add long, dramatic shadows that break the pattern in an interesting way. Picture using a winding river as a leading line that pulls the eye through a scene layered with atmospheric haze at different altitudes. This synthesis is where your unique artistic voice begins to emerge.
Moving Beyond a Checklist
The ultimate goal is to internalize these drone photography techniques so they become second nature, not just a mental checklist you run through before each flight. This allows you to react instinctively to the environment and the light, seeing compositions and opportunities that others might miss. Your drone is far more than a tool for achieving a high vantage point; it is a brush that allows you to paint with perspective, light, and motion.
To accelerate this process, make pre-flight planning a non-negotiable part of your routine.
Scout Digitally: Use satellite and 3D map views to identify potential leading lines, patterns, and unique topographical features before you even leave home.
Anticipate the Light: Check the sun's path and the weather forecast. Know exactly when the golden and blue hours will occur and from which direction the light will fall.
Set a Creative Goal: Instead of just "getting a cool shot," approach your flight with a specific technique in mind. For example, tell yourself, "Today, I'm focusing exclusively on creating depth with altitude layering."
By deliberately practicing these skills, you build a strong creative foundation. Your ability to see and compose a shot will sharpen, and you'll find yourself creating breathtaking images that are not just technically proficient but also emotionally resonant. The sky is no longer just a space to fly in; it has become your personal canvas, waiting for your unique vision. Your next flight isn't just another trip; it's an opportunity to create something truly unforgettable.
Ready to put these advanced drone photography techniques into practice with a machine built for creative control? The JAB Drone offers the stability, high-resolution camera, and intelligent flight modes you need to execute every shot with precision. Elevate your artistry by visiting JAB Drone to discover the perfect partner for your aerial ambitions.
Comments